Figure 136: Configuring echo cancellation settings
2. Set the Audio delay automatic estimation field to Yes.
This enables the endpoint to constantly measure the audio delay.
3. Set the Apply audio delay value field to Yes.
This enables the system to fix problems with the audio delay.
4. From the web interface only, select Save.
5. If necessary to further fine tune audio delay on the Microphone Pod, perform these steps:
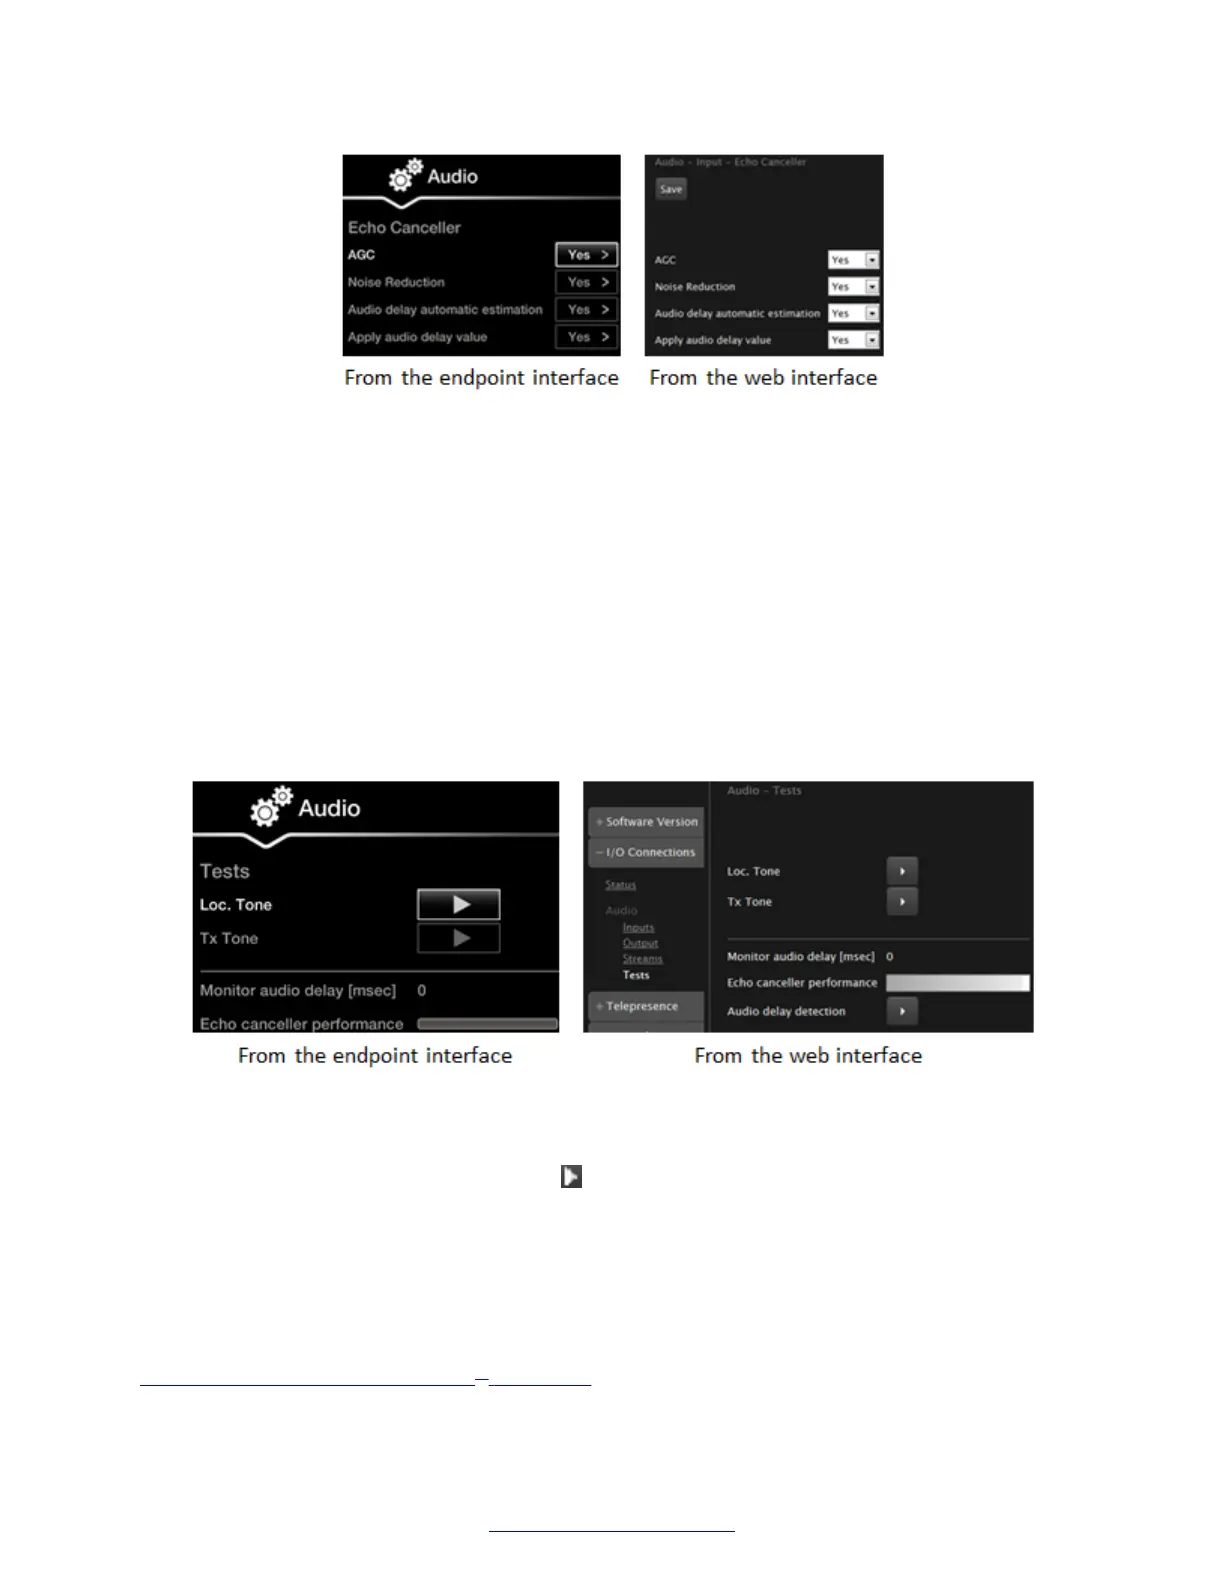
a. Navigate to audio tests. From the XT Series web interface, select Diagnostics > I/O
Connections > Audio > Tests. From the endpoint's main menu, select Configure >
System Status > Diagnostics > I/O Connections > Audio > Tests.
Figure 137: Testing the audio from the web interface
b. Bring the Microphone Pod to about 1 m (3 feet) from the monitor. Keep silent.
c.
Select Audio delay detection and select Yes.
The monitor generates an evaluation noise and the XT Series estimates the audio delay
introduced by the monitor. The display shows the audio delay in milliseconds, and uses
this value to calculate the audio delay and improve the echo cancellation performance.
6. From the web interface only, select Save.
Related Links
Troubleshooting the Avaya Scopia
®
XT Series on page 172
Troubleshooting the Avaya Scopia
®
XT Series
184 Avaya Scopia
®
XT Series Deployment Guide April 2015
Comments? infodev@avaya.com

 Loading...


