2. Press ok/menu again.
3. Select Video Source.
Connectivity
Solution
Ensure the camera is correctly connected to the system, including the VISCA cable connected to
the IN RS-232C connector on the camera.
Moving setting
The Moving setting may not be enabled.
If configuring from the endpoint, you must first enable advanced configuration, as described in
Enabling Advanced Maintenance on the XT Series on page 112.
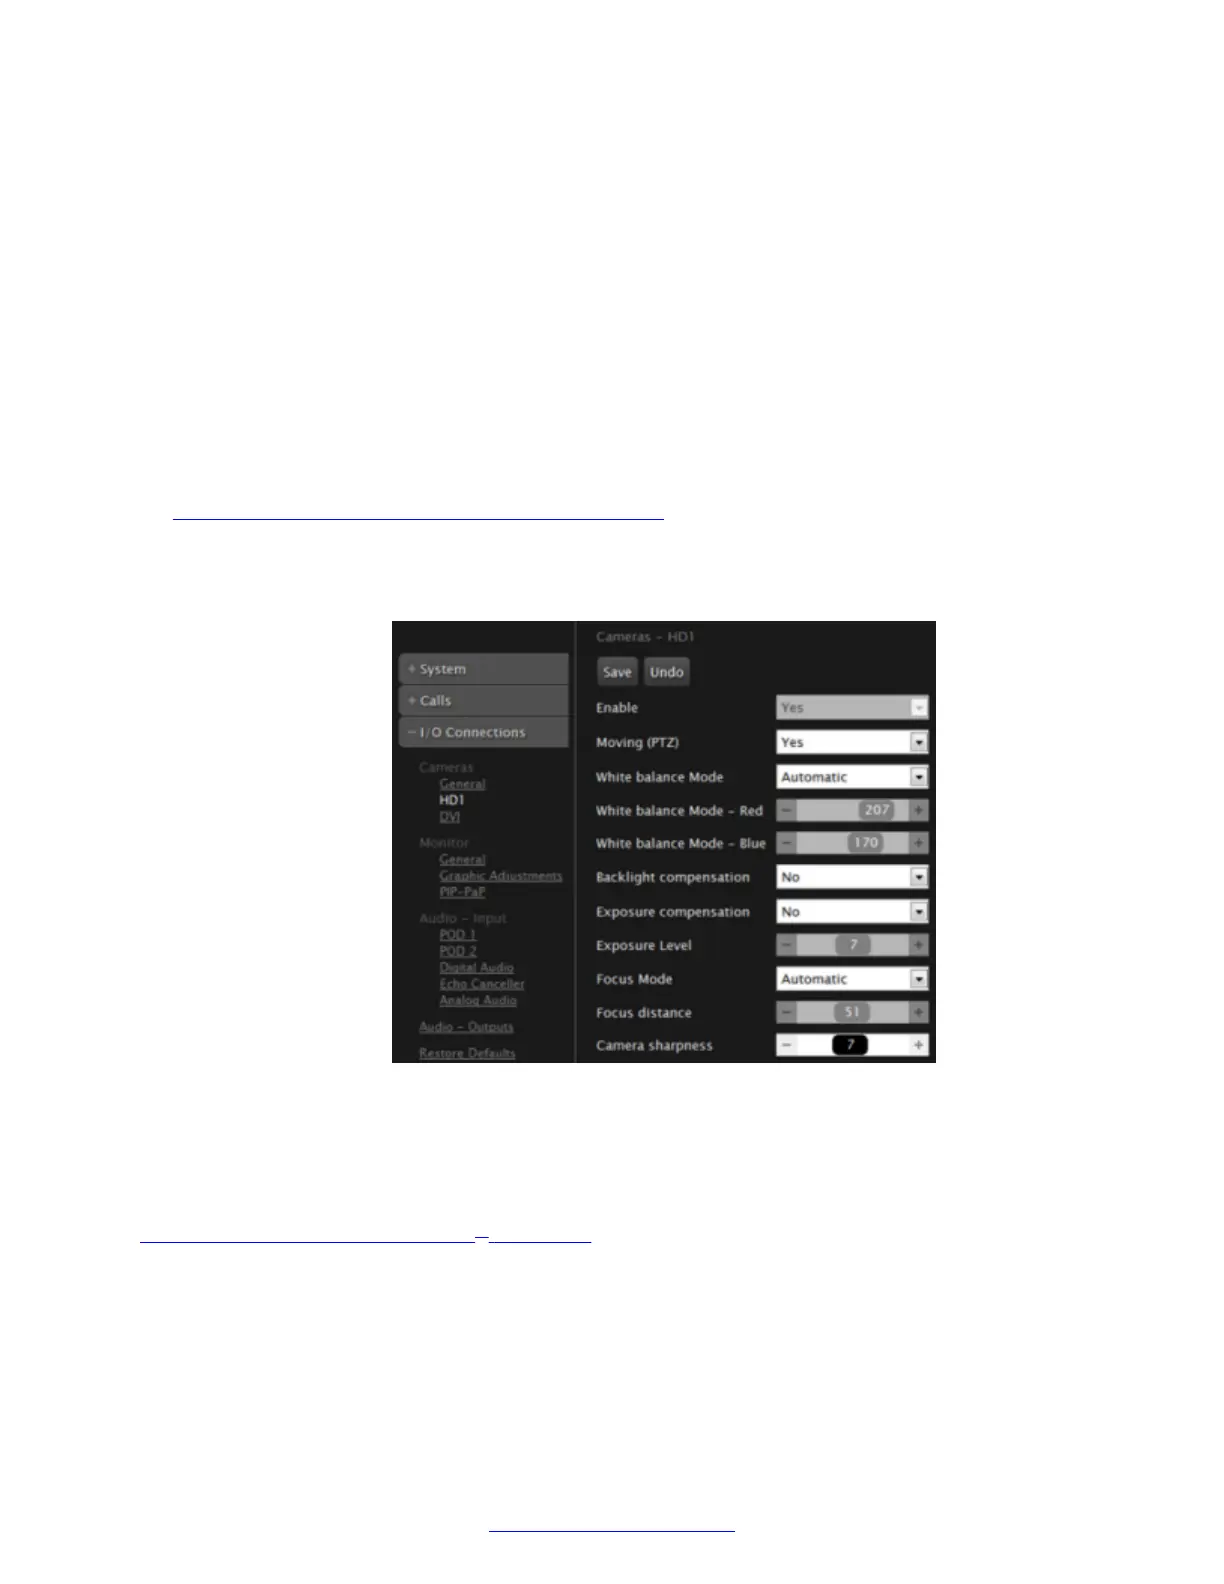
1. Access the general camera settings. From the XT Series web interface, select
Administrator Settings > I/O connections > Cameras > HD1. From the endpoint's main
menu, select Configure > Advanced > I/O connections > Cameras > HD1.
Figure 145: Enabling the Moving setting
2. Make sure that the Moving field is set to Yes.
3. From the web interface only, select Save.
Related Links
Troubleshooting the Avaya Scopia
®
XT Series on page 172
Troubleshooting the Avaya Scopia
®
XT Series
194 Avaya Scopia
®
XT Series Deployment Guide April 2015
Comments? infodev@avaya.com

 Loading...


