91
Step 14. A Video wall control user interface page appears. The table below provides information on
each component of Video Wall control user interface page.
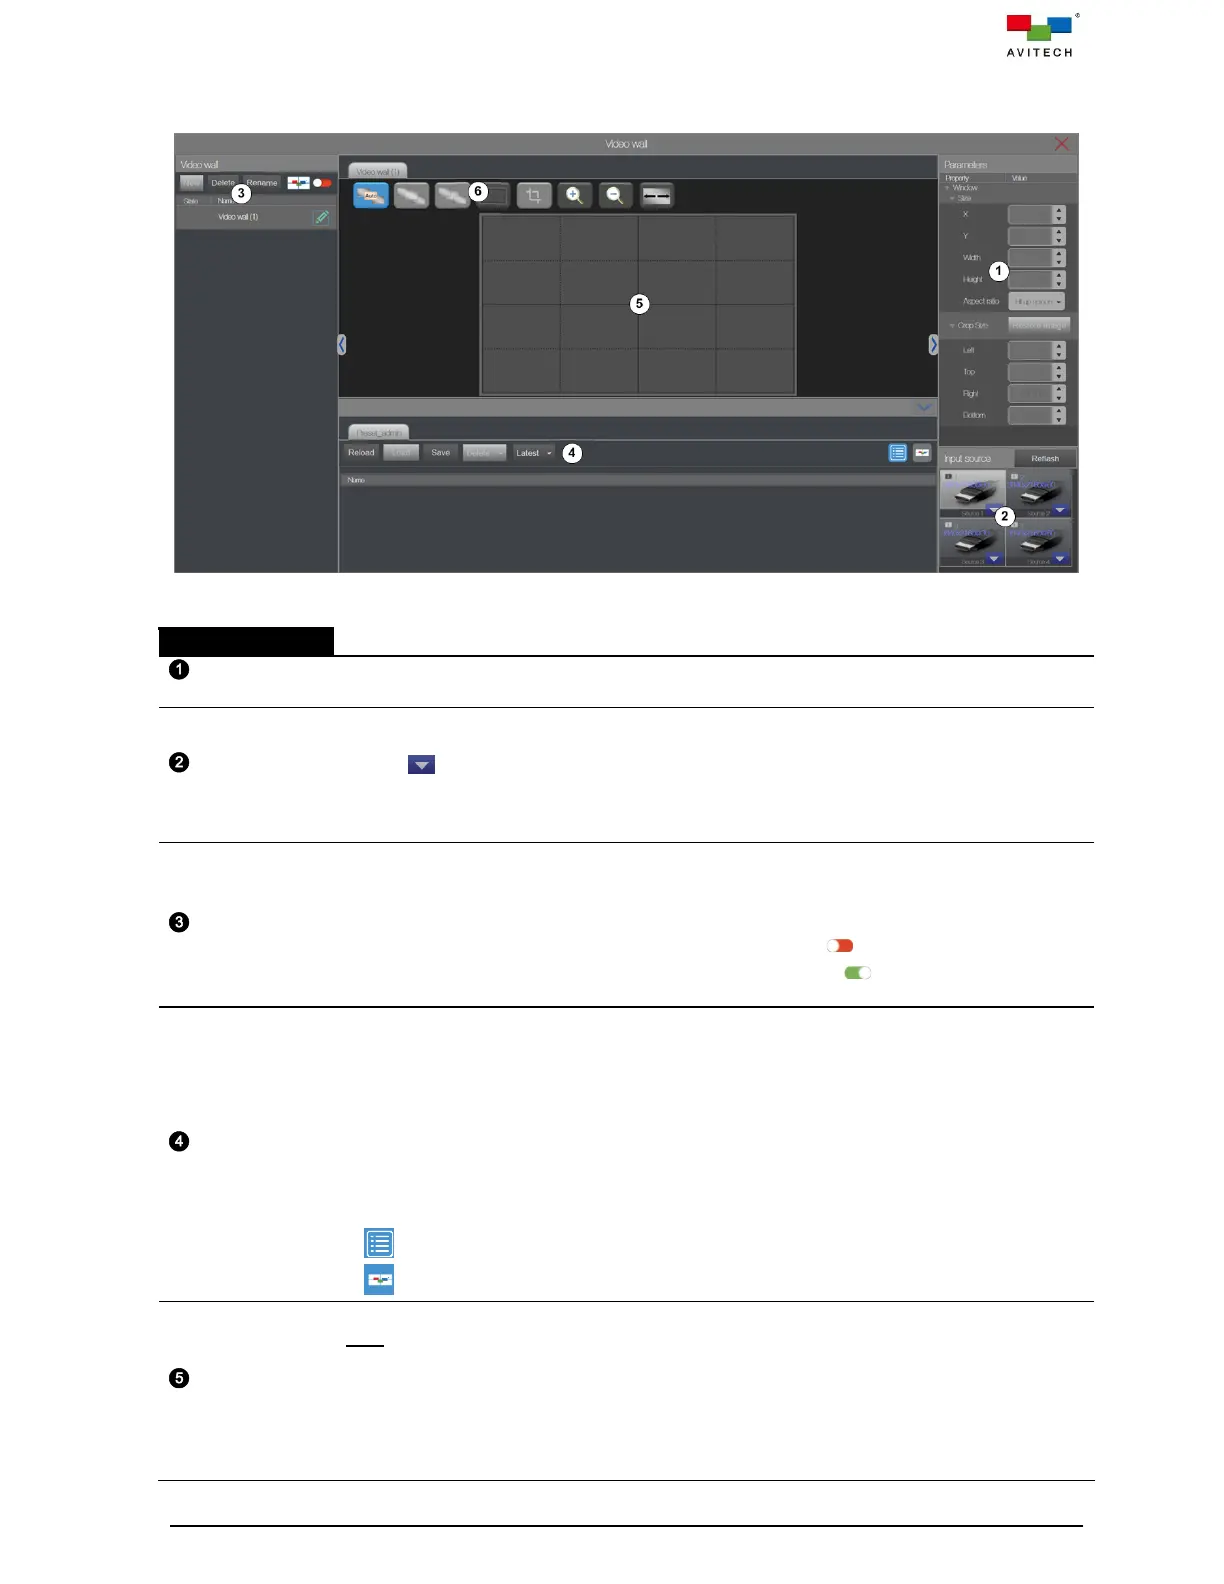
Figure 5.2.26 Video Wall Control User Interface and Components
Shows the window size, position and crop size information. Supports free-scaling position,
size and image crop adjustment for each window.
Shows the detected HDMI INPUT ports’ source name and resolution of Sequoia 4K60.
Click Refresh to update the input source latest data information.
Click to enable (default disable) Mac PC function for the video source display correctly.
When connect a MacBook or Mac-mini source to the input port of Sequoia 4K60 and the
video source display a white noise or black image on-screen, enable Mac PC to have the
video source display normally.
Allows user to instantly:
New = click New to create the video wall in the video wall design area.
Delete = click Delete to delete the designed video wall.
Rename = click Rename to modify the video wall name.
Edit mode = click Wall Editor switch to slide it to the left ( ) to modify the wall settings.
Take mode = click Wall Editor switch to slide it to the right ( ) to forbid modify the wall
settings and only allow to load presets.
Allows user to instantly:
Reload = to acquire the latest layout from the wall again.
Load = select from a list of previously saved preset(s) to be loaded as the wall layout.
Save = saves the Video wall page’s configuration into Sequoia 4K60 for automatic recall of
settings upon its next power on.
Delete = select a previously saved wall preset to be removed from memory.
Latest allows you to quickly load the latest saved wall layout after rebooting the Sequoia
4K60. The triangle on the right lower part of button. Upon clicking it, click Save on the
pull-down menu to store the present layout as the latest. Click Delete on the pull-down
menu to remove the latest layout from the memory.
List mode = click to switch to preset files in list mode.
Icon mode = click to switch to preset files in icon (display windows layout) mode.
Allows user to add/remove/move a window in the canvas.
Note:
1. Each screen supports a maximum of two windows.
2. For a window that straddles both screens will be counted as one window for each screen.
Adding a third window on either screen will cause the first window created or, from out of the
two windows, the first window will become hidden from view by the system. But upon
removing the newly added window, system will cause the hidden window to reappear on the
same position/size prior to its being hidden.