Allows user to instantly:
Auto bring to top = click to auto set a selected window display in the front of the
display.
Bring to front = click to move the selected window to the front of the display so that it
overlays with other window or hides other window.
Send to back = click to move the selected window to the background of the display so
that other window overlays on it.
Close all windows = click to remove all the windows in canvas.
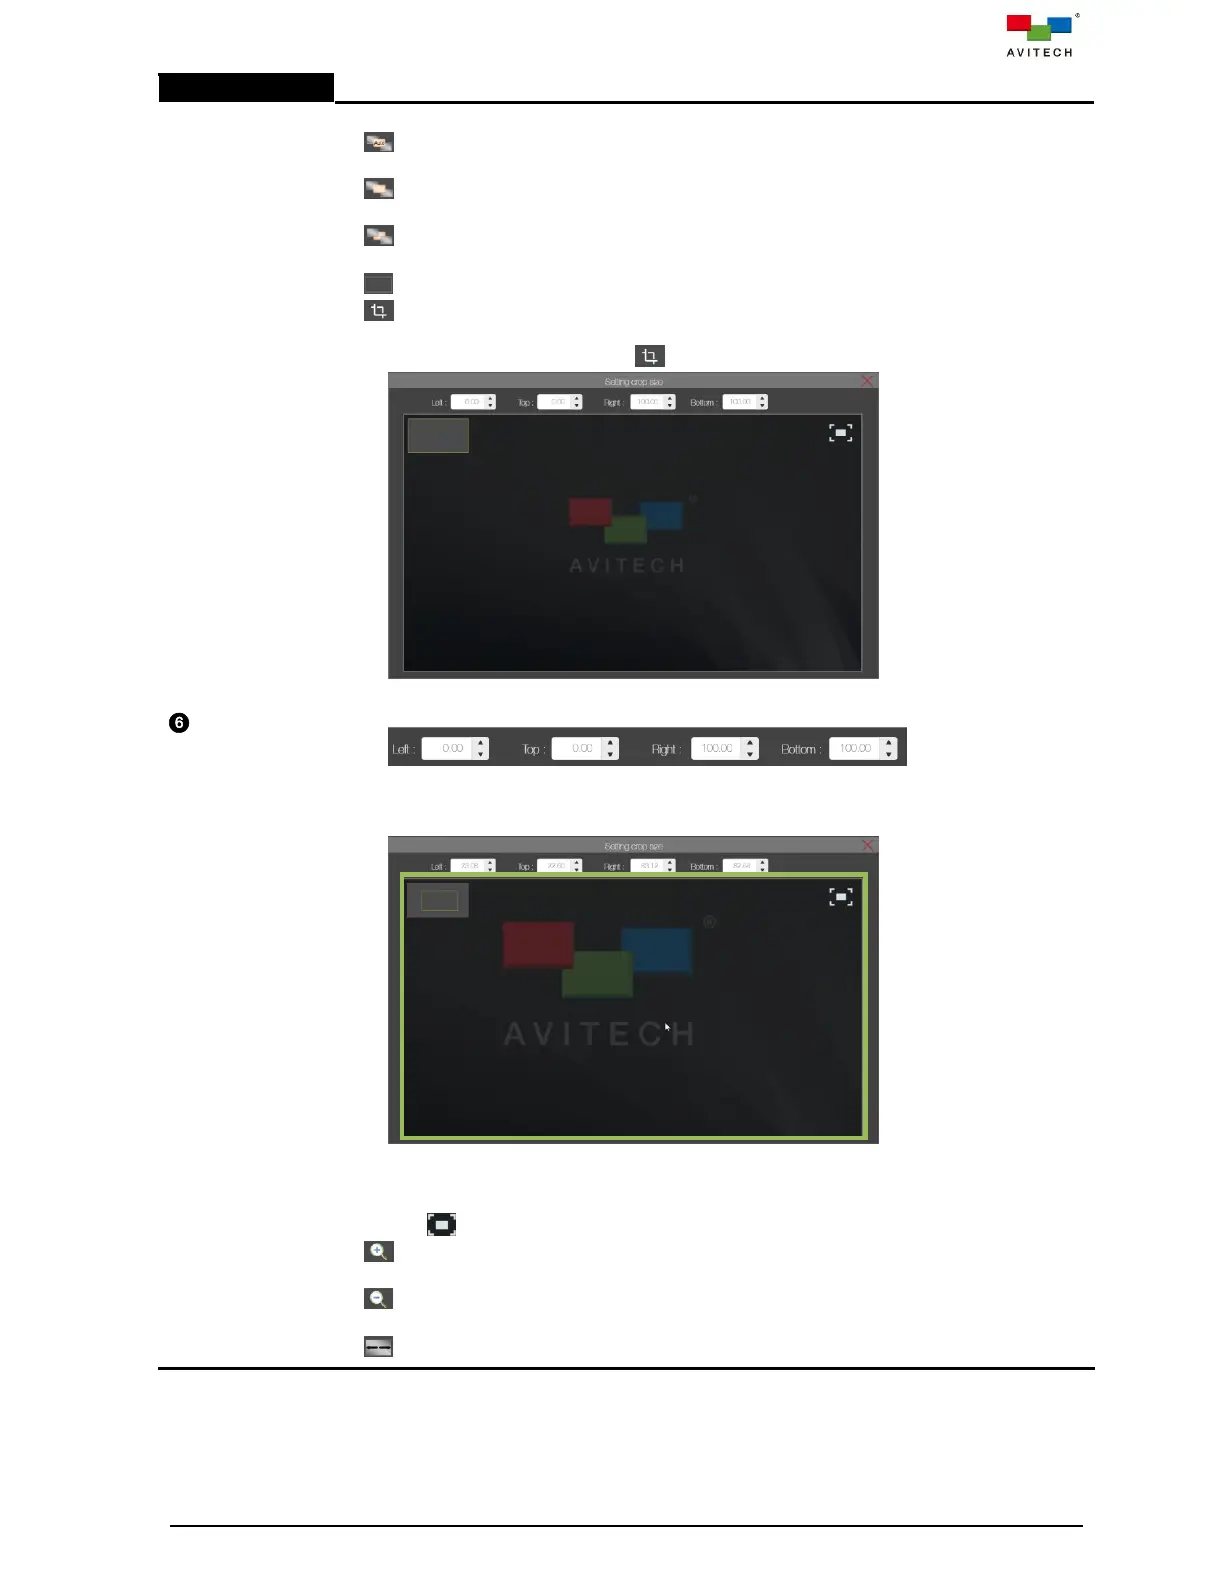
Crop = set the specific size of the crop (zoom in) image on a particular window. Freely
adjust the horizontal (Left and Right) and vertical (Top and Bottom) values to set the size of
the cropped image. Upon clicking , the Setting crop size window will appear.
Input (edit) the Top, Down, Left and Right numerical values to create the crop area.
Click OK to view the result. Or,
Move mouse cursor to your desire position onto the work area (corresponding to the
whole image of the particular window), then roll the mouse scroll button (upwards
direction) to zoom in or enlarge the image till the needed size.
Move mouse cursor to your desire position onto the work area (corresponding to the
whole image of the particular window), then roll the mouse scroll button (downwards
direction) to zoom out or shrink the image till the needed size.
Click to restore the image prior to crop (1:1).
Zoom in = to zoom in or enlarge the video wall canvas (includes the wall and window
contained therein).
Zoom out = to zoom out or shrink the video wall canvas (includes the wall and window
contained therein).
Zoom reset = to reset the video wall canvas to its default state.
Step 15. Click to highlight (select) an input source.