7: Advanced Element Controls • 107
©2008 Axia Audio — Rev. 3.0
Chapter 7:
Advanced Element Controls
In Chapter 1, we covered the basics of setting up
your Element and StudioEngine, in the interest of get-
ting you up and running quickly. Now that you’ve read
this far, you should consider yourself an advanced user!
In keeping with your dawning guru status, it’s time for a
thorough look at all of the controls found in the Element
configuration Web pages.
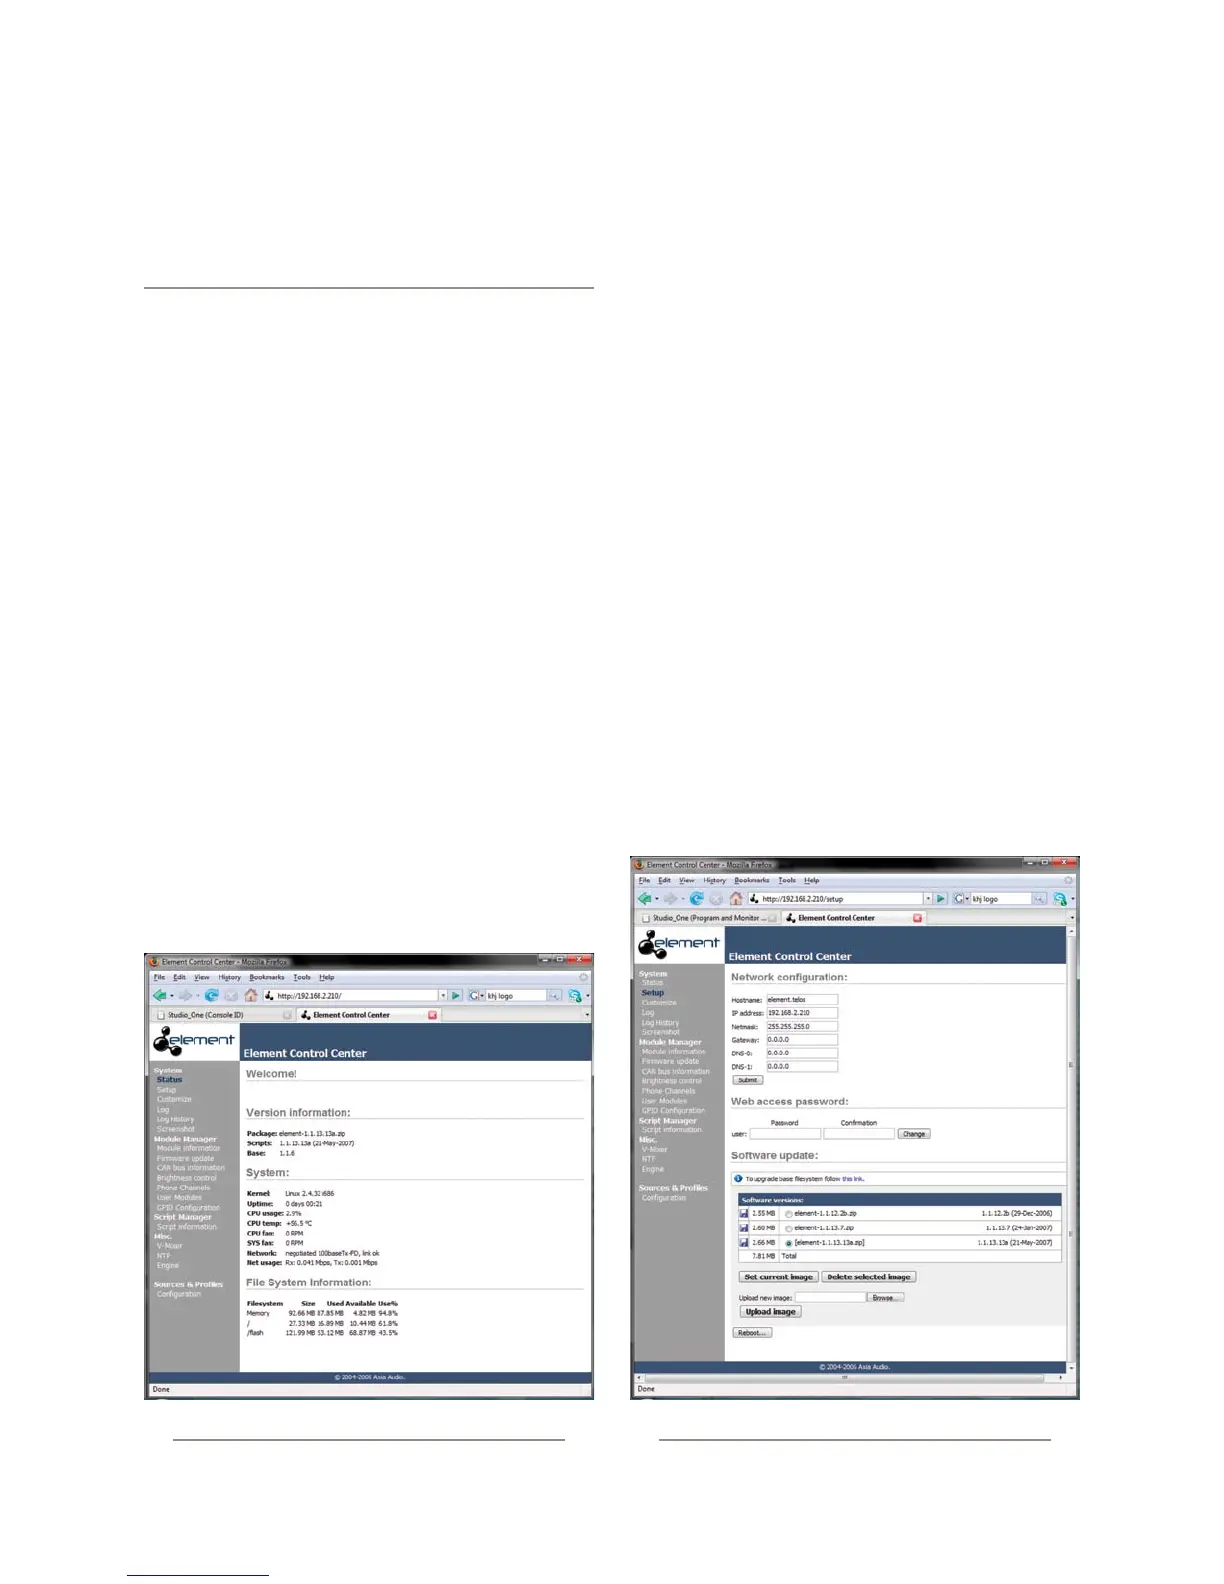
Element Configuration Screens
The Element Control Center
This is the first screen you see when you log into
your Element console from your Web browser. The main
menu runs down the left side and gives access to all of
Element’s options and settings. In the main window you
can see at a glance what version of Element software is
loaded, system information such as console uptime, net-
work link integrity and CPU stats, and more. This infor-
mation screen is accessible without a password; clicking
on any menu heading will prompt you for a password.
The Setup Menu
We touched briefly on the Setup screen in Chapter 1.
Now let’s look at the rest of the tools on this page.
Network Conguration contains the fields for the
Element’s IP Address and other network functions.
Hostname is the unique name you give the con-
sole to identify it in the Web interface. You might
want to name it after the studio it’s in.
IP Address: This Element’s unique network ad-
dress.
Netmask: Enter your network’s submask here.
Gateway: If you have a network gateway to al-
low access from outside your facility, enter it
here.
DNS-0 & DNS-1: If your Axia network is con-
nected to the “outside workd”, you can specify
your ISP’s DNS servers in these fields.
Why would you want to do this? Well, you could
•
»
»
»
»
»
Fig. 7-1: The Element Control Center
Fig. 7-2: Setup screen