6: Virtual Mixer • 97
©2008 Axia Audio — Rev. 3.0
OFF to ON and visa versa. If the source is off, gain
is negative infinity (not adjustable, just a law of na-
ture). When the source goes ON, the time in which
the audio adjusts form OFF to ON (the gain value
set in the first field) is the “Up time”. It the field is
set to 1 second, the audio will “fade up” to the gain
value in 1 second. If the field is set to 0, the audio
will have no fade period and simply just turn on at
the gain value specified. The second field controls the
ON to OFF fade time. This function can be used to
create cross fades between sources when Pathfinder
is dynamically making changes to the VMIX based
on conditions met.
Gain: You’ll find a Master gain setting for the Sub-
mix (the mix of all five inputs) at the top of this col-
umn, followed by individual gain settings for each
input that establish the gain for the input when it is
in the ON state.
Out Name: This column shows the name of the
stream as it will appear when viewed in source as-
signment boxes elsewhere on the network.
Channel (the 2nd instance of it): Assigns a channel
number to the output of the source. Just as each audio
source from an Audio Node and each mix and monitor
feed from a StudioEngine must have a unique chan-
nel number, so do each of the VMIX sources that you
want to make available to the network. In most cases
only the Submix output itself needs a unique channel
number, but if you so desire, each VMIX input can
also be sent back to the network as a unique source,
post the ON/OFF and gain stage of the VMIX. Just
provide a unique channel number to each “VMIX
Fader” you’d like to send out.
Out Stream Type: Set the stream type you want
to provide to the network for each VMIX output
(Live Stream, Medium Stream, Standard Stream or
Disabled) After you’ve given the Submix output a
unique Channel number, enable it here. (Normally
all of the VMIX “fader” channels remain “Disabled”
unless you have other uses for them.)
Status/Audio: An indicator field to tell you whether
the stream is valid and audio is present. Note that if
you have just enabled VMIX streams, you will need
to click Apply to commit your changes. This will re-
load the browser page and refresh the Status fields.
•
•
•
•
•
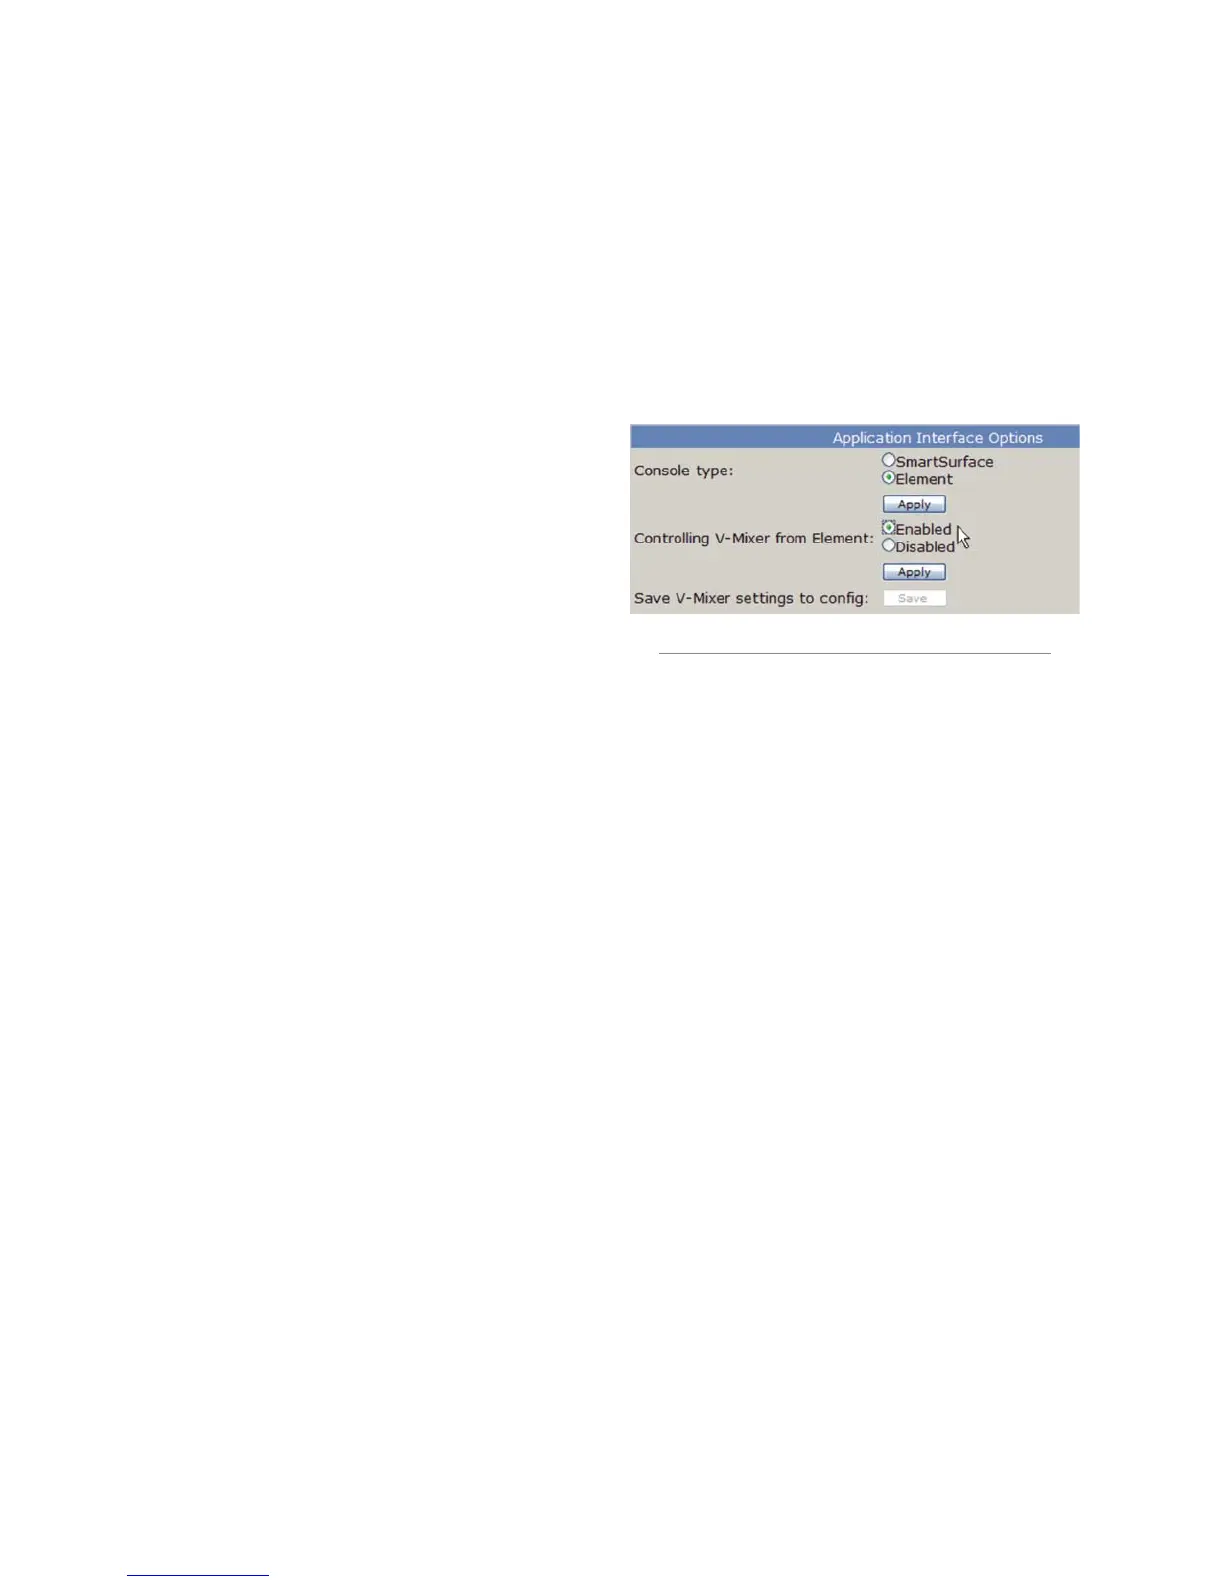
Element VMIX Controls
Enabling Element control of VMIX
To switch control of VMIX from the StudioEngine
to Element, open the StudioEngine HTTP pages and log
in to the Engine ID page. set the Controlling V-Mixer
from Element option to Enabled. This allows Element
to control VMIX sources.
When Element has control of VMIX, the StudioEn-
gine’s presentation of the VMIX controls has most of its
fields are grayed out, indicating that VMIX control has
passed to the Element HTTP page.
Fields that do not gray out are the Channel numbers
and the Mode selection boxes that determine the type
of audio streams to be sent to the network. The fields
that are gray now function as indicators, showing what’s
been selected in the Element config pages; please refer to
the descriptions of these fields in the previous section.
VMIX Control Description
To gain access to VMIX settings in the Element con-
figuration Web pages, log into your Element and choose
the Misc. menu item, then choose V-Mixer. This page
shows eight Mixer settings — these settings are the
control portion of the eight submixers mentioned previ-
ously.
Figure 6-3 shows controls for one of those eight Vir-
tual Mixers. There are five Faders, which are the five
inputs into the submixer, each with its own ON/OFF
control, Source ID drop boxes, and Gain, Up time and
Down time boxes.
Remember the Status indicator fields on the Studio-
Engine’s VMIX page? When controlling VMIX with
Figure 6-2: Enabling Element control of VMIX