8: StudioEngine Controls • 117
©2008 Axia Audio — Rev. 3.0
start the StudioEngine, performing a complete
reboot. Clicking the Down button exits the Axia
StudioEngine application and allows a connected
terminal to access the Linux OS of the Engine. This
is a diagnostic tool and should only be used at the
direction of the Axia Support team.
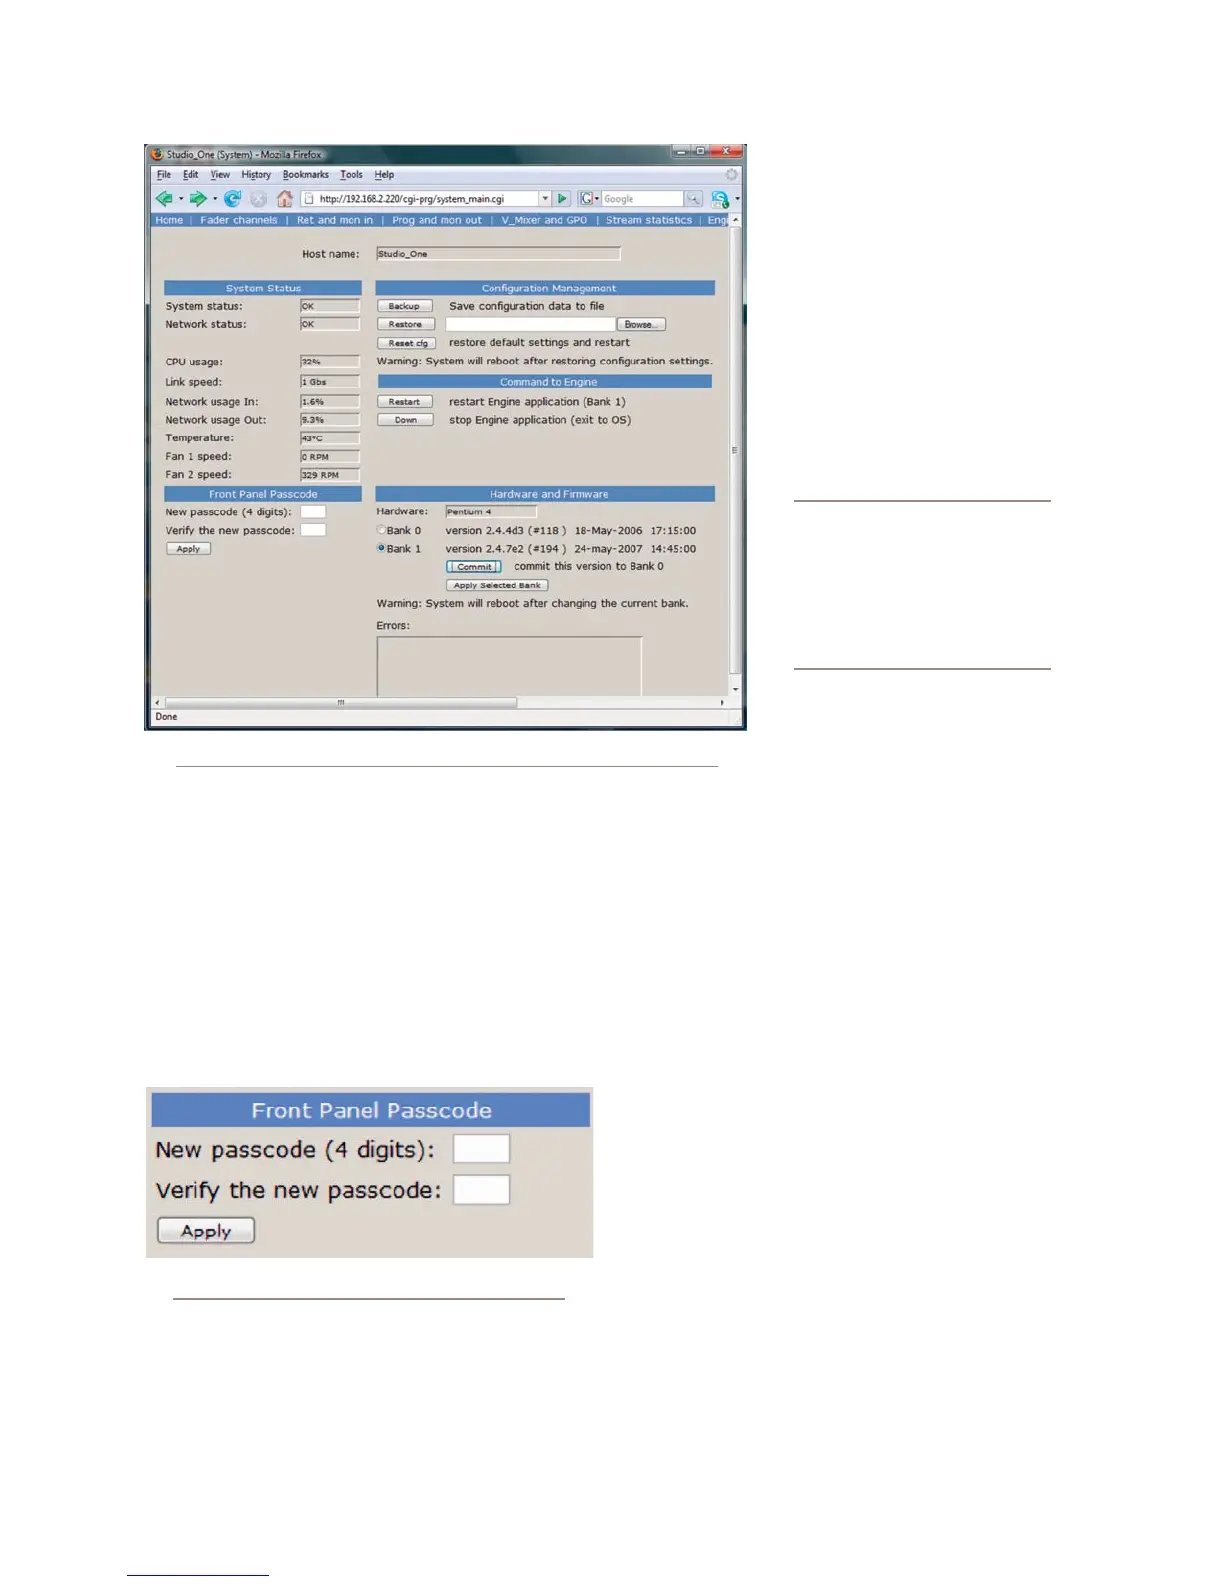
The Front Panel Passcode fields allow you to pass-
code-protect the physical controls on the Engine’s
front panel.
Figure 8-7: Front Panel Passcode controls
By default, access is open. However, if your Engines
are located in a public space in your facility, you
may wish to set a code to limit front-panel access to
authorized personnel. To enable this feature, enter a
•
four-digit code in the top box shown in
Figure 7-18, then enter it again in the
lower box to confirm. Click Apply to
activate passcode protection.
The Hardware and Firmware section
is where you upload and apply new op-
erating software for the StudioEngine.
Use the File field and the Browse
and Upload buttons to up-
load new software to the Engine.
Where are my buttons? Unlike Ele-
ment, where you can store multiple
versions of operating software, the
StudioEngine has only two software
“banks.” If both banks are full, you
must eliminate one, or you will not
see the File, Browse or Upload
controls. Instead, you’ll see...
The Commit to Bank 0 button. Press-
ing this button takes the software in
Bank 1 and loads it into Bank 0, which
opens Bank 1 for new software.
You can run Engine software from either Bank 0
or Bank 1. Siimply click on the radio buttion next
to the software bank you wish to run from, and
click Apply Selected Bank. The Engine will re-
boot after changing banks, so plan this operation
for off-hours or switch program output to another
studio to avoid program interruptions.
The Errors message field will show diagnostic
messages about the state of the StudioEngine
should any fault conditions exist.
Diagnostics Menu
The Diagnostics menu provides tools to help Axia
Support in the event your system needs attention. To en-
able a Diagnostics Trace, click the radio button corre-
sponding to the Simple, Medium or Detailed options,
then click Apply.
The other controls here provide other options relating
to generating diagnostic information. Please use these as
instructed by Axia Support.
•
»
»
»
»
Fig. 8-6: System screen