1: Setup & Connections • 9
©2008 Axia Audio — Rev. 3.0
of the IP address. Push and rotate the control knob
to select the value for this digit. Push again to “take”
the value.
Continue this sequence until your IP address is prop-
erly entered. When finished, turn the control knob
until the check mark at the end of the line is high-
lighted, and push the knob to apply the new IP ad-
dress value.
When you’ve set the subnet mask and gateway IP ad-
dress, choose OK at the bottom of the screen.
You’ll be asked if you’d like to reboot for changes
to take effect. select YES and connect the Ethernet
cable to your StudioEngine.
Secret Button Function: Here it is, the rst
of many “secret” controls hidden about Ele-
ment and meant for your Engineering eyes only.
If, during bootup, you press the StudioEngine’s
control knob within 6 secs of the initial screen
display, you’ll be asked if you want to reset the
front panel and HTTP passwords to factory de-
fault. This is your “backdoor” into the system
should you forget the login password to the
front panel. Changing these passwords forces
a reboot.
StudioEngine Channel Settings
For the next steps we’ll be using the StudioEngine’s
HTTP interface, so connect a computer loaded with
an Internet browser to the local switch. This computer
should have an IP address in the same range assigned to
the Element and StudioEngine.
Note: Axia web interfaces have been tested
with Microsoft Internet Explorer, version 5 or
later, but may also work with other browsers.
Whatever browser you choose, Java must be
enabled and your pop-up blocker, if any,
must be disabled in order to work with Axia
equipment.
Note that Windows Vista versions do not have
Java installed by default as in prior versions.
You must install the Sun Java package found at
http://www.java.com .
In a Livewire network, individual devices (audio
nodes, studio controllers, etc.) are identified by unique
IP addresses. But what about the audio streams these
5.
6.
7.
devices generate? Think about how many audio sources
and destinations there are in even a small studio — there
are a lot to keep track of. In the analog days, we’d affix
a numbered label to each cable that entered the terminal
room to identify each audio circuit. Obviously, we can’t
attach pieces of paper to digital packet streams, but we
can give each one a “label.”
We refer to these “labels” as Network Channel Num-
bers. Each Livewire system can support 32,766 channels
of audio, which enables us to give each audio source or
destination its own unique numeric channel number.
Note: 32,000+ channel numbers exceeds the
average human’s RAM storage capacity. We rec-
ommend using a spreadsheet program — just
to make sure you don’t generate painful read-
memory register errors.
As soon as you connected your StudioEngine to the
network (following the steps in the previous section), it
began to generate audio using factory default channel
numbers. To avoid conflict with other studios, you must
change those default values to new channel numbers.
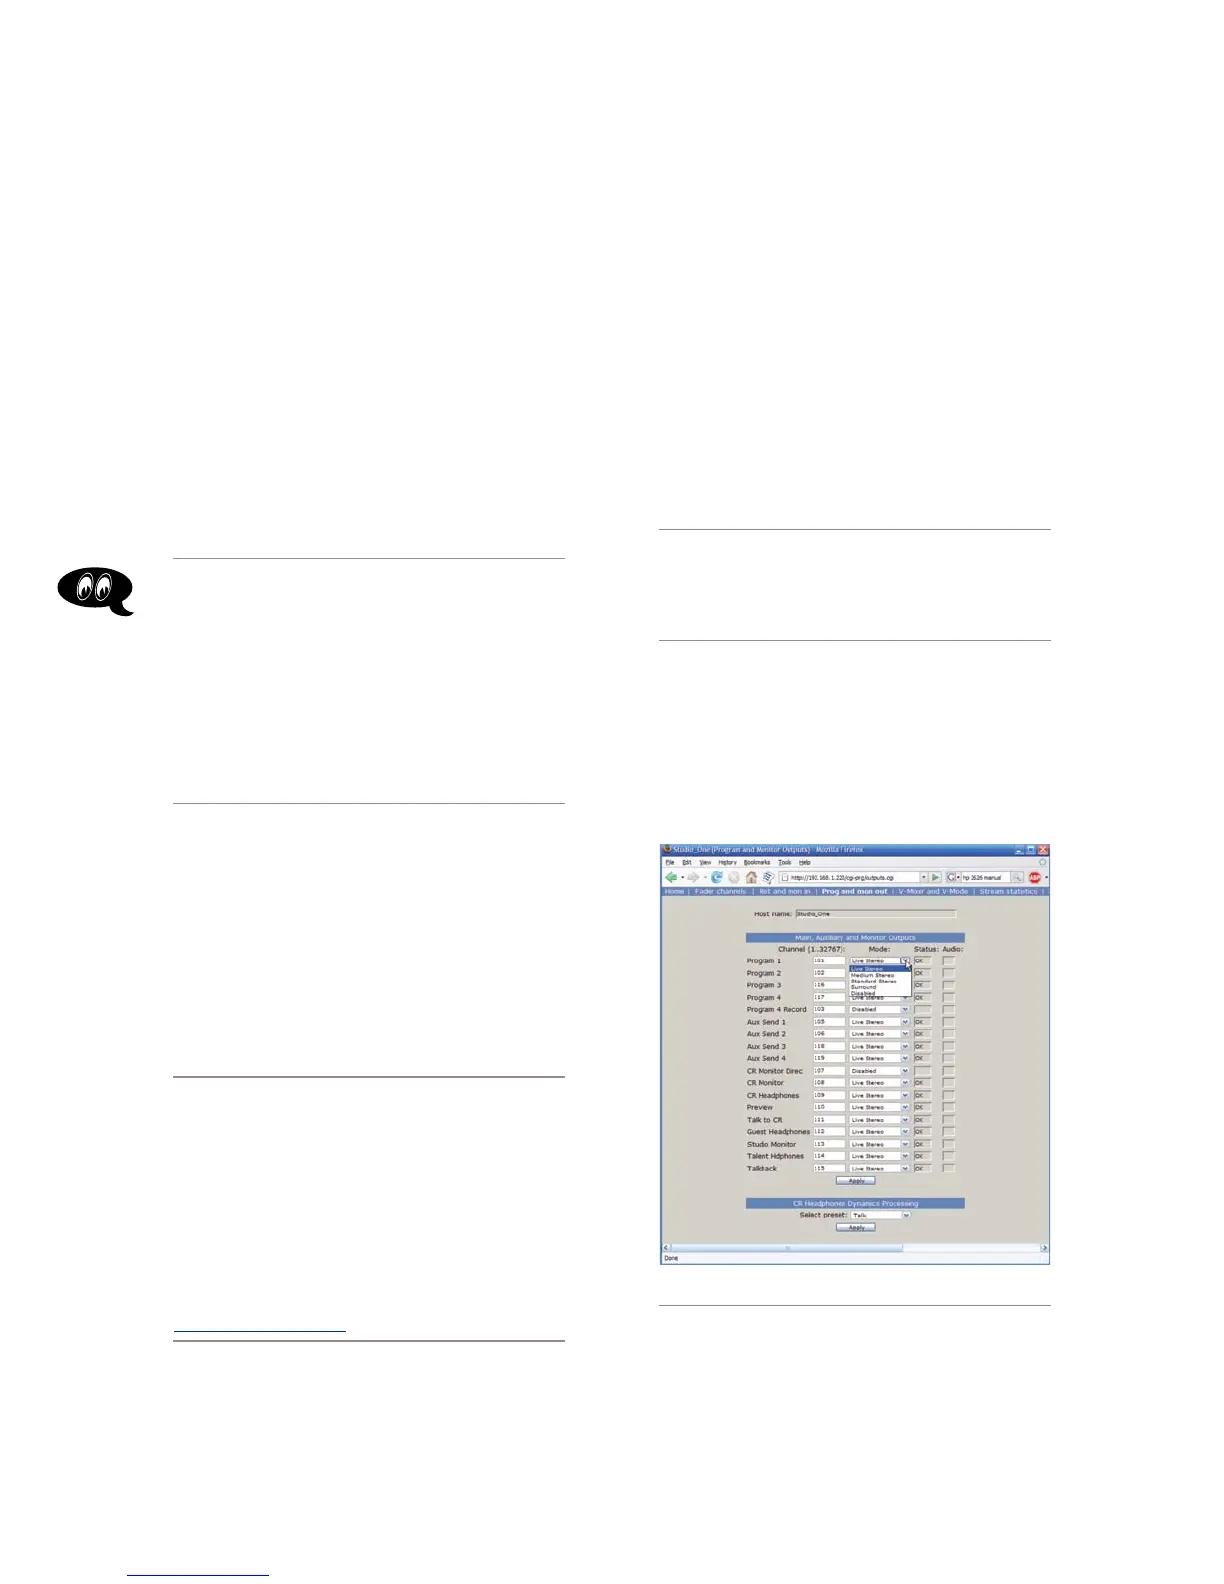
Figure 1-13: StudioEngine Output conguration
Open the browser on your computer and point it to the
IP address you previously set for your StudioEngine.
Choose the Program And Monitor Outputs menu
option to configure the output buses of the Element.
1.