1: Setup & Connections • 6
©2008 Axia Audio — Rev. 3.0
Subnet Mask: Enter your network’s subnet
mask value here, usually 255.255.255.0
Gateway IP Address: To enable remote admin-
stration of your Livewire network, you’ll need a
network gateway. If you have one installed, enter
its IP Address value here.
Engine IP Address: Each Axia control surface
controls a unique Studio Engine. Enter the IP of
the controlled Engine here.
1st NTP Server IP Address: Element supports
NTP (Network Time Protocol) timekeeping to
synchronize time-of-day clocks across your fa-
cility. If you have an NTP server, enter its IP Ad-
dress here.
2nd NTP Server IP Address: Element v2.x
software supports redundant NTP servers. Enter
the IP Address of your backup server here.
Web Page User Password: You can password-
protect your Element’s webserver connection by
entering a numeric password here.
Note: If you set a password for HTTP access,
you will not see your password displayed in this
eld upon re-entering the IP Address book. This
is a security feature intended to prevent “over-
the-shoulder” password theft.
If you want to reverse changes you’ve made and haven’t
saved, press the Undo knob to erase them.
Press Reboot to immediately reboot the Element.
Press Save to save changes you’ve made.
Press Exit to leave the IP Address Book.
Note: After making changes to any Element IP
address settings, you must reboot the console.
Use the “REBOOT” soft key to begin an immediate
reboot sequence.
Remember, you can even reboot Element while
on-the-air, since the audio mixing is not done in
the console but in the Studio Engine; your audio
will continue to play without interruption.
Setting IP using the Monitor+ 2-Fader Module
When Element has completed its start cycle
»
»
»
»
»
»
•
•
•
•
(meter screen appears), find the numeric keypad at the
top right of the Monitor Module. Press and hold the *
(star), “7” & “4” keys simultaneously for five seconds
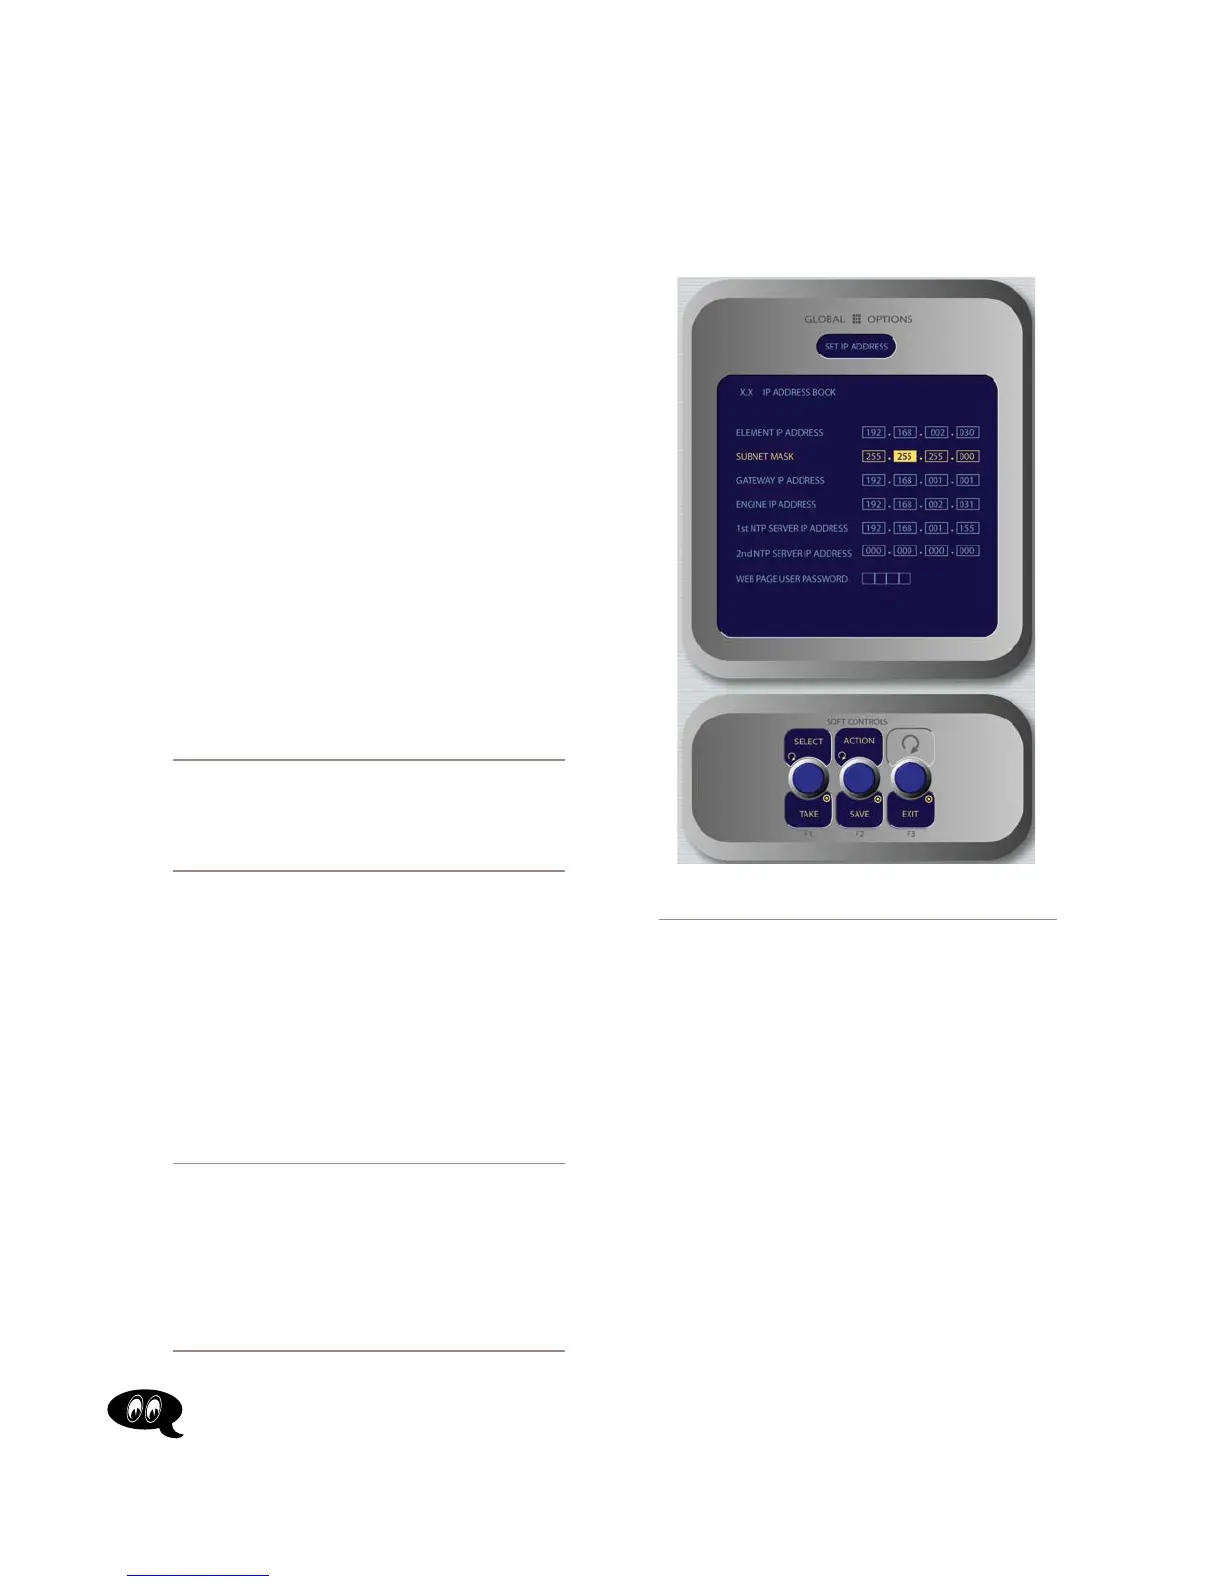
to enter the IP Address Book (Figure 1-12).
Figure 1-12: IP Address Book,
Monitor Module
To set the IP address, rotate the leftmost SoftKnob to
highlight the line titled “Element IP Address” and push
the knob to select that line. Now use the numeric pad to
enter the IP address. Press the leftmost SoftKey again
to “take” the new IP value. Repeat this process to set the
subnet mask value.
Continue down the screen and, in the same way, en-
ter the other fields’ values as appropriate.
Rotate the Select/Set SoftKnob to scroll through
the list of available options. To select an option to
modify, push this knob. While modifying an options,
rotate the knob to change an option’s value, and push
the knob to move to the next field. Available options
include:
Element IP Address: Every piece of Livewire
gear must have its own unique IP Address. Set
the IP Address for each Element in this field.
•
»