Chapter 7 DISASSEMBLY/ASSEMBLY PROCEDURES
7 - 4
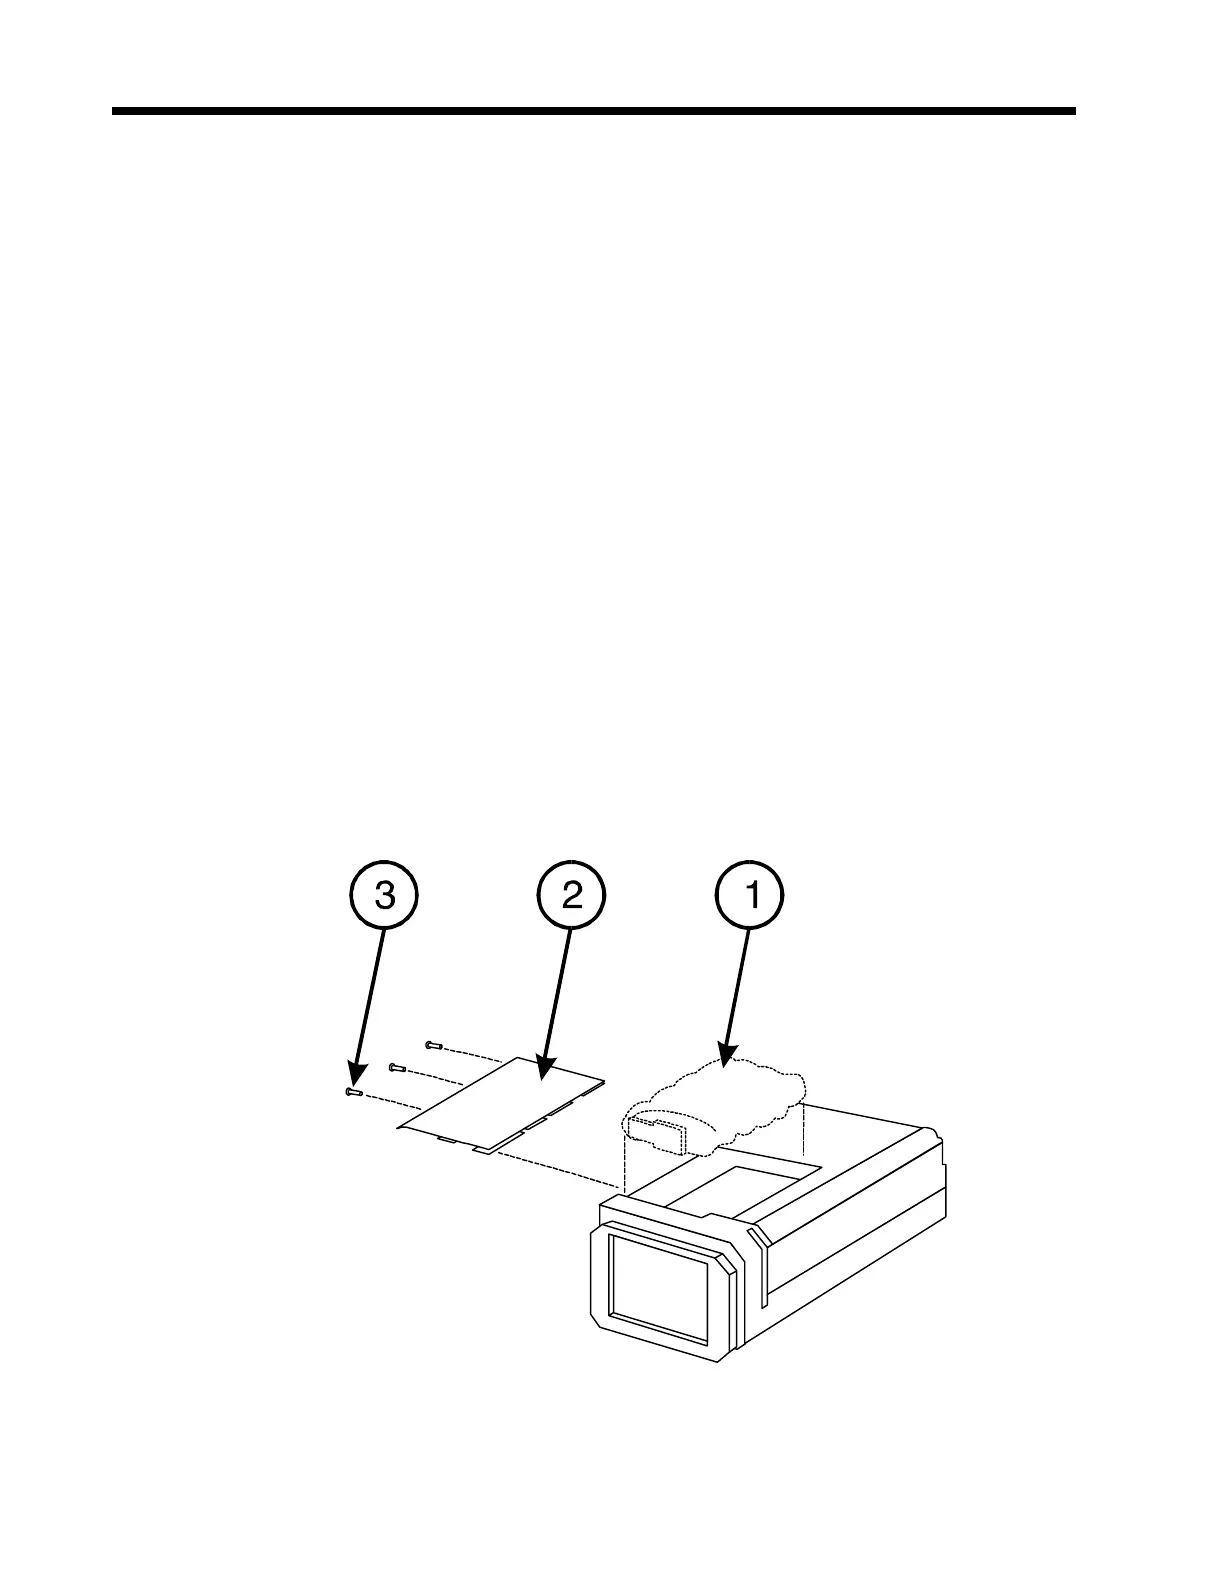
7.2.3 Battery Stack Replacement
1. Remove the three black screws (3) at the side of the Battery Cover (2).
2. Place thumb on thumb press of the Battery Cover (2) and apply slight pressure while
sliding the Battery Cover (2) away from the pump. Remove the Battery Cover (2).
3. Turn the pump over to allow the Battery Stack Assembly to release from the battery
compartment being careful not to allow the stack to fall from the case or stress the
harness. Disconnect the wire harness at the stack by pressing the latch tab and
releasing the connector.
4. Inspect the foam compartment liner used to cushion the Battery Stack assembly. If
there is evidence of moisture inside the pump, remove the foam insert and dry out the
pump interior with filtered, warm air. Do not allow any foreign material to enter the
pump and keep the temperature below 45°C (113°F). When replacing the Battery
Stack Assembly (1), write the date replaced on the new Battery Stack Assembly (1) in
permanent ink.
5. Connect the Battery Stack Assembly (1) to the wiring harness and ensure that the latch
tab is well seated. Place the Battery Stack Assembly (1) into the battery compartment.
During installation, do not crush or kink the wire harness leads while dressing them
along the sides of the stack.
6. Slide the Battery Cover (2) onto the case. Ensure that the cover fits cleanly on all
edges. Install the three black screws (3) being careful not to overtighten them.
Figure 7-3 Battery Stack Replacement

 Loading...

