DISASSEMBLY/ASSEMBLY PROCEDURES Chapter 7
7 - 5
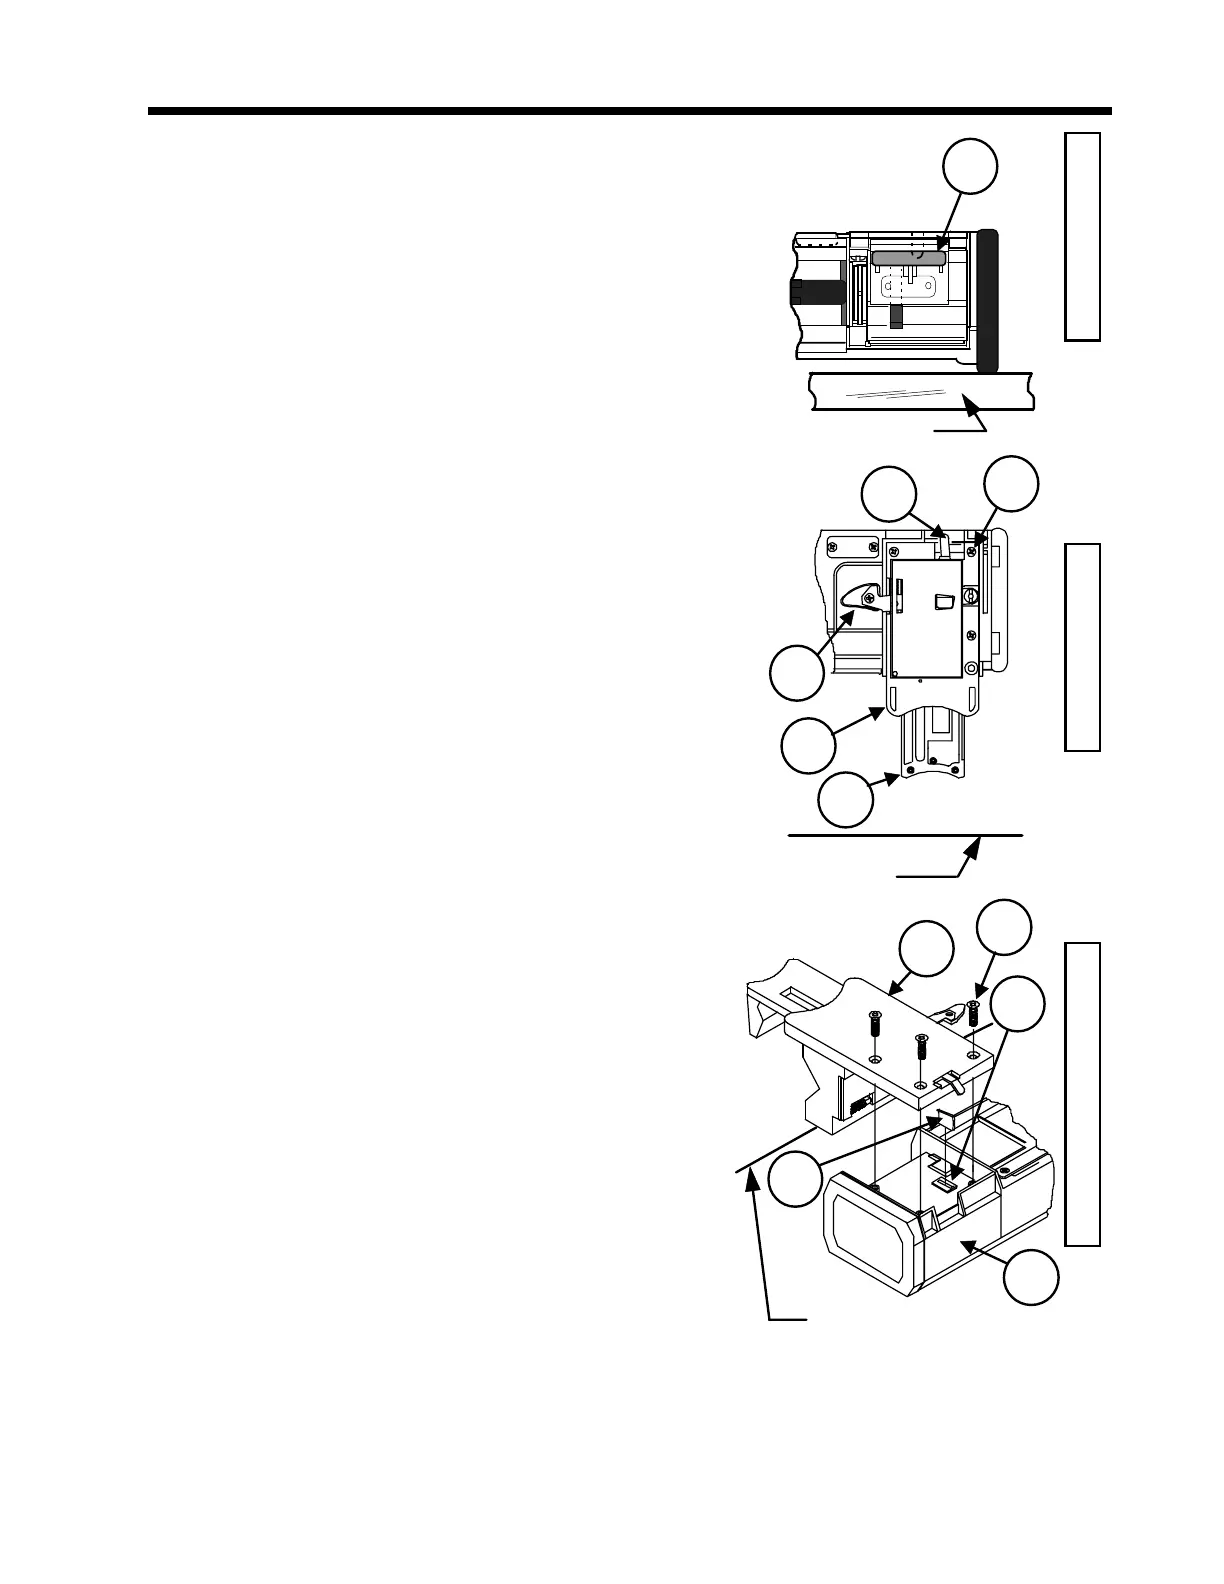
7.2.4 Barrel Clamp Assembly
7.2.4.1 “Barrel Clamp Assembly” Removal
1. Refer to the side, rear, and exploded views on
this page, as necessary, during this and all
remaining steps in this section. Open the
barrel clamp using either the primary (1) or
secondary (2) brake lever.
2. Lay the pump face down on a smooth surface
so that the words “PRESS HERE” (appearing
upside down) on the Clamp Face Decal (3)
face the outside edge of the work surface.
3. Remove the three black Flat Head Screws (4)
holding the Barrel Clamp Assembly (5) to the
Case Assembly (6).
4. Use the left hand to hold the pump down
against the work surface and apply slight
downward pressure on the barrel clamp slide
(7) (using palm of right hand) until the far end
of the clamp (end closest to ON/OFF switch)
lifts up approximately 1″ from the pump.
5. Using the left hand, continue to hold the pump
against the work surface. Grasp the base (8)
of the clamp between the thumb and index
finger of your right hand and lift the clamp
away from the pump.
NOTE
The clamp should easily lift
away from the pump. If it
does not, the far end of the
clamp has not been lifted
high enough.
6. Remove the Barrel Clamp Zebra Strip (9) from
the pocket on the case located below the
zebra strip support (10). Discard the strip.
During reassembly, a new Barrel Clamp Zebra
Strip (9) is to be installed.
OUTSIDE EDGE OF
WORK SURFACE
OUTSIDE EDGE OF
WORK SURFACE
OUTSIDE EDGE OF
WORK SURFACE
3
4
2
1
8
7
4
5
6
9
10
R
E
A
R
V
I
E
W
E
X
P
L
O
D
E
D
V
I
E
W
S
I
D
E
V
I
E
W
Figure 7-4 Barrel Clamp
Assembly Removal

 Loading...

