vi pro+ Surface Instructions for Use (209196 REV 8)
Table of Contents
Step 3B: Install the MCM Status Indicator Mounting
Kit (Rental Only) . . . . . . . . . . . . . . . . . . . . . . . . . . . . . . . . . 27
Step 4: Final Steps . . . . . . . . . . . . . . . . . . . . . . . . . . . . . . . 28
Status Indicator light . . . . . . . . . . . . . . . . . . . . . . . . . . . . . 30
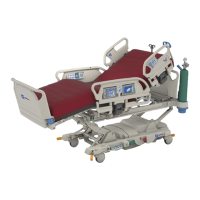
CENTRELLA Smart+ Bed—Integrated pro+ Surface . . . . . . . . . 31
Step 1: Setup . . . . . . . . . . . . . . . . . . . . . . . . . . . . . . . . . . . . 31
Step 2: Final Steps . . . . . . . . . . . . . . . . . . . . . . . . . . . . . . . 34
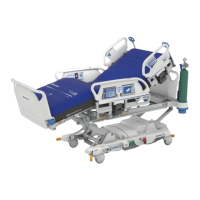
VERSACARE Bed—pro+ Surface Installation Instructions. . . . 36
pro+ Surface Long Power Cord
(P3255A01, P3255A02, and P3255A05) . . . . . . . . . . . . . . . . . . . . 38
Step 1: Setup . . . . . . . . . . . . . . . . . . . . . . . . . . . . . . . . . . . . 38
Step 2: Route the Long Surface Power Cord
(P3255A01, P3255A02, and P3255A05) . . . . . . . . . . . . . 39
Step 3A: Install the MCM Status Indicator Mounting
Kit (Capital Only) . . . . . . . . . . . . . . . . . . . . . . . . . . . . . . . . 42
Step 3B: Install the MCM Status Indicator Mounting
Kit (Rental Only) . . . . . . . . . . . . . . . . . . . . . . . . . . . . . . . . . 43
Step 4: Final Steps . . . . . . . . . . . . . . . . . . . . . . . . . . . . . . . 44
Status Indicator Light . . . . . . . . . . . . . . . . . . . . . . . . . . . . 47
pro+ Surface Short Power Cord
(P3255A03 and P3255A04) . . . . . . . . . . . . . . . . . . . . . . . . . . . . . . . 48
Step 1: Setup . . . . . . . . . . . . . . . . . . . . . . . . . . . . . . . . . . . . 48
Step 2: Route the Surface Power Cord (P3255A03
and P3255A04) . . . . . . . . . . . . . . . . . . . . . . . . . . . . . . . . . . 49
Step 3: Install the MCM Status Indicator Mounting
Kit
(Capital Only) . . . . . . . . . . . . . . . . . . . . . . . . . . . . . . . . . . . 52
Step 4: Final Steps . . . . . . . . . . . . . . . . . . . . . . . . . . . . . . . 53
Status Indicator Light . . . . . . . . . . . . . . . . . . . . . . . . . . . . 56
CAREASSIST and ADVANTA 2 Beds. . . . . . . . . . . . . . . . . . . . . . . 57
Step 1: Setup . . . . . . . . . . . . . . . . . . . . . . . . . . . . . . . . . . . . 57
Step 2: Route the Surface Power Cord . . . . . . . . . . . . . . 58
Step 3A: Install the MCM Status Indicator Mounting
Kit (Capital Only) . . . . . . . . . . . . . . . . . . . . . . . . . . . . . . . . 61