30
Clinician's Guide
Custom Image Library and Custom Word List
Custom images and text can be added to create a library for individual clients. The custom images and
text can be used in a number of programs to create custom, tailored stimuli.
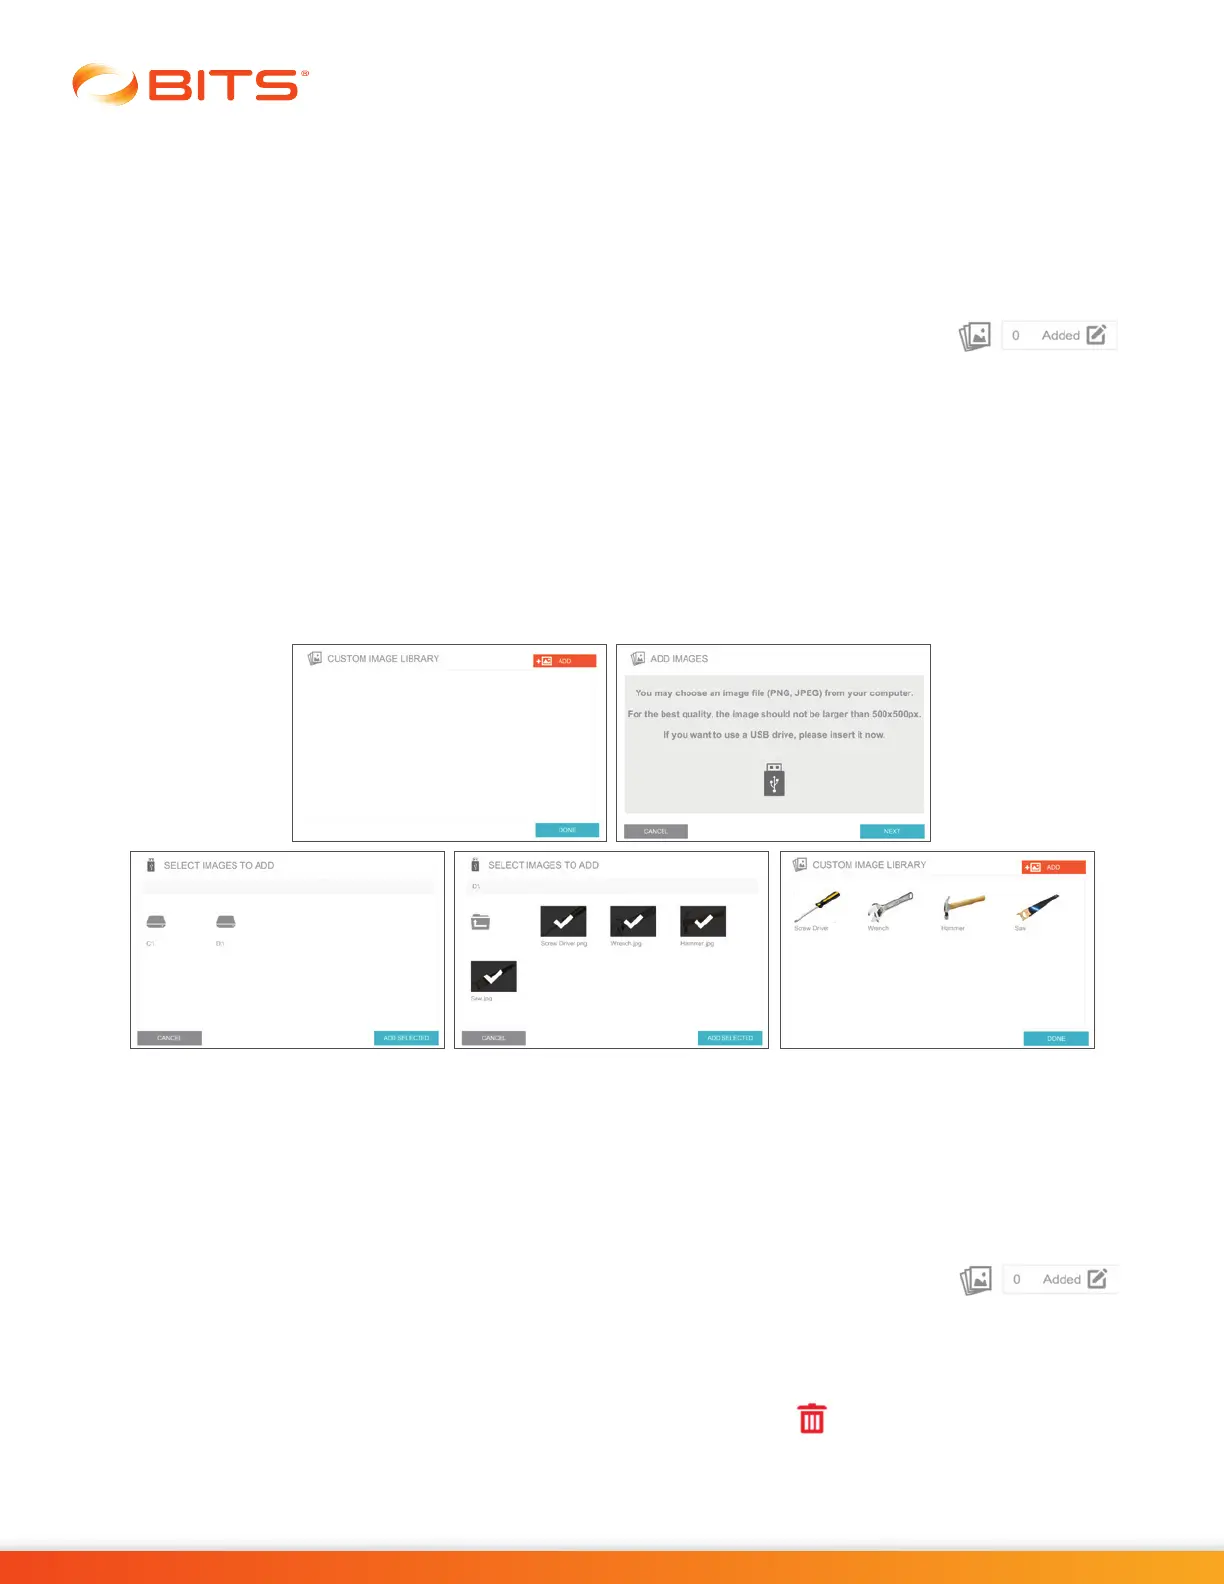
Adding Custom Images
1.
From the Client Detail Screen, press the Image Icon Box next to the Custom Image Icon
to add images. See Figure 5-6.
2. The Custom Image Library Window will open. Press the Add Button, see Figure 5-7.
3. The Add Images Window will open. Press the Next Button, see Figure 5-7.
4. The Select Images to Add Window will open. Select the drive icon and corresponding folder that
contains the custom image. Select the desired image file(s). A check mark will appear when selected.
Press the Add Selected Button. See Figure 5-7.
5.
The Custom Image Library Window will open, displaying the custom images. Press the Done Button to
close the Custom Image Library Pop-up Window and return to the client Detail Screen. See Figure 5-7.
Figure 5-7: Adding Custom Images, Windows
6. Press the Save or Save & Start Button to save changes to the client record. See Figure 5-6.
Removing Custom Images
1.
From the Client Detail Screen, press the Image Icon Box next to the Custom Image Icon
to remove images. See Figure 5-6.
2.
The Custom Image Library Window will open. Press the thumbnail of the image that you want to remove
from the library, see Figure 5-8.
3. A window displaying the image will open. Press the red Trash Icon , see Figure 5-8.
4. A dialog window will open to confirm that the user wants to delete the image from the Custom Image
Library. Press the Yes Button, see Figure 5-8.