IQC 5000B Operation Manual
47
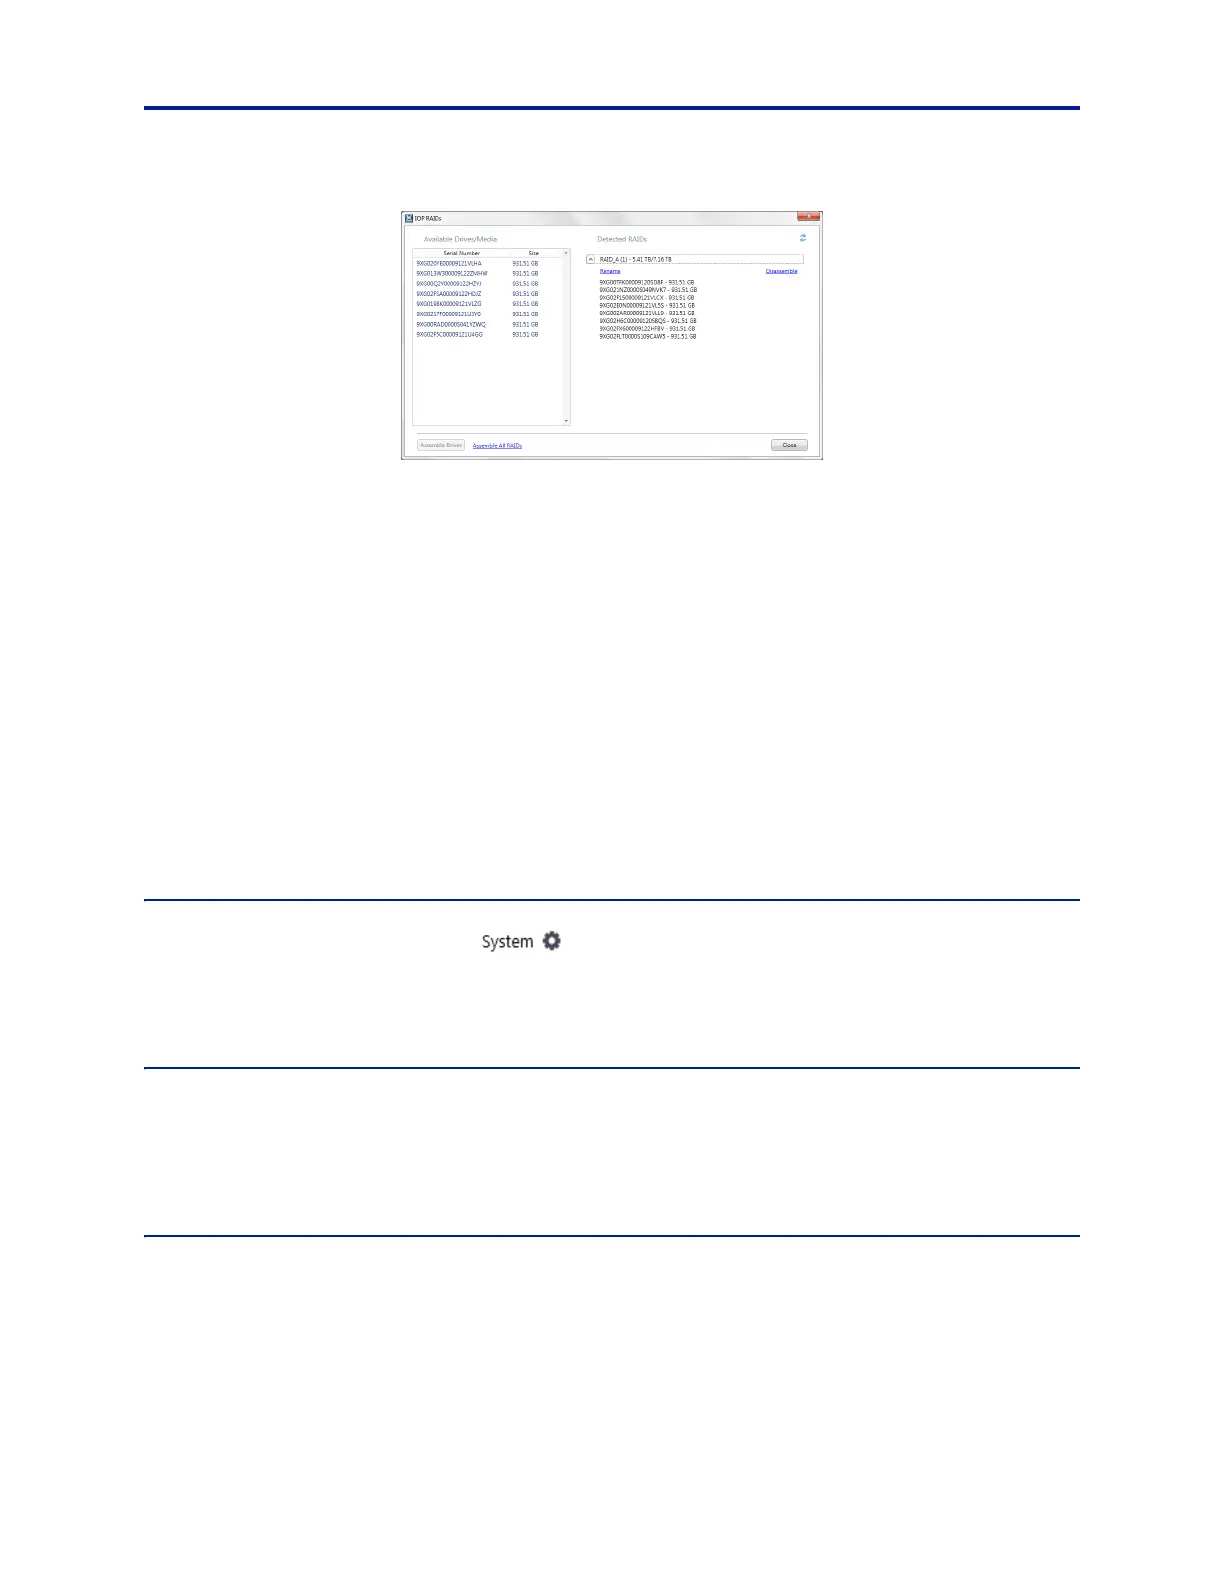
Figure 38 RAID Assembly
Unused disks not currently assembled in a RAID are listed on the left under Available Drives/Media. Assembled/
Mounted RAIDs and their disks are listed on the right under Detected RAIDs. Serial number and size are shown for
each disk.
Unused disks are available for assembly. To assemble them as a RA
I
D, click Assemble all RAIDs in the lower-left
corner of the menu. This instructs the IQC-MEM module to automatically build the optimal RAID configuration
based on the disks available. An alternate approach – only recommended for advanced users – is to select a series
of unused disks and click Assemble Drives. Assembled RAIDs are available and ready for use.
After a RAID has been assembled, i
t wi
ll be listed under Detected RAIDs. Click on a RAID to expand the list of its
member disks.
To disassemble a RAID, click on the R
AID and then select Disassemble. The disassembled RAID member disks will be
transferred to the Available Drives/Media list.
If an external storage unit is attached while the IQC5000 and IQC
-MEM are powered on, click the Refresh button in
the upper-right corner to refresh the disk list.
Specific procedures for creating Single
and Dual RAIDS are located in "Advanced RAID Configuration Modes" on
page 82.
Selecting a RAID for Use
To select a RAID, click on the System tab ( ) to display the RAID controls. Once a RAID has been configured
for use, it will become available in the RAID dropdo
wn menu(s). For single external storage unit setup, select the
configured RAID device from the RAID drop-down menu to select it as the recording device. For dual external
storage unit setup, select the desired RAID devices for each I RAID and Q RAID.
RAID Self-Monitoring, Analysis and Reporting Technology (SMART) Data
SMART Data are a collection of metrics that help to communicate the health of an HDD/SSD. SMART Data are
managed by the HDD/SSD controller and stored on the local disk, and include metrics such as temperature, read
errors, write errors, and much more. Click on the SMART link next to a configured RAID to view the SMART data for
the disks that make up that RAID. See Figure 37 on page 46.
Maximum Record File Size
If a maximum recorded file size is desired, use the Max Record File Size option on the System Tab. Setting the Max
Record File Size to something other than the default setting of None will cause recordings to be split into multiple
recordings once the max record file size has been met. Subsequent recordings will be followed by a number
signifying the order in which it was recorded.