IQC 5000B Operation Manual
53
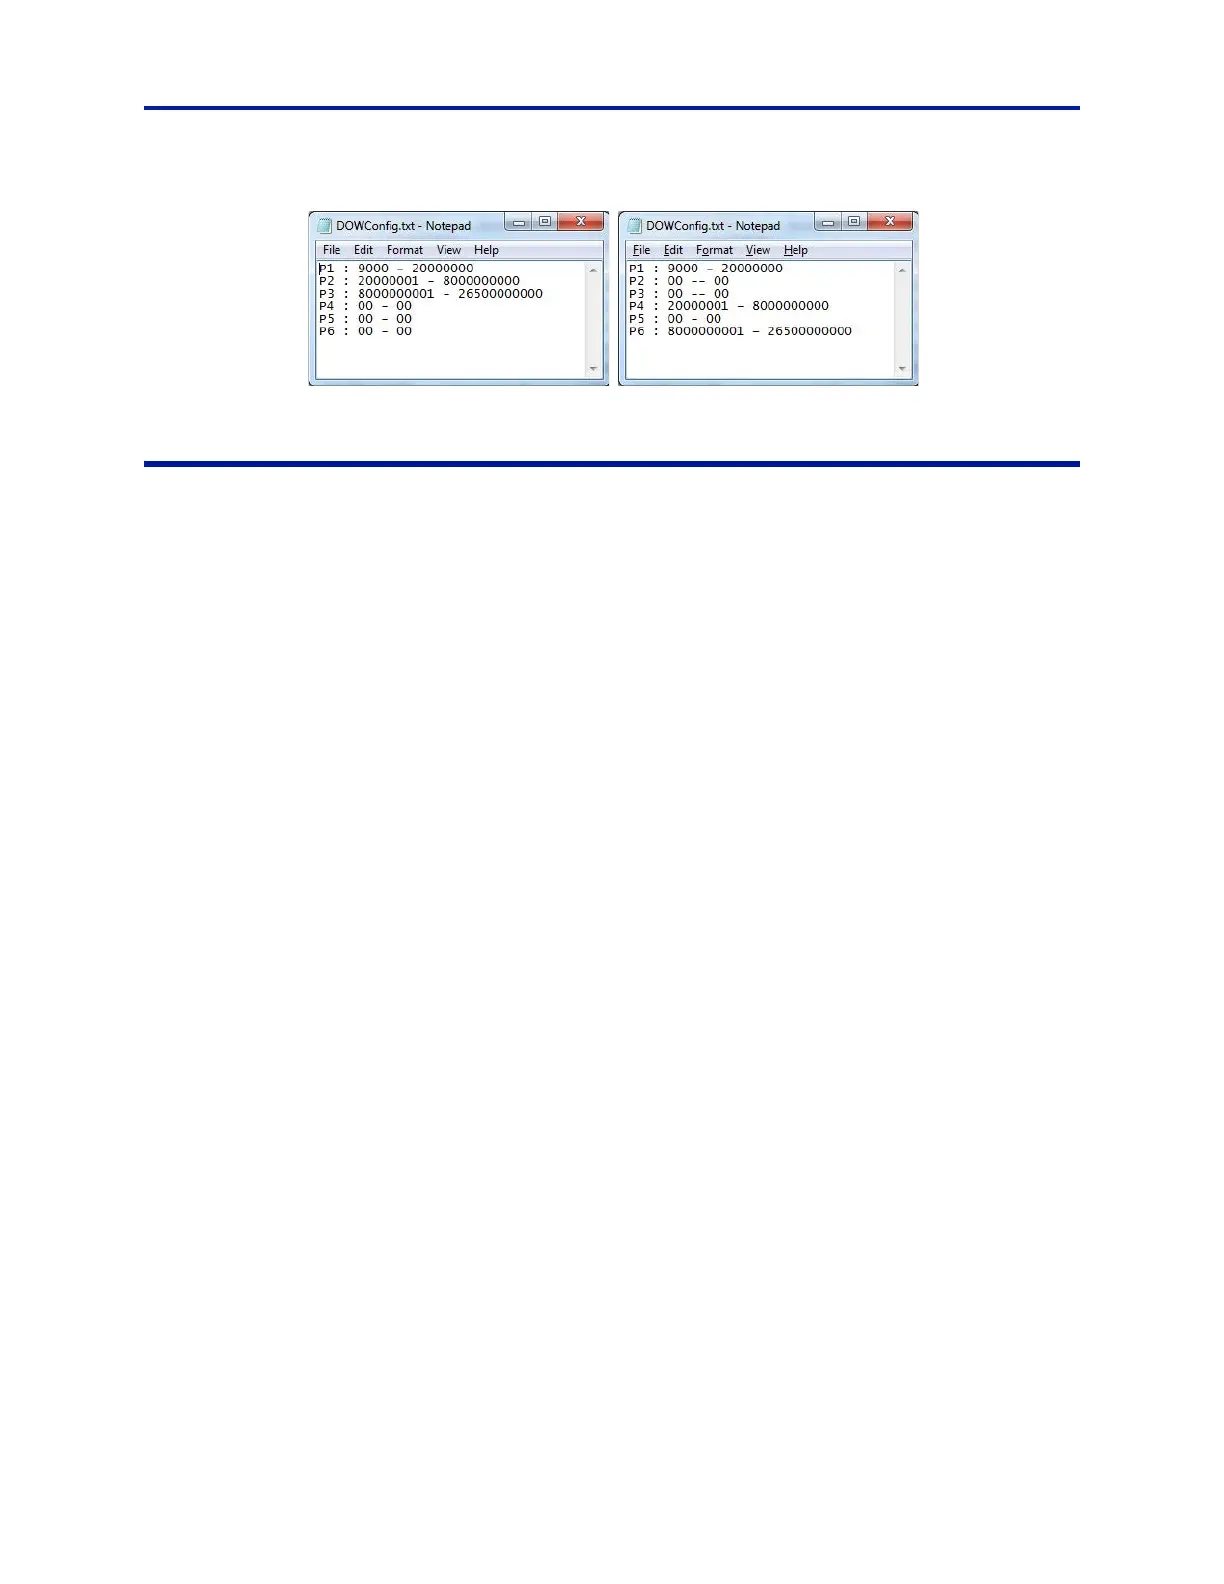
Figure 44 Sample DOWConfig.txt Files
Recording with IQC Control
Note: Select discrete acquisition bandwidths are supported for playback. If playback of a recording is
desired, it is recommended to record at a playback-supported acquisition bandwidth. See "IQC5000 Sup-
ported Playback Acquisition Bandwidths" on page 33.
To set up for recording using IQC Control:
1. Ensure correct setup:
a. Hardware - See step “Hardware Setup – Record” on page 8.
b. Network - See step “Network Setup” on page 15.
c. Spectrum analyzer - see setup for your spectrum analyzer type.
2. Add an IQC5000 tab in IQC Contr
ol - follow steps in "Adding an IQC5000 to IQC Control" on page 42.
3. Connect to the IQC5000 - follow steps in "Establishing Connection" on page 45.
4. Manage IQC5000B-MEM external st
o
rage - follow steps in "Managing IQC5000B-MEM External Storage" on
page 46.
5. Add the spectrum analyzer as a remote device - follow steps in "Adding a Remote Device" on page 49.
6. Connect to the spectrum analyzer - follow steps in "Connecting/Disconnecting to a Remote Device" on page 50.
7. Set the IQC5000 into record mode - follow steps in "Setting the IQC5000 into Record Mode" on page 54.
8. Select the record channel(s) - follow steps in "Channel Selection" on page 54.
9. Identify signal of interest on spectrum analyzer
10. Determine and set recording start/stop methods - follow steps in "Record Modes" on page 54.
11. (Optional) Configure marker settings - follow steps in "Setting up Markers" on page 56.
12. Name and describe the recording - follow steps in "Naming and Describing the Recording" on page 56.
13. Modify center frequency, input power settings, and acquisition
bandwidth as desired on the spectrum analyzer,
or through IQC Control
Once the initial configuration is set, IQC Control recording is r
eadied by arming the IQC5000.
14. Press the Arm for Record button - see "Arming" on page 57
The IQC5000 is now ready to record. The start method will dictat
e when the recording is initiated for
triggered or time of day recordings. Manual recordings can be started/stopped at any time.
15. Press the Record button. Wait for the desired duration of the rec
ording.
16. Press the Stop button.