To manually set the date and time, toggle the ‘auto set date and time’ setting to ‘off’ and use the
‘date’, ‘time’ and ‘time zone’ menu options to make adjustments. The date format is day, month,
year and the time format is 24 hour.
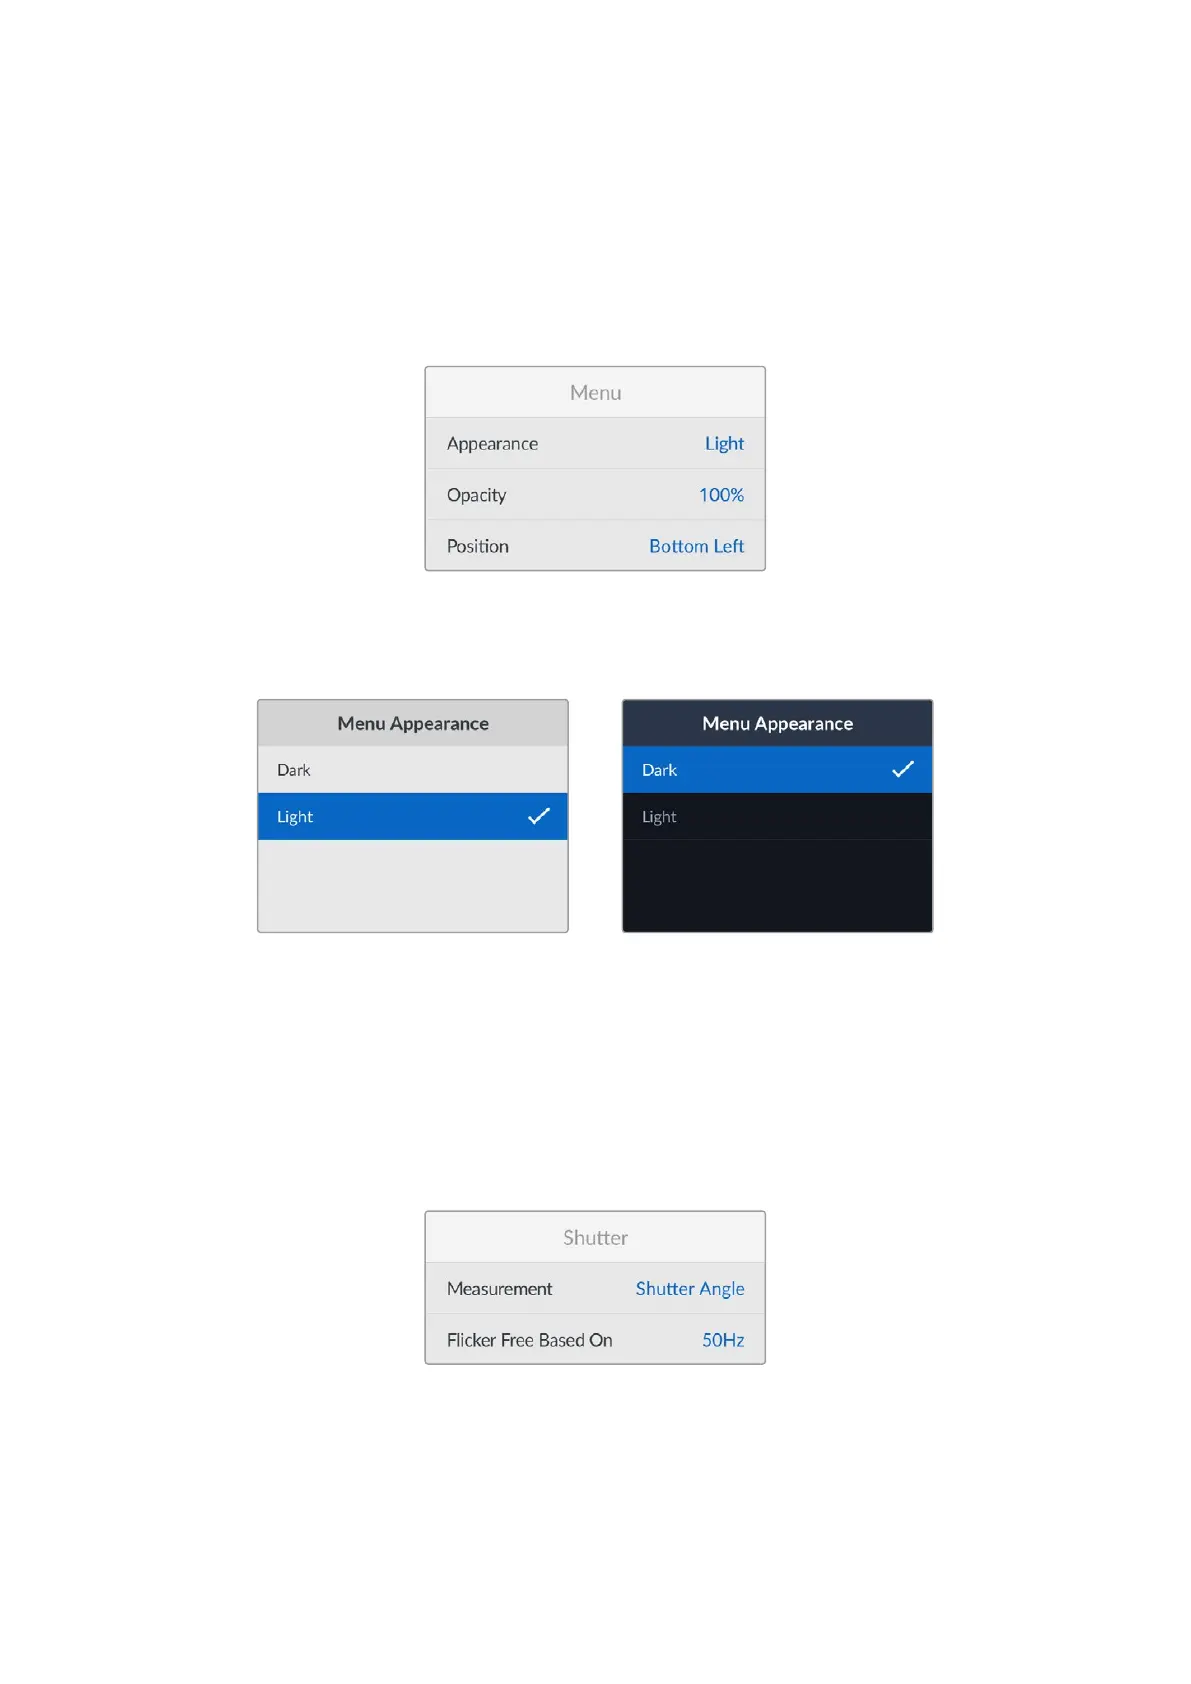
Menu
Use the menu settings to adjust the location and appearance of the menu on the connected
HDMI display.
Appearance
Set your camera’s onscreen menu to dark or light mode. Light mode will offer more contrast
when shooting in low light conditions.
Opacity
Adjust the levels to reduce the opacity of the menu overlay on the connected display from the
default 100% to 20%.
Position
The menu overlay will default to the bottom left hand corner of the screen. To move the menu to
a different location, select ‘position’ and press the ‘set’ button. Now you can select the top left,
top right, bottom left or bottom right corner of the screen.
Shutter
Measurement
Use this setting to select whether to display shutter information as ‘shutter angle’ or
‘shutter speed’.
It’s worth mentioning that when using shutter angle, the shutter conforms to the frame rate.
54Setup Menu
 Loading...