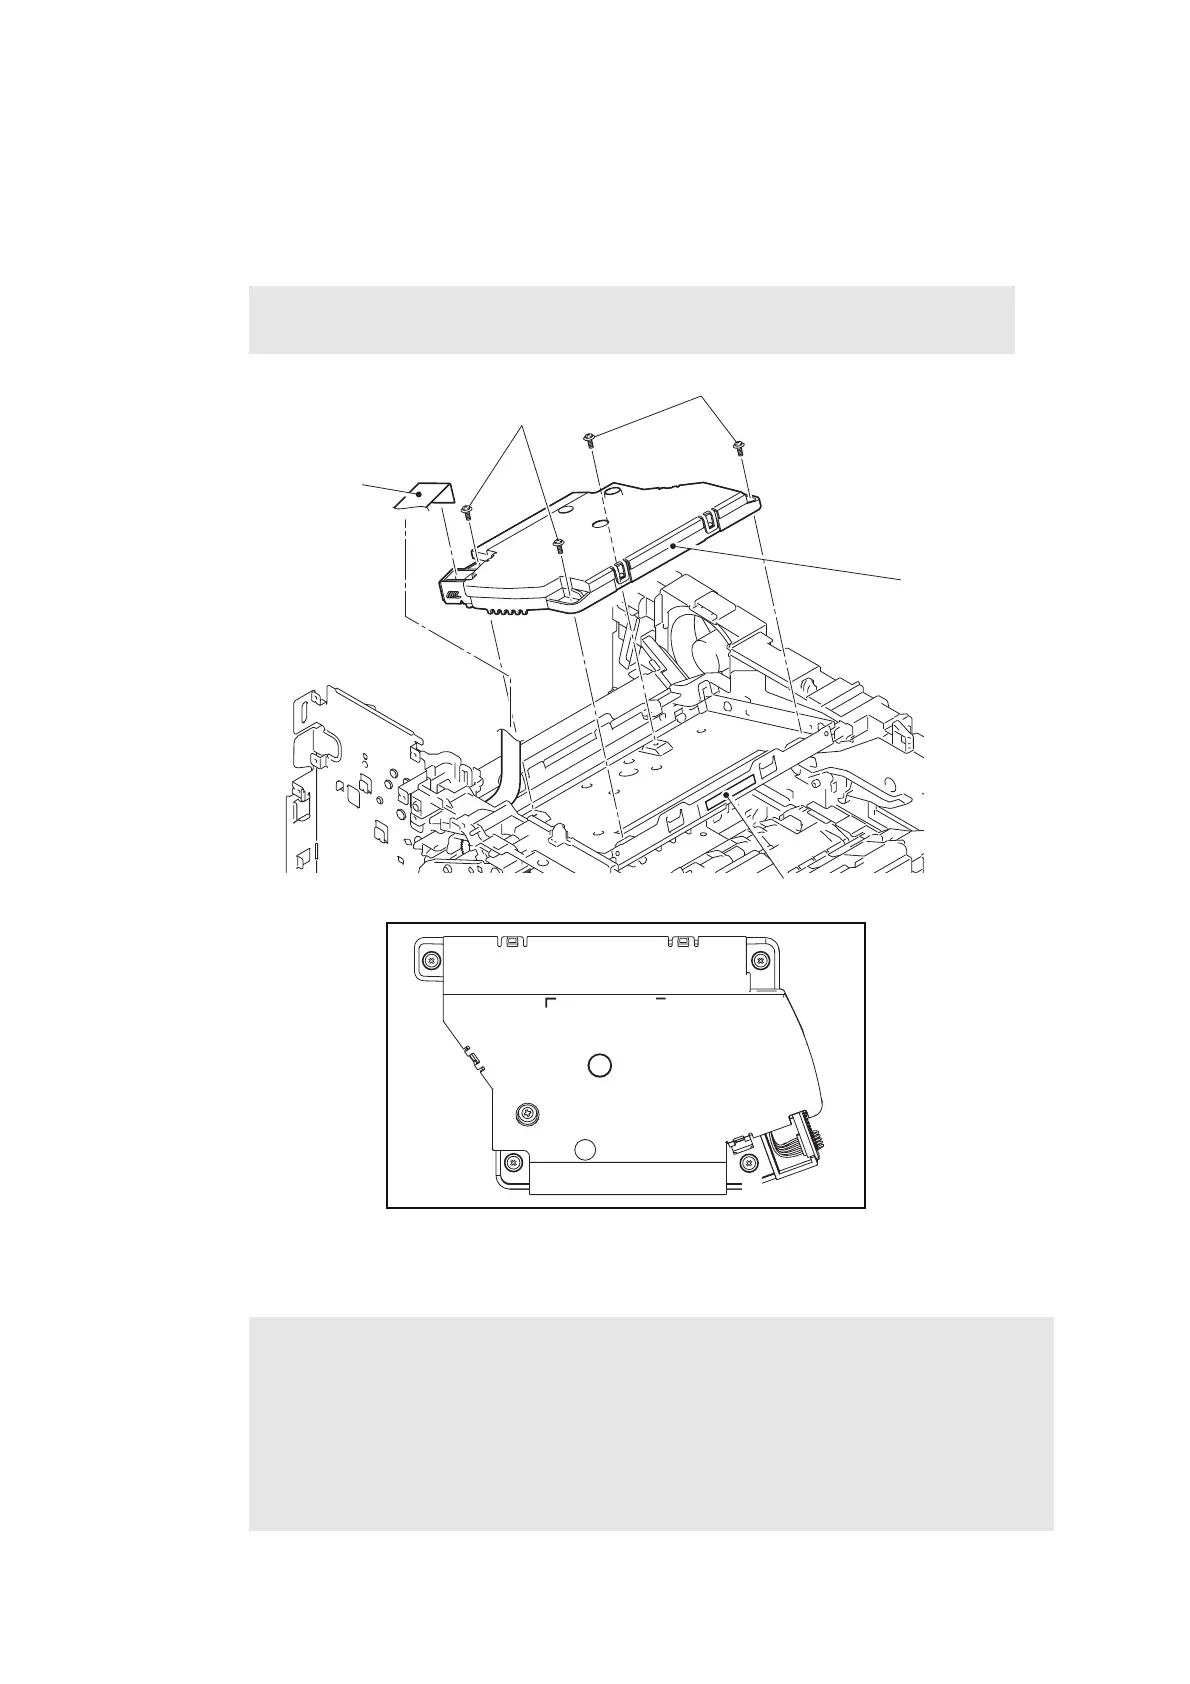
EasyManuals Logo

Brother DCP-8152DN User Manual

Brother DCP-8152DN
373 pages
To Next Page IconTo Next Page
To Previous Page IconTo Previous Page
Page #222 background imageLoading...
Page #222 background image
3-76
Confidential
9.19 Laser unit
(1) Disconnect the laser unit flat cable from the laser unit.
(2) Remove the four taptite cup S M3x8 SR screws, and remove the laser unit from the
machine.
Fig. 3-104
Harness routing: Refer to “1.Main PCB ASSY” and “6.Laser unit” .
Note:
Be careful not to touch the lens of the laser unit.
Assembling Note:
When attaching the laser unit, tighten the screws in the following order: upper right,
lower right, lower left and upper left.
When connecting the flat cable(s), insert it straight. After insertion, check that the cable
is not at an angle.
After replacing the laser unit, attach the laser serial number label of the new laser unit
on the scanner plate as shown in the illustration above.
Laser unit flat cable
Taptite cup S M3x8 SR
Laser unit
Taptite cup S M3x8 SR
1
2
3
4
Laser serial number label

Table of Contents

Questions and Answers:

Question and Answer IconNeed help?

Do you have a question about the Brother DCP-8152DN and is the answer not in the manual?

Brother DCP-8152DN Specifications

General IconGeneral
Printer TypeMonochrome Laser Printer
FunctionsPrint, Copy, Scan
Print ResolutionUp to 1200 x 1200 dpi
Duplex PrintingYes
ConnectivityUSB, Ethernet
Monthly Duty CycleUp to 50, 000 pages
Scanner TypeFlatbed with ADF
Optical ResolutionUp to 1200 x 1200 dpi
Copier ResolutionUp to 1200 x 600 dpi
Network ReadyYes
DisplayLCD
Weight16.5 kg
Print SpeedUp to 40 ppm
Paper Input Capacity250 sheets
ADF Capacity35 sheets
Maximum Paper SizeA4
Maximum Copy SpeedUp to 40 cpm

Related product manuals