Operation
6
CLS Pro 600 – Line and Contrast Sensor 53/108
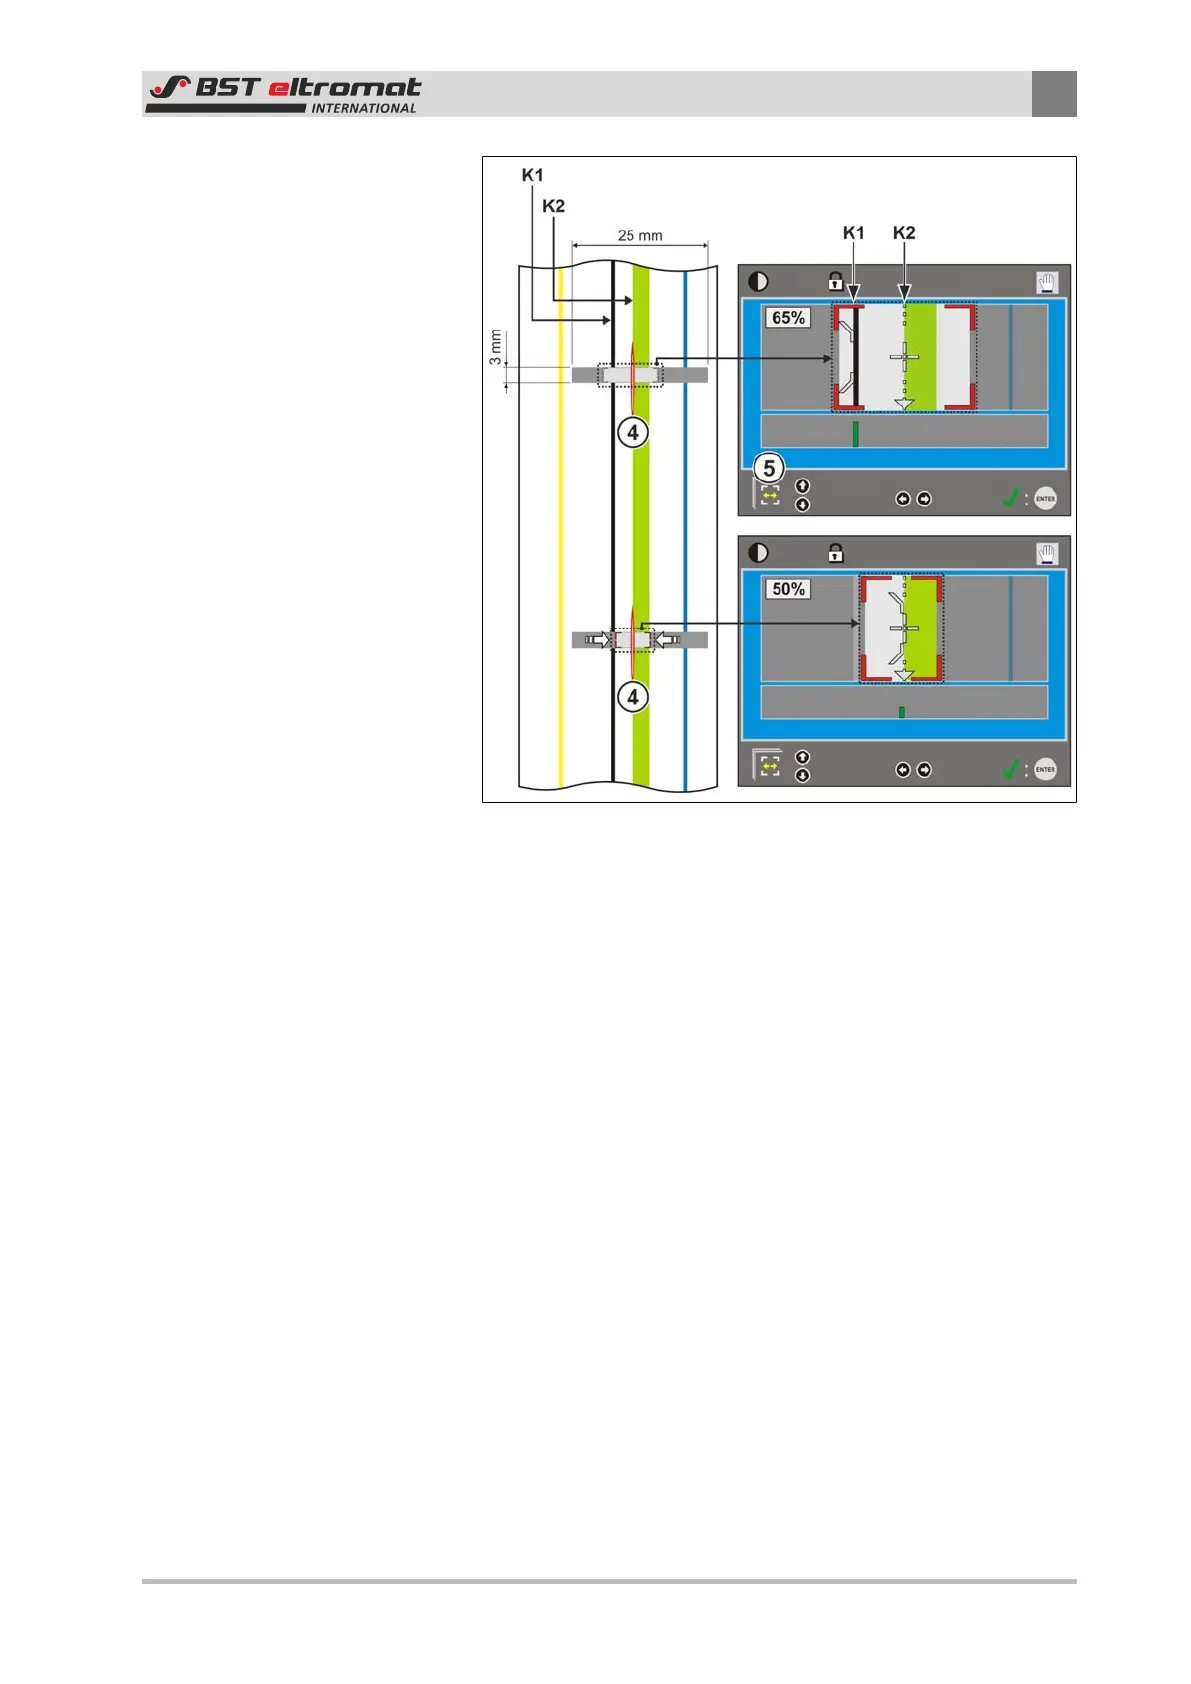
Fig.38: Edge Setup Mode
4. Use the laser line ④ to position the sensor on the edge to be
scanned.
5. Use the mechanical adjustment device to fix it in position. The
edge with the best contrast will be selected automatically by
the system. In this case it is edge K1.
6. If the pre-selected edge is to be used for the controlling, then
no other settings have to be entered. Press the ENTER button.
The LEDs inside the ENTER and SETUP keys will be extin-
guished. The display will change over from setup mode to scan-
ning mode.
7. If edge K2 has to be used for the guiding then the arrow keys
must be used to define the search area. In this case you must
select define search area ⑤ and set up the size of the search
area accordingly. Press the ENTER button. The LEDs inside the
ENTER and SETUP keys will be extinguished. The display will
change over from setup mode to scanning mode.
8. Press the ENTER button. The system will now switch back to
AUTO mode (operating mode).
ð The edge setup is finished.