6
Operation
58/108 CLS Pro 600 – Line and Contrast Sensor
ð The selected job will be loaded. A relevant information win-
dow will be displayed after the loading has been completed
successfully.
Deleting a job:
A saved job that is no longer wanted can be deleted.
1. Call up the \\parameter\jobs\choose job menu. A selection list
of saved jobs will be displayed.
2. Use the up / down arrow keys to select the job that you want
to delete and then press ENTER to confirm your selection.
ð The job will be deleted.
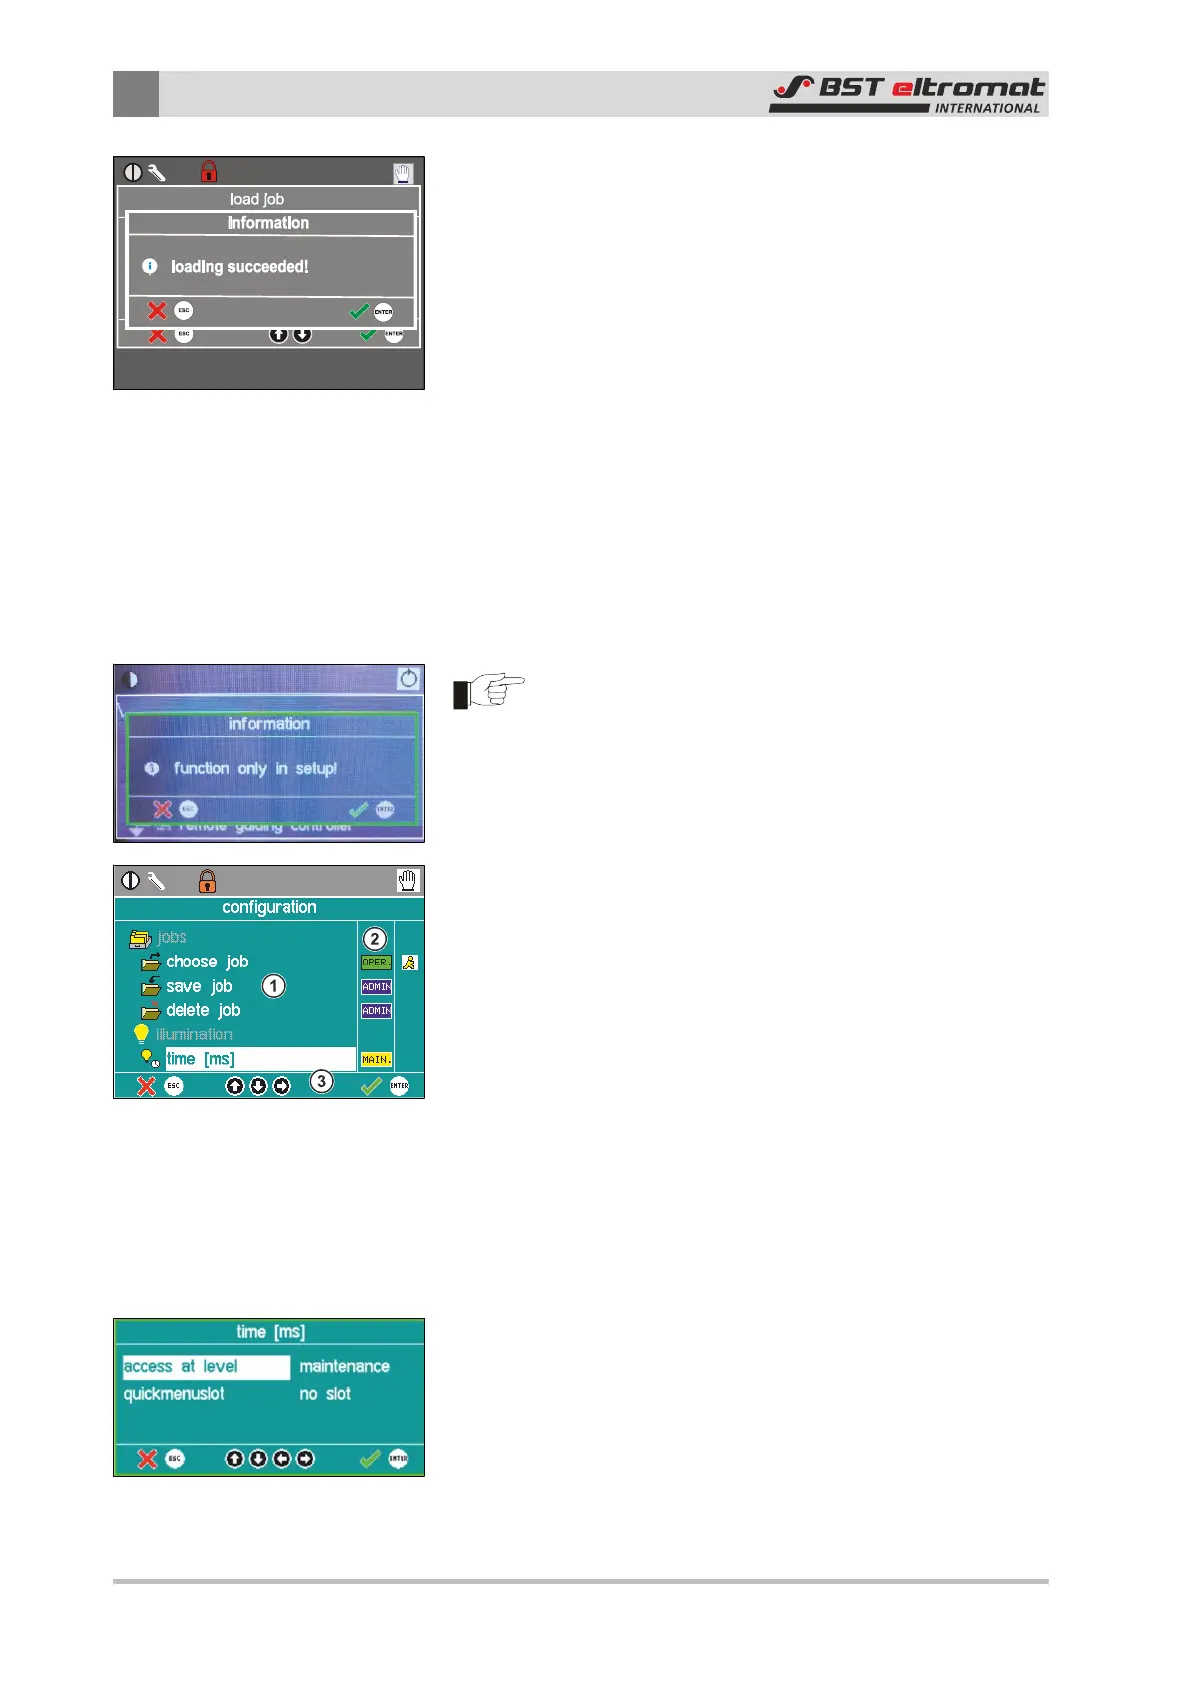
6.6.3 Assigning User Levels to the Parameters
Access rights can be assigned to specific parameters via the \\con-
figuration\edit menu configuration sub-menu, i.e. only those
holding access rights can access parameters that have been as-
signed a user level.
Caution!
The \\configuration\edit menu configuration sub-menu
can only be called up in setup mode and you have to be
logged on as Admin. A relevant information window will
be opened up if you try to call it up from scanning mode
(see screenshot on the left).
Procedure:
►
Call up the \\configuration\edit menu configuration sub
menu. The dialog window is sub-divided into the following sec-
tions:
① Parameter Display
② Assigned User Levels
③ Footer with User Help
ð Only the parameters that the current user hold access rights
to will be displayed in the parameter screen.
Assignment:
1. Use the up / down arrow keys to select the parameter that you
want to optimise and then press ENTER to confirm your selec-
tion.
2. The associated editing window will be opened. The time [ms]
parameter window is used as an example here.
3. Now select access at level. You can now define the user level in
the option field on the right that will enable users to view / use
this parameter. Confirm the entry by pressing ENTER.
4. The display will return to the configuration screen.
ð The relevant symbol will be displayed in the user level
column.