2007 Buell Lightning: Engine 3-79
HOME
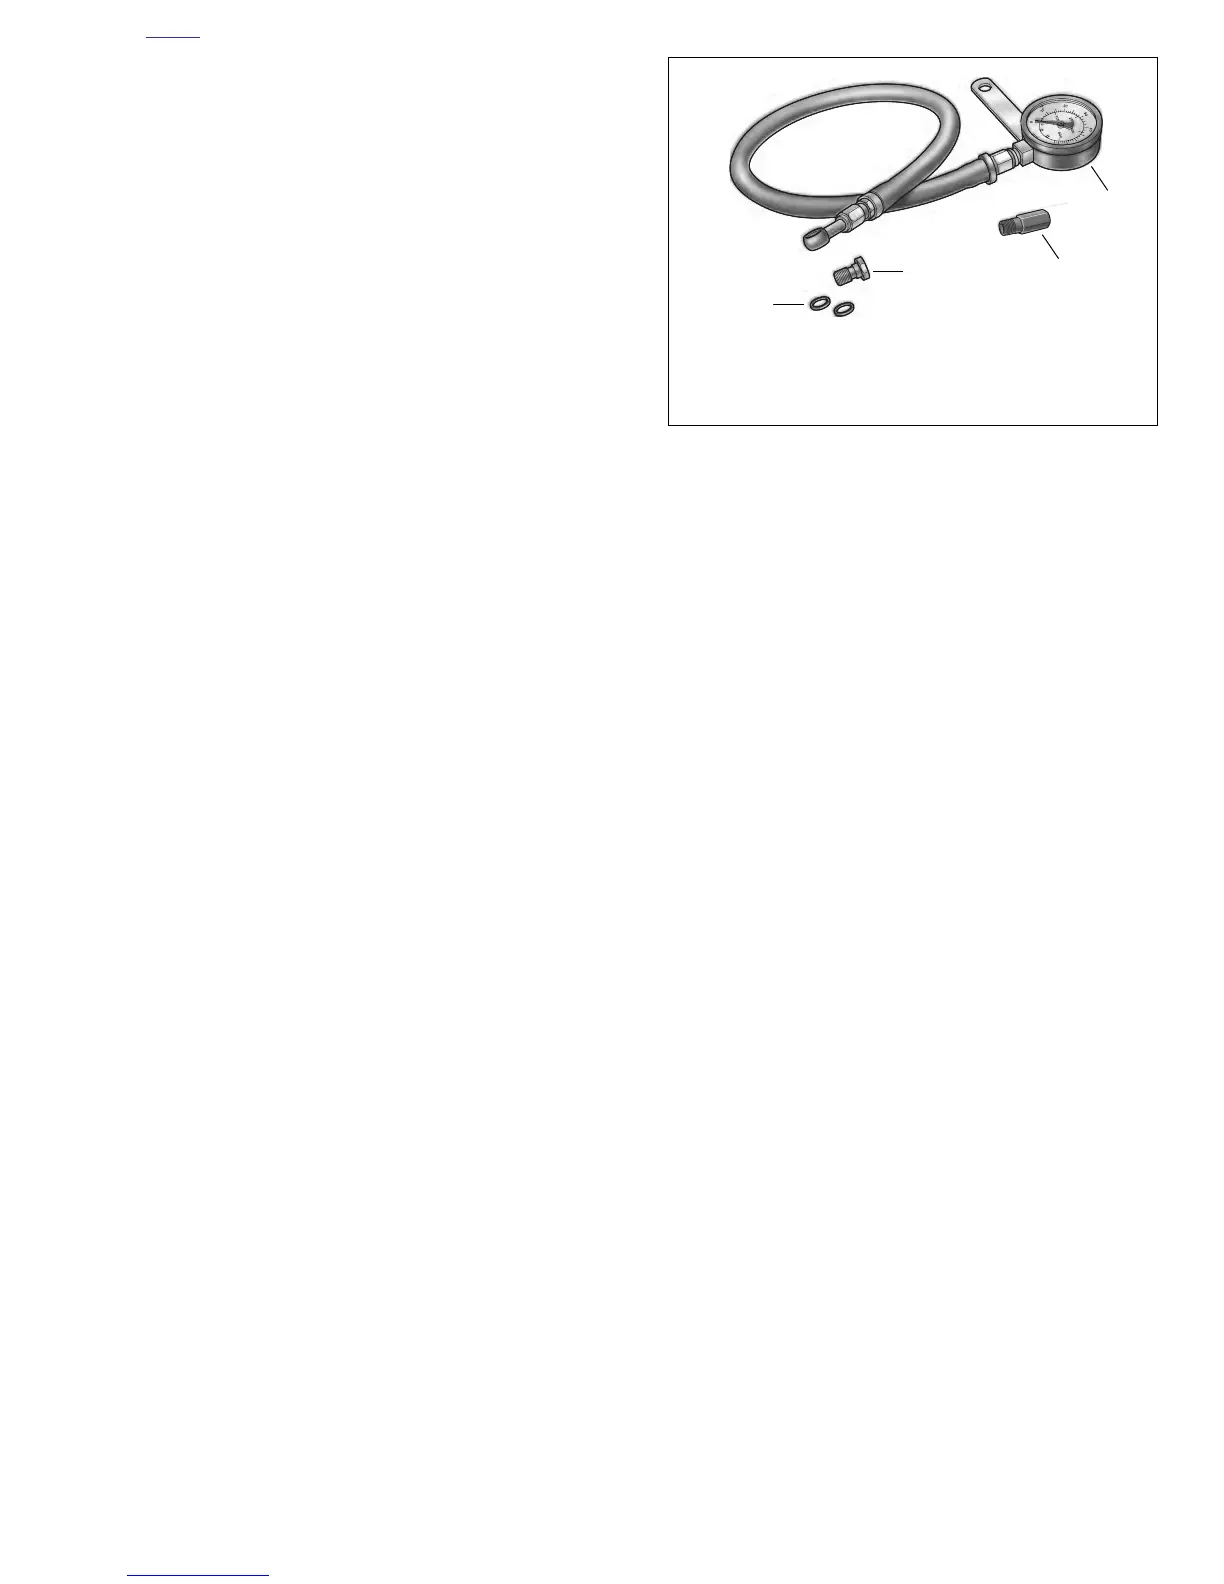
4. Assemble banjo bolt (3), washer (4), OIL PRESSURE
GAUGE (1) banjo fitting and second washer onto
adapter and tighten snugly. See Figure 3-113.
5. Temporarily secure oil pressure gauge and hose to
motorcycle frame with cable straps. Make sure gauge
and hose assembly do not interfere with normal opera-
tion of the vehicle. Start engine and ride motorcycle at
least 20 miles (32 km) at or above 50 mph (80 km/h) to
allow engine to reach operating temperature.
a. At 2500 RPM, oil pressure will vary from 10-17 psi
(69-117 kPa).
b. At idle speed (1050-1150 RPM), oil pressure will
vary from 7-12 psi (48-82 kPa).
6. Stop engine. Remove OIL PRESSURE GAUGE assem-
bly from oil pressure indicator lamp switch mounting hole
in crankcase. Cut cable straps that you installed in step 5
above, and remove banjo bolt, gauge assembly, washers
and adapter from vehicle.
7. Coat threads of oil pressure switch with LOCTITE 565
HIGH PERFORMANCE PIPE SEALANT with TEFLON.
Reinstall oil pressure switch. Using OIL PRESSURE
SENDING UNIT WRENCH, tighten switch snugly to 50-
70 in-lbs (5.6-7.9 Nm).
8. Plug in connector (2) by pushing elbow connector
straight down onto stud on oil pressure switch.
9. Using a cable strap, secure the oil pressure switch wiring
to the oil pressure switch.
NOTE
If an appreciable amount of oil leaked out when oil pressure
switch was removed, it will have to be replaced with fresh oil.
10. Check oil level in oil tank. See 1.5 ENGINE LUBRICA-
TION SYSTEM. Top off oil level if necessary.
11. Start engine and test oil pressure switch for proper oper-
ation. Check oil pressure switch for leaks.
Figure 3-113. Oil Pressure Gauge Set
(Part No. HD-96921-52B)
x0520x3x
1. Gauge
2. Adapter
3. Banjo bolt
4. Washers (2)
1
2
3
4