2007 Buell Lightning: Chassis 2-69
HOME
CLUTCH CONTROL/CABLE 2.26
GENERAL
For clutch adjustment, see 1.8 CLUTCH.
For clutch replacement, see 6.4 CLUTCH.
REMOVAL/DISASSEMBLY
Clutch Cable
11WARNING1WARNING
To prevent accidental vehicle start-up, which could
cause death or serious injury, disconnect negative (-)
battery cable before proceeding. (00048a)
1. Remove seat. See 2.44 SEAT.
2. Disconnect negative battery cable. See 1.4 BATTERY
MAINTENANCE.
3. Remove chin fairing. See 2.37 CHIN FAIRING.
4. Cut tie wrap from clutch cable/regulator wiring.
NOTE
Always disconnect front tie bar from the "V" bracket first.
5. Remove front tie bar from “V” bracket.
6. Remove front tie bar, P clamp and clutch cable from
engine.
7. Remove cable strap securing clutch cable to voltage reg-
ulator wire.
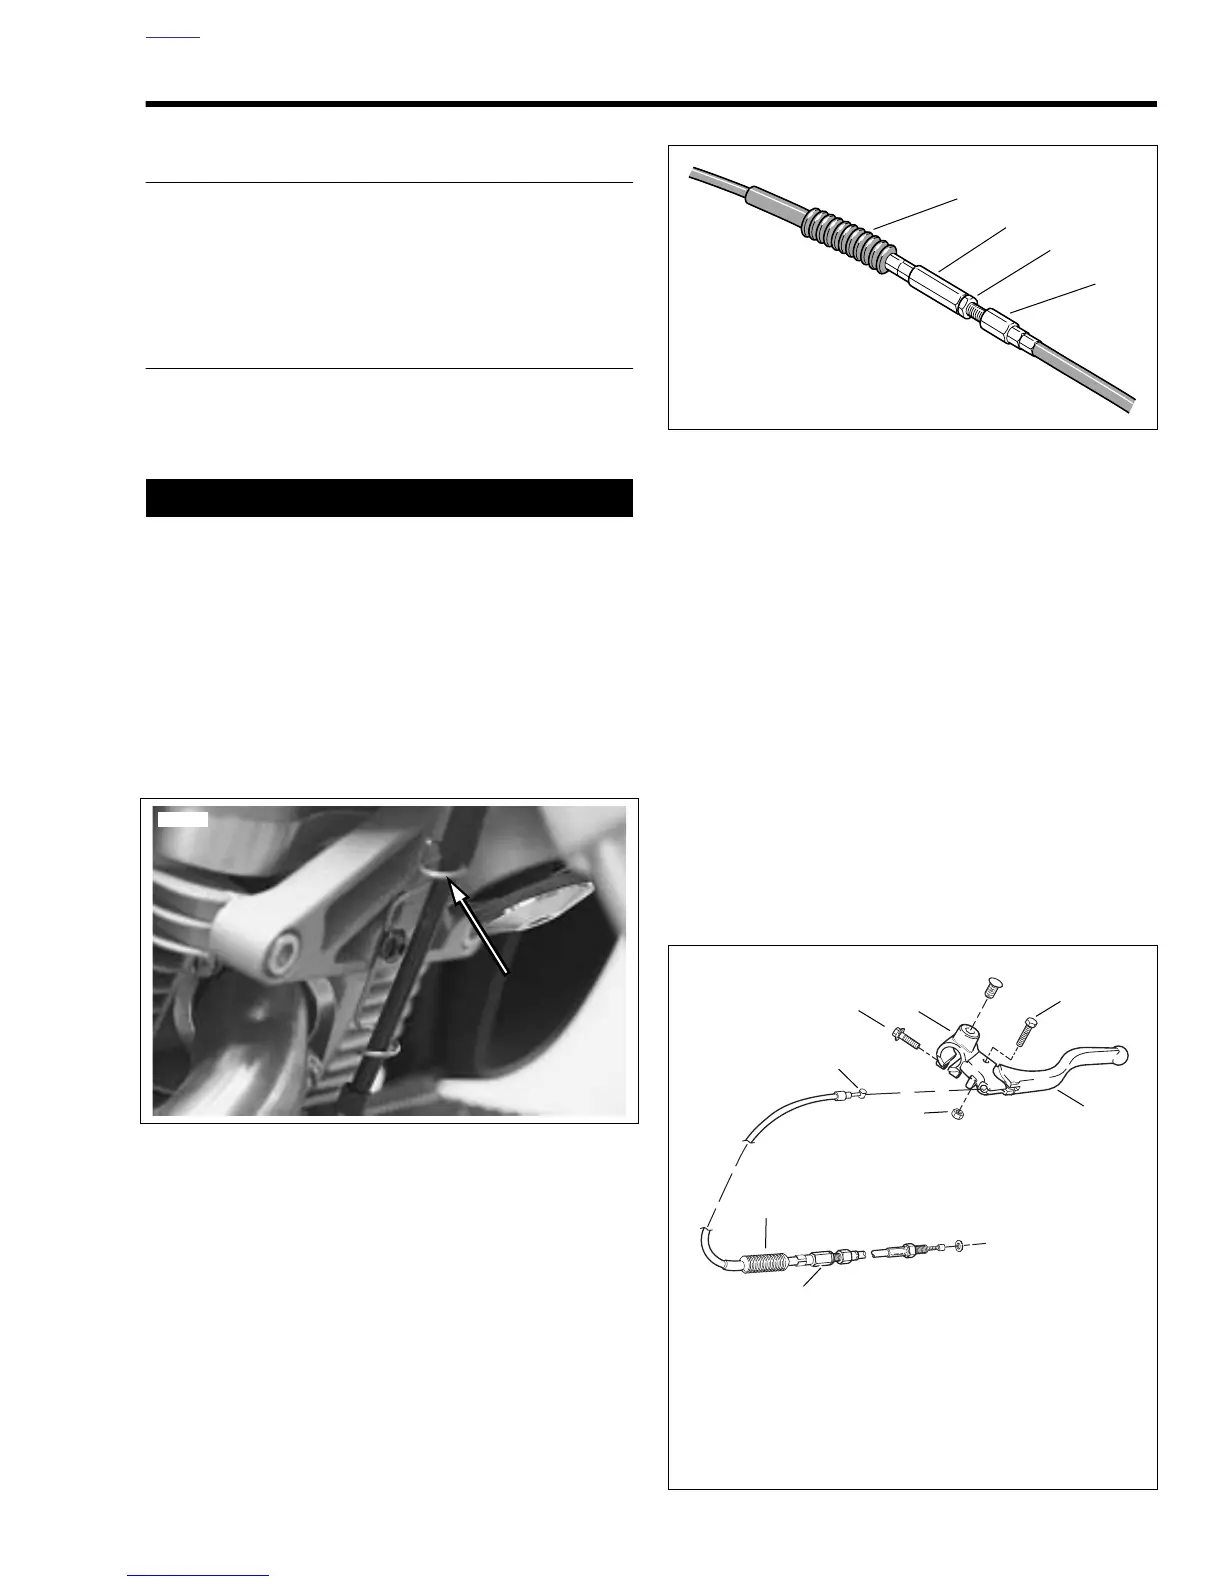
8. See Figure 2-99. Slide clutch cable adjuster boot (1) up
to access clutch adjuster (2).
9. Loosen clutch adjuster (2) to release tension from hand
lever and clutch release mechanism.
10. See Figure 2-100. Remove clutch cable ferrule (7) from
hand lever (4).
NOTE
See D.1 HOSE AND WIRE ROUTING in Appendix D.
11. Pull clutch cable down and out of upper triple clamp.
12. Remove three TORX screws with washers securing
clutch inspection cover.
13. See Figure 2-101. Remove clutch inspection cover (2).
Figure 2-98. Clutch Cable Wire Form
10500
Figure 2-99. Clutch Cable Adjuster Mechanism
Figure 2-100. Clutch Hand Control Assembly
x0055x6x
1. Rubber boot
2. Cable adjuster
3. Jam nut
4. Cable end
1
2
3
4
1. Hand lever clamp pinch fastener
2. Hand lever clamp
3. Hand lever pinch fastener and nut
4. Clutch hand lever
5. Clutch adjuster
6. Clutch cable adjuster boot
7. Clutch cable ferrule
b0939b2x
3
1
7
4
3
5
2
6