7-32 2007 Buell Lightning: Electrical
HOME
VOLTAGE REGULATOR 7.9
GENERAL
The voltage regulator is mounted to the front of the crank-
case. The voltage regulator is not repairable. Replace the unit
if it fails.
REMOVAL
1. Remove seat. See 2.44 SEAT.
1WARNING1WARNING
To prevent accidental vehicle start-up, which could
cause death or serious injury, disconnect negative (-)
battery cable before proceeding. (00048a)
2. Disconnect negative battery cable from battery.
NOTE
When disconnecting the alternator stator wiring, pull apart the
connector by firmly grasping both connector halves. Do not
pull on leads or damage to the wires and/or terminals may
result.
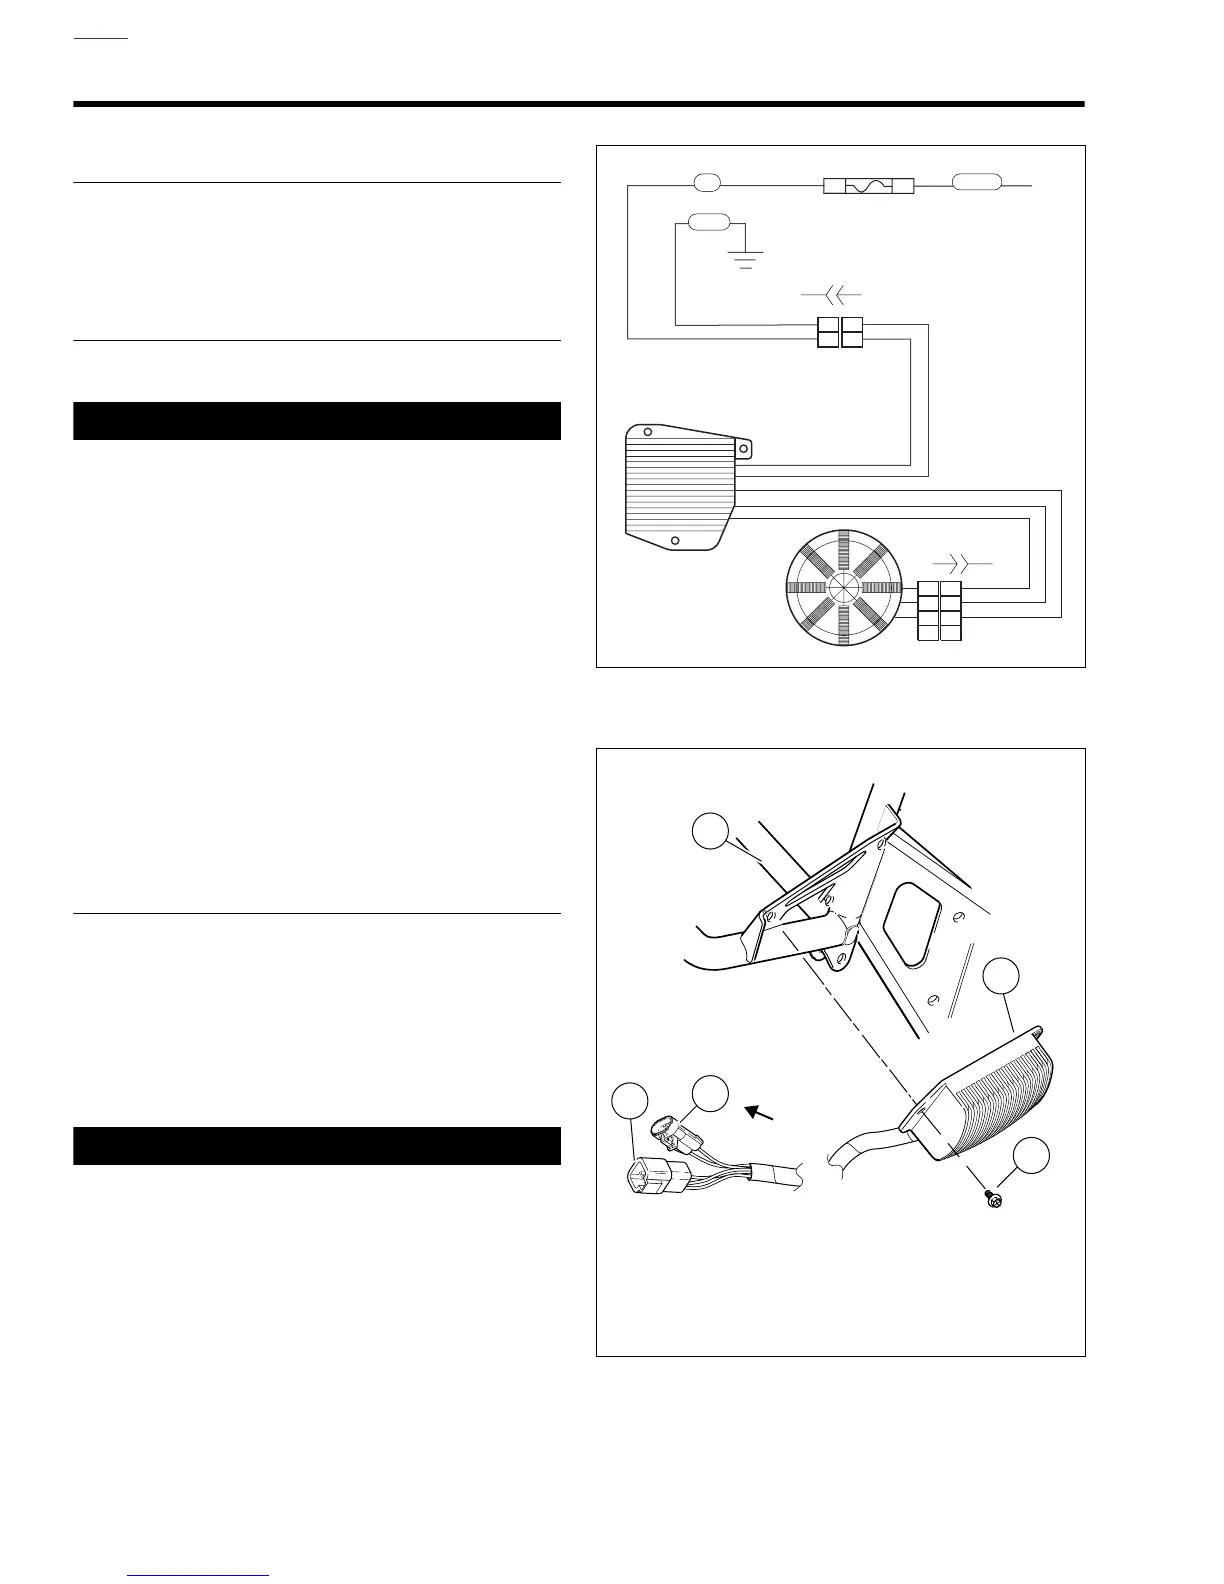
3. See Figure 7-39. Disconnect stator connector [46] (1)
and voltage regulator connector [77] (2) located under
sprocket cover. See 7.26 SPROCKET COVER WIRING.
4. Remove fasteners (5) and voltage regulator (4) from
bracket (3).
INSTALLATION
1. See Figure 7-39. Attach
new
voltage regulator (4) to
bracket (3). Tighten
new
fasteners (5) to 60-72
in-lbs
(6.7-8.1 Nm).
2. Connect stator connector [46] (1) and voltage regulator
connector [77] (2) located under sprocket cover. See
7.26 SPROCKET COVER WIRING.
3. Connect negative battery cable to battery terminal.
1WARNING1WARNING
After installing seat, pull upward on front of seat to be
sure it is in locked position. While riding, a loose seat can
shift causing loss of control, which could result in death
or serious injury. (00070a)
4. Install seat. See 2.44 SEAT.
5. Test charging system. See 7.7 CHARGING SYSTEM.
Figure 7-38. Voltage Regulator Connector [77]
Figure 7-39. Voltage Regulator
22
3
4
3
4
11
22
11
35
41
b1095b7x
Voltage
Regulator
Stator
[46A]
[77A]
R
BK
[46B]
[77B]
R/Y
b1004x7ax
1. Stator connector [46]
2. Voltage regulator connector [77]
3. Voltage regulator mount bracket
4. Voltage regulator
5. Fastener (3)
3
5
4
1
2