7-56 2007 Buell Lightning: Electrical
HOME
INSTRUMENT MODULE 7.19
GENERAL
Replace the instrument module if the unit is not working prop-
erly. However, before replacing a component, check that the
problem is not caused by a loose wire connection.
NOTE
● Replacement bulbs are available for indicator lights,
check engine light and backlights.
● Replace instrument module if low fuel warning indicator
fails.
REMOVAL
1WARNING1WARNING
To prevent accidental vehicle start-up, which could
cause death or serious injury, disconnect negative (-)
battery cable before proceeding. (00048a)
1. Remove seat. See 2.44 SEAT.
2. Disconnect negative battery cable.
3. Remove windscreen. See 2.43 WINDSCREEN.
4. See Figure 7-70. Disconnect instrument module connec-
tor [39].
5. See Figure 7-75. Remove fasteners (5) and washers (4).
6. Pull instrument module (2) from front support module (1).
Bulb Replacement
1. Once the instrument module has been removed from the
vehicle place face down on a work surface.
2. Remove the nine fasteners securing the back of the
module housing to the display and remove back cover.
NOTE
Do not turn display over. Speedometer and tachometer will
fall out possibly causing damage to instruments.
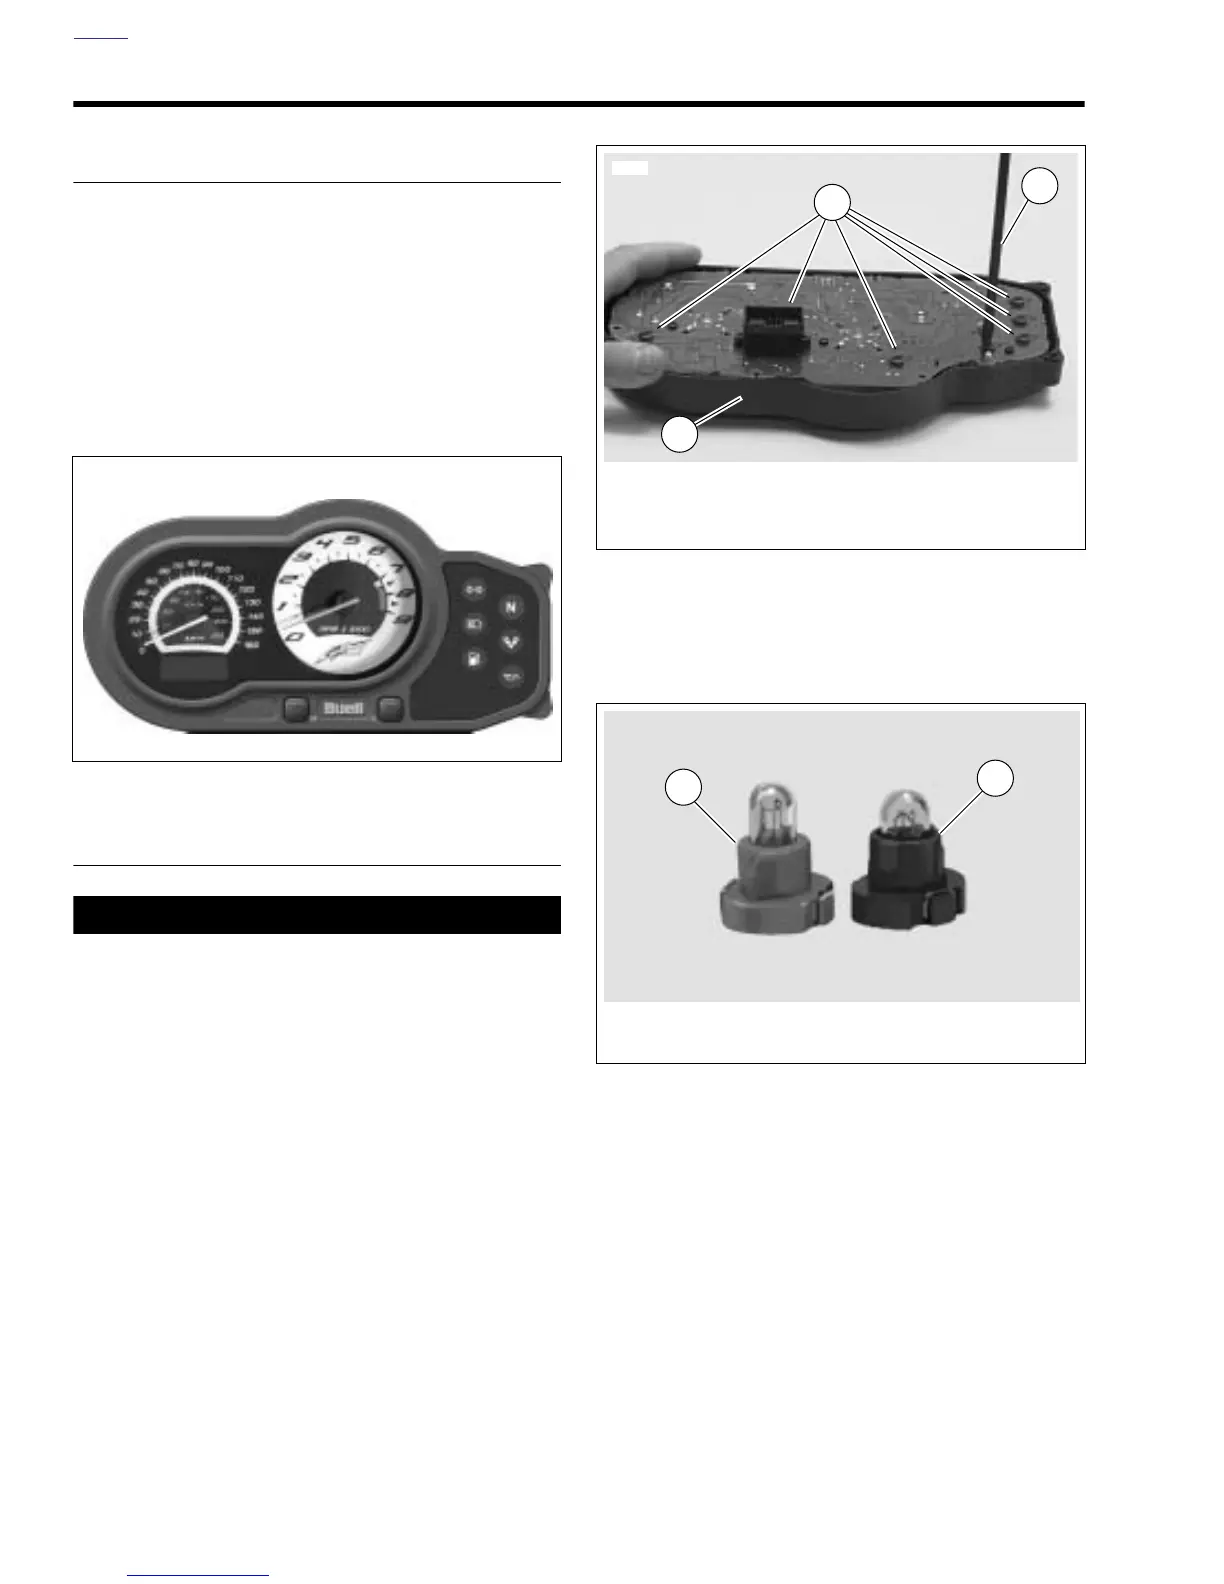
3. See Figure 7-72. Insert screwdriver blade into the slot on
the back of the bulb to be replaced and lightly turn coun-
terclockwise and remove bulb.
NOTE
See Figure 7-73. Bulbs are identified both by color and
length.
4. Select correct replacement bulb and install into back of
instrument cluster.
5. Reinstall back cover and insert and tighten the nine fas-
teners originally removed.
Figure 7-71. Instrument Module
9952
Figure 7-72. Bulb Replacement for Instrument Module
Figure 7-73. Instrument Module Bulbs
1. Instrument module
2. Bulbs
3. Screwdriver
3
3
1
10720
1. Light grey/taller bulb-Y0162.02A8
2. Dark grey/shorter bulb-Y0163.02A8
2
1