2-30
CLEANING, INSPECTION AND
REPAIR
1. Thoroughly clean and inspect all parts. Replace any
parts that are bent, broken or damaged.
2. Inspect the O-rings for damage, wear or general deterio-
ration; replace as necessary. Replace all other removed
seals.
3. See Figure 2-32. Check inner tube (18). Tube surface
should be shiny, smooth and free of scoring or abrasions.
ASSEMBLY
1. Install
new
fork seal retaining ring (14) and spacer ring
(13) on inner tube.
2. See Figure 2-33. Using FRONT FORK BUSHING/SEAL
INSTALLER (Part No. B-41176), install
new
fork oil seal
on inner tube. External spring on fork oil seal faces bot-
tom of fork leg.
3. See Figure 2-32. Install
new
support ring (11).
4. Install upper DU bushing (16) with large end towards the
bottom of the fork leg. Install washer (17) and lower DU
bushing (10). Install red retaining cap (15).
NOTE
Inspect both DU bushings upon assembly. Bushings are
bronze with a Teflon layer. A DU bushing should be replaced
when 20-30% of the Teflon layer has been worn through. In
this circumstance, a visual inspection will show 20-30% of the
bronze base. Also replace bushings if bushing interiors show
any small grooves. Such grooves will damage the outside sur-
face of the inner tubes.
5. Clamp outer tube (9) upside down using FRONT FORK
HOLDING TOOL (Part No. B-41177).
6. See Figure 2-34. Place inner tube assembly inside outer
tube. Using
bushing
side of FRONT FORK BUSHING/
SEAL INSTALLER (Part No. B-41176), drive in DU bush-
ings until fully seated.
7. Reverse FRONT FORK BUSHING/SEAL INSTALLER.
(Part No. B-41176). Seat fork oil seal with
seal
side of
tool. Drop seal retaining ring in place. Fully seat retaining
ring.
8. See Figure 2-32. Clamp fork in a horizontal position.
Install damper assembly (22) using bolt (20) (metric) and
a
new
copper washer (19). Tighten bolt to 18-23 ft-lbs
(24.4-31.2 Nm).
9. Clamp fork upright in the fully compressed stage.
10. Fill fork with oil. See FRONT FORK in Section 1.
11. Install fork spring (8).
12. Pull damper assembly above fork spring. Place steel
washer (7) and preload shim(s) (6) on top of spring.
13. Installing the retaining clips (5) requires two people.
Have one person compress the spring, steel washer and
preload shim(s). At the same time, have the second per-
son install both retaining clips.
14. Install washer (4),
new
O-ring (3) and fork cap (2) (metric).
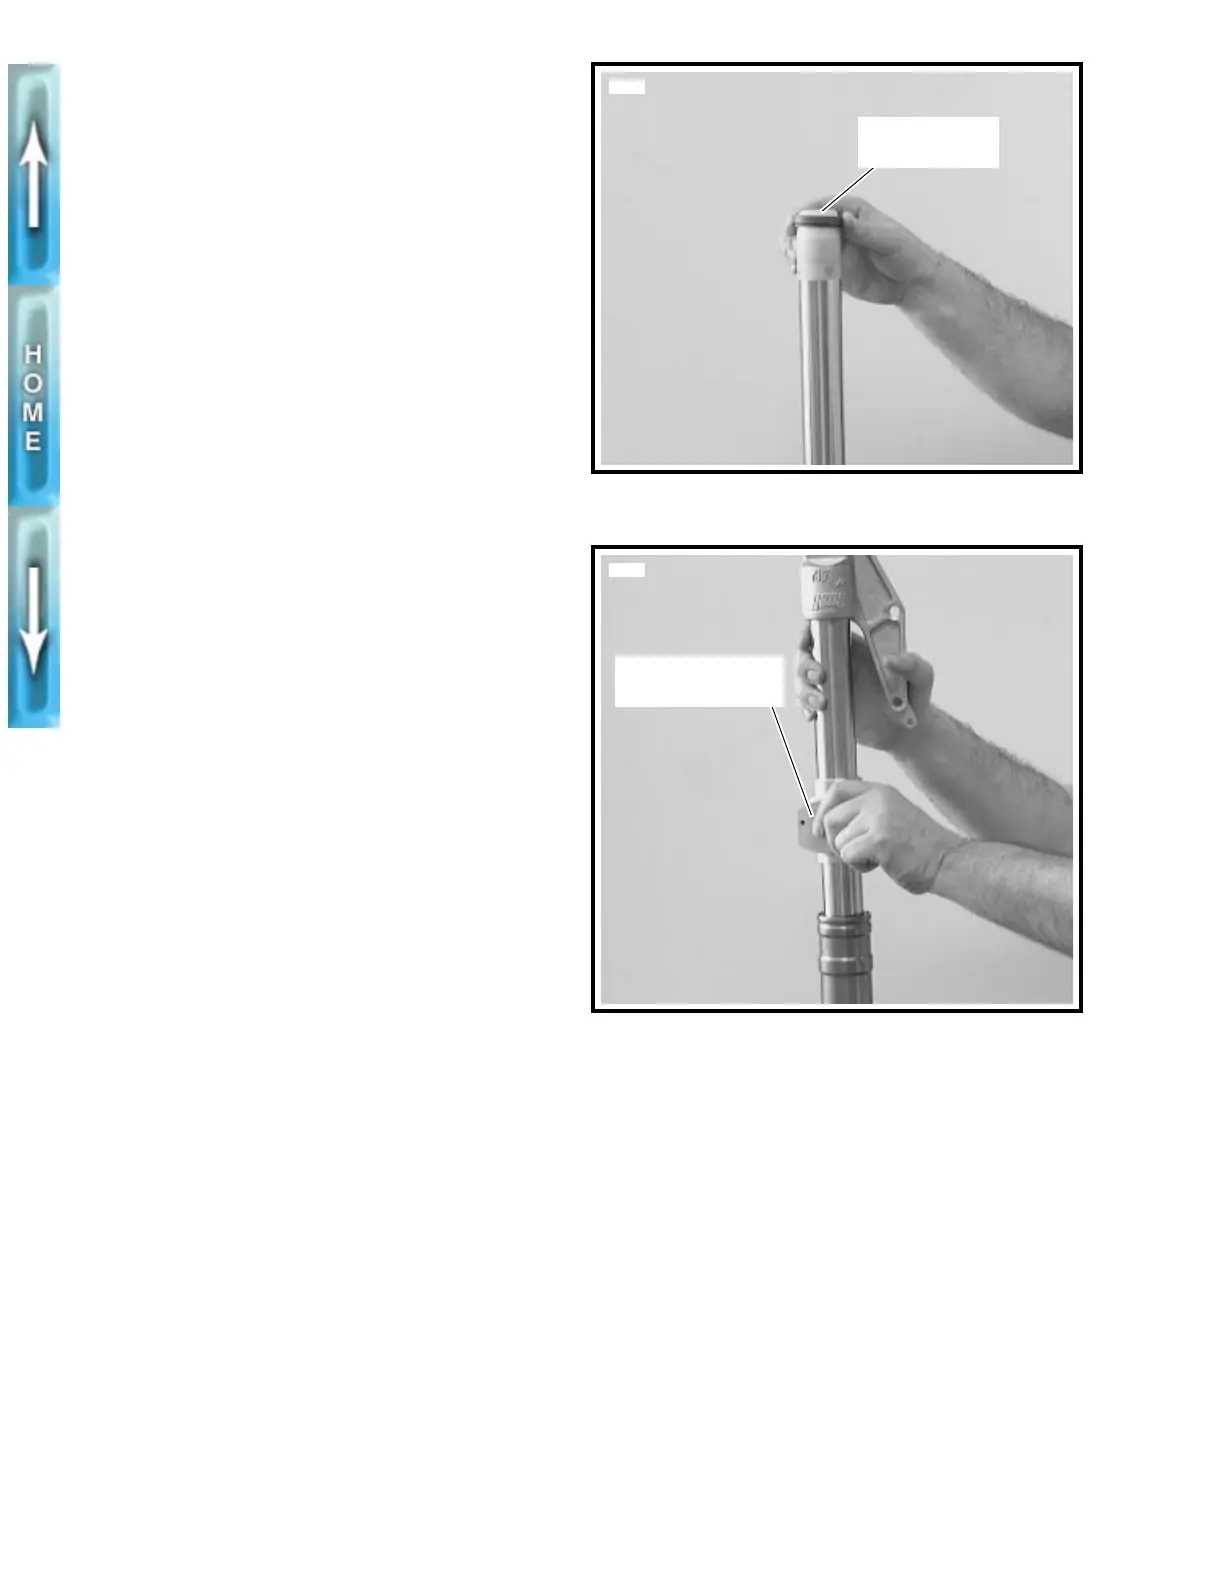
Figure 2-33. Installing New Fork Seal Using Front Fork
Bushing/Seal Installer (Part No. B-41176)
Figure 2-34. Installing Bushings and Seals Using Front
Fork Bushing/Seal Installer (Part No. B-41176)
5760
Slide fork seal
over installer
5759
Use tool to fully
seat DU bushings