23
INSTALLATION
1. Install backplate.
a. Apply HYLOMAR to threads of breather bolts.
b. Install air cleaner support ring and backplate using
breather bolts. Tighten breather bolts to 10-15 ft-lbs
(13.6-20.3 Nm).
c. Attach rear breather hose to rear breather bolt.
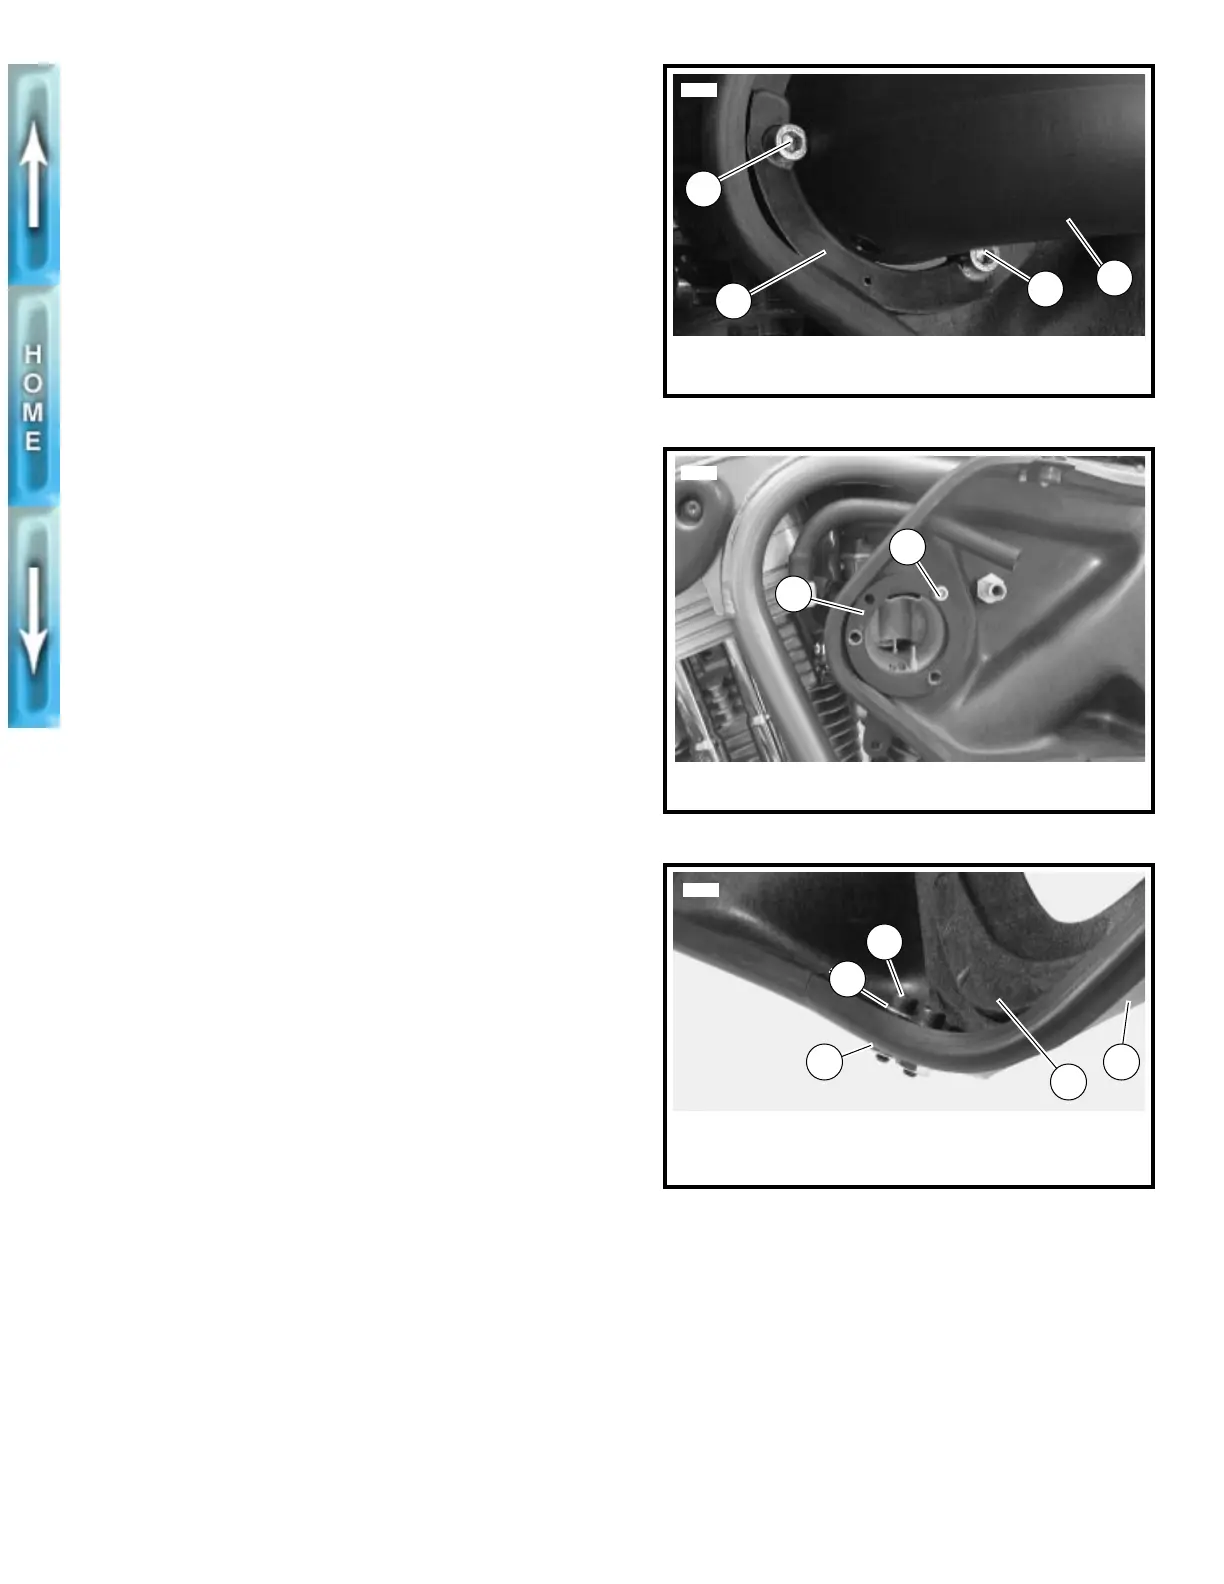
d. See Figure 24. Install two bolts (1), washers (2) and
nuts (3) through backplate into isolator mount.
2. See Figure 21. Install breather hoses.
a. Slide rear breather hose through backplate.
b. Attach front breather hose (5, with attached tee and
snorkel breather hose) to front breather bolt (6).
c. Connect rear breather hose (4) to tee fitting (3).
d. On California models, insert fresh air hose from can-
ister through backplate.
3. See Figure 23. Apply LOCTITE THREADLOCKER 242
(blue) to screw. Install ring with screw through backplate.
Tighten to 7-9 ft-lbs (9.5-12.2 Nm).
4. See Figure 22. Apply LOCTITE THREADLOCKER 242
(blue) to screws. Fasten snorkel tube with ring and two
screws. Tighten to 6-8 ft-lbs (8.1-10.8 Nm).
5. Connect snorkel hose to snorkel tube.
6. See Figure 20. Check air cleaner filter. Place filter inside
filter box. Place cover assembly over backplate.
7. See Figure 19. Install screw and washer into top well nut.
8. Install screw and locknut at rear mount. Tighten to 6-8 ft-
lbs (8.1-10.8 Nm).
Figure 22. Snorkel Ring
Figure 23. Air Cleaner Spacer
Figure 24. Front Isolator Mount Attachment
1. Screw (2)
2. Snorkel plate
3. Snorkel
1
2
1
3
5884
1. Air cleaner spacer with gasket
2. Screw
1
5897
2
5898
1. Bolt (2)
2. Washer (2)
3. Nut (2)
4. Backplate
5. Isolator mount
1
2
3
4
5