2-10
INSTALLATION
1. Apply LOCTITE ANTI-SEIZE LUBRICANT to axle.
2. Position wheel between forks with brake rotor on right
side of vehicle. With pinch screws (metric) loose, insert
threaded end of axle through right side fork. Push axle
through fork and wheel hub until axle begins to emerge
from left side of hub.
1
CAUTION
Speedometer drive tab must be properly inserted or dam-
age to the unit will occur. If drive tab is damaged, it must
be replaced.
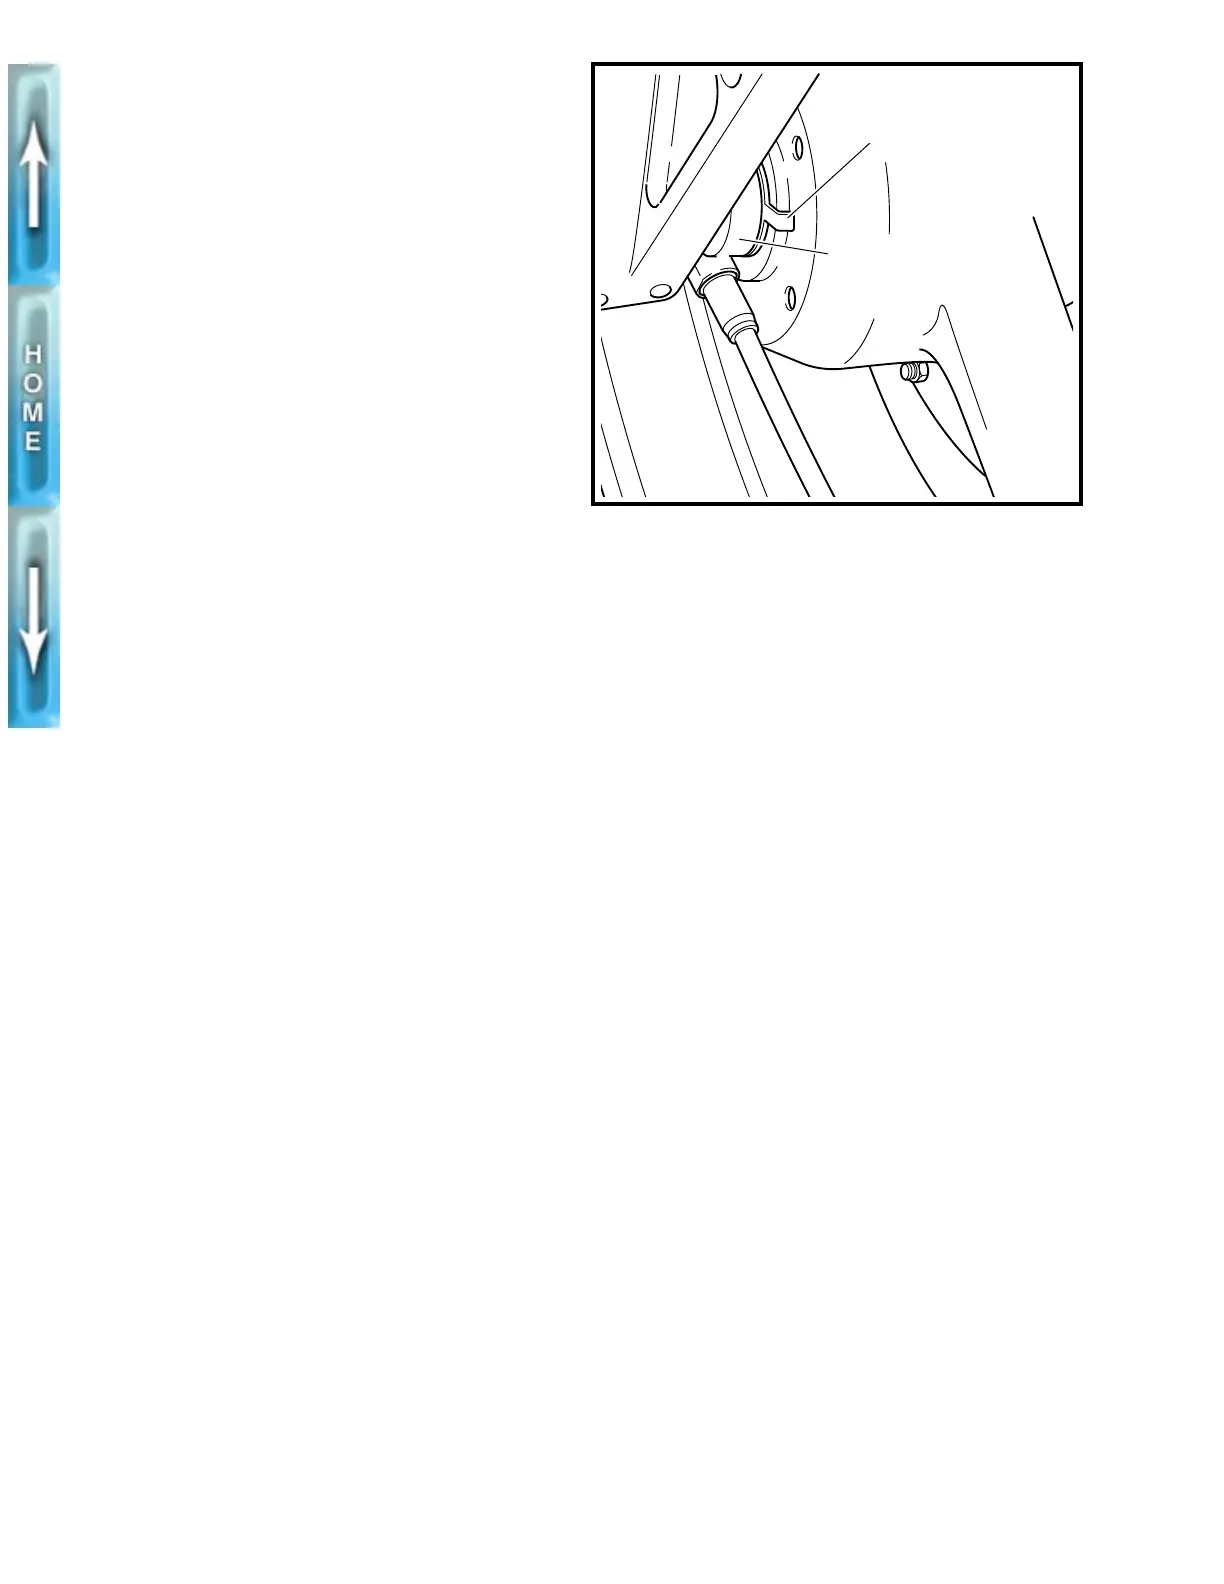
3. See Figure 2-7. Align speedometer drive tab and wheel
hub. Push axle through speedometer drive, speedometer
drive spacer and left fork leg.
4. Compress the front suspension to make sure it is free
and not binding.
5. See Figure 2-6. Apply LOCTITE THREADLOCKER 242
(blue) to axle nut. Install washer (2) and axle nut (1) (met-
ric) over threaded end of axle. Insert screwdriver or steel
rod through hole in axle on right side of vehicle. While
holding axle stationary, tighten axle nut to 48-63 ft-lbs
(65.1-71.9 Nm).
6. See Figure 2-5. Tighten the four front axle pinch screws
(2) (metric) to 13-15 ft-lbs (17.6-20.3 Nm).
7. Install front brake caliper. See FRONT BRAKE CALI-
PER, INSTALLATION on page 2-21.
Figure 2-7. Speedometer Drive
Speedometer
drive tab
Speedometer drive
b0197x2x