EasyManuals Logo

Casio QT-6000 Service Manual

Casio QT-6000
154 pages
To Next Page IconTo Next Page
To Previous Page IconTo Previous Page
Page #14 background imageLoading...
Page #14 background image
— 12 —
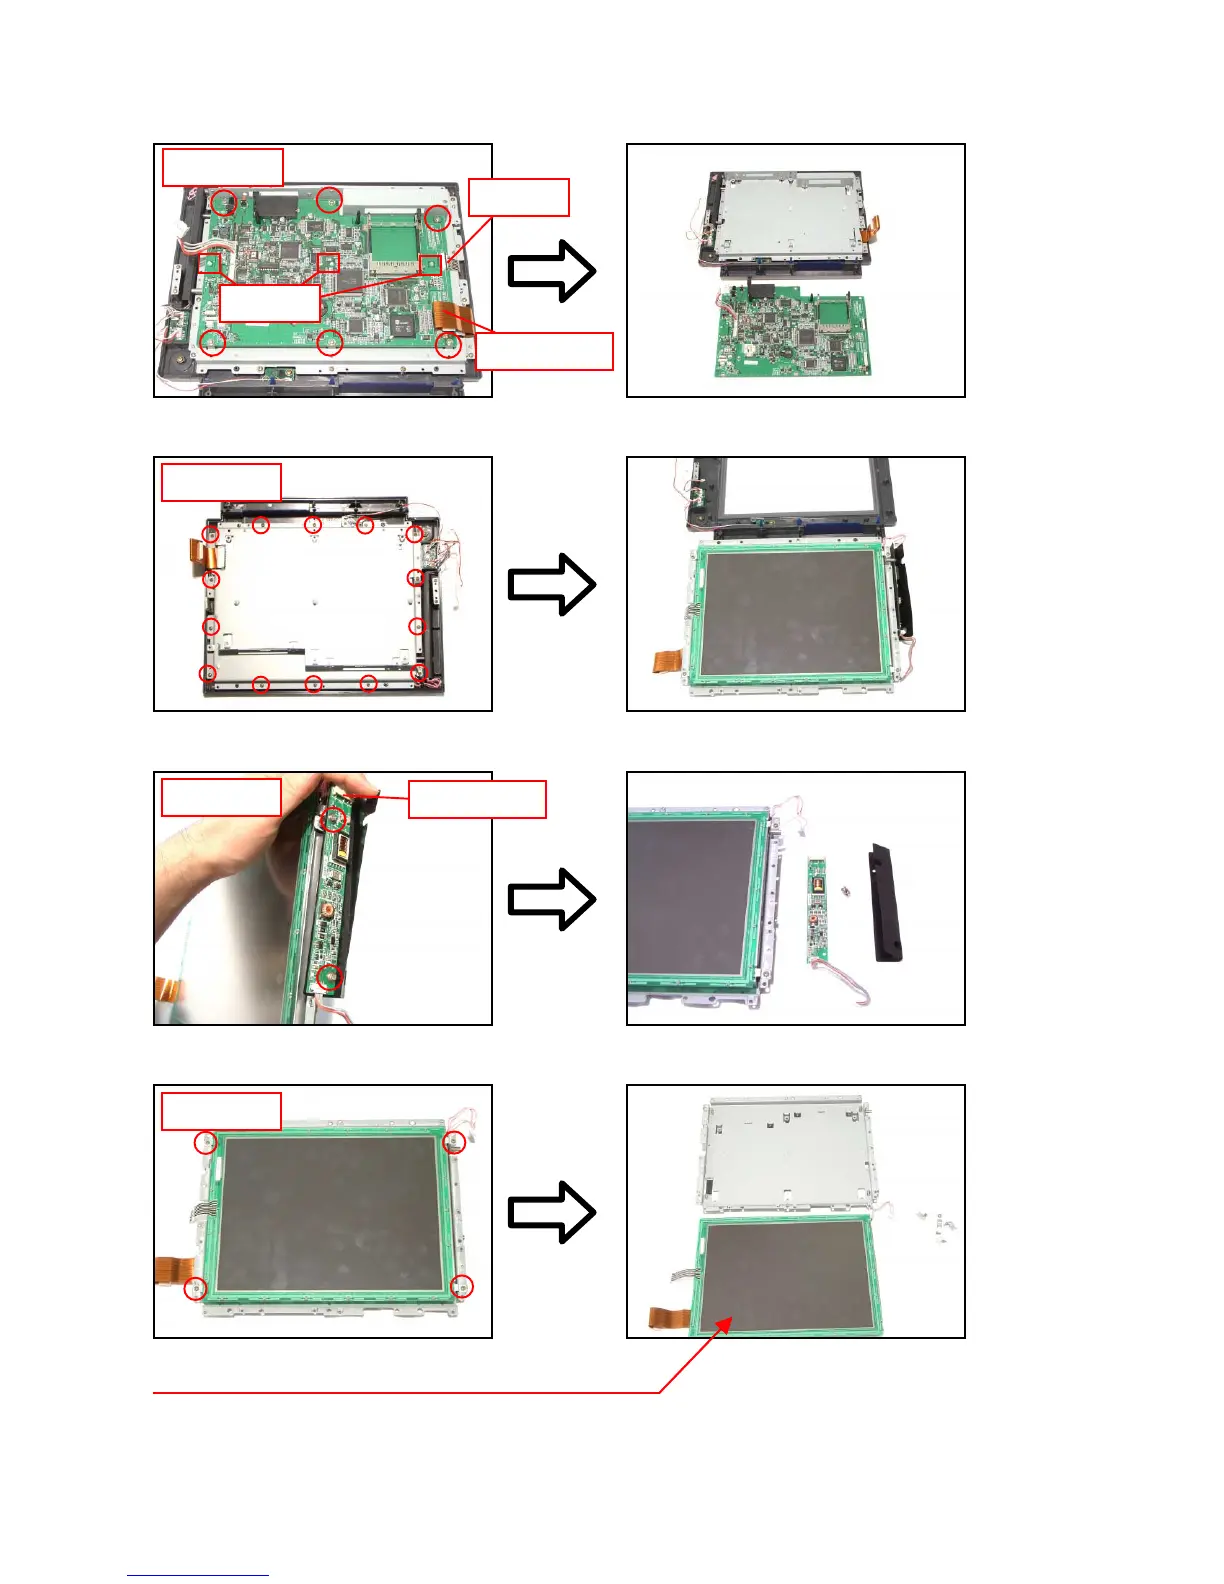
17.Remove six screws, one connector, one FPC, three bosses, and then remove the main PCB.
FPC
Connectors
boss
Screw × 6
18.Remove 14 screws and then the LCD unit.
19.Remove two screws, one connector and the inverter PCB.
20.Remove four screws and the LCD.
Screw × 14
Screw × 2
Connectors
Screw × 4
The touch panel is fixed by double-sided tape.

Table of Contents

Other manuals for Casio QT-6000

Questions and Answers:

Question and Answer IconNeed help?

Do you have a question about the Casio QT-6000 and is the answer not in the manual?

Casio QT-6000 Specifications

General IconGeneral
Types of paymentCash
Second displayYes
Second display typeLED
Power sourceAC
AC input voltage120-240 V
Power consumption1100 mA
Operating temperature (T-T)0 - 40 °C
Operating relative humidity (H-H)20 - 85 %
Weight and Dimensions IconWeight and Dimensions
Depth311 mm
Width343 mm
Height288 mm
Weight5300 g

Related product manuals