EasyManuals Logo

Casio QT-6000 Service Manual

Casio QT-6000
154 pages
To Next Page IconTo Next Page
To Previous Page IconTo Previous Page
Page #24 background imageLoading...
Page #24 background image
— 22 —
To install Type B
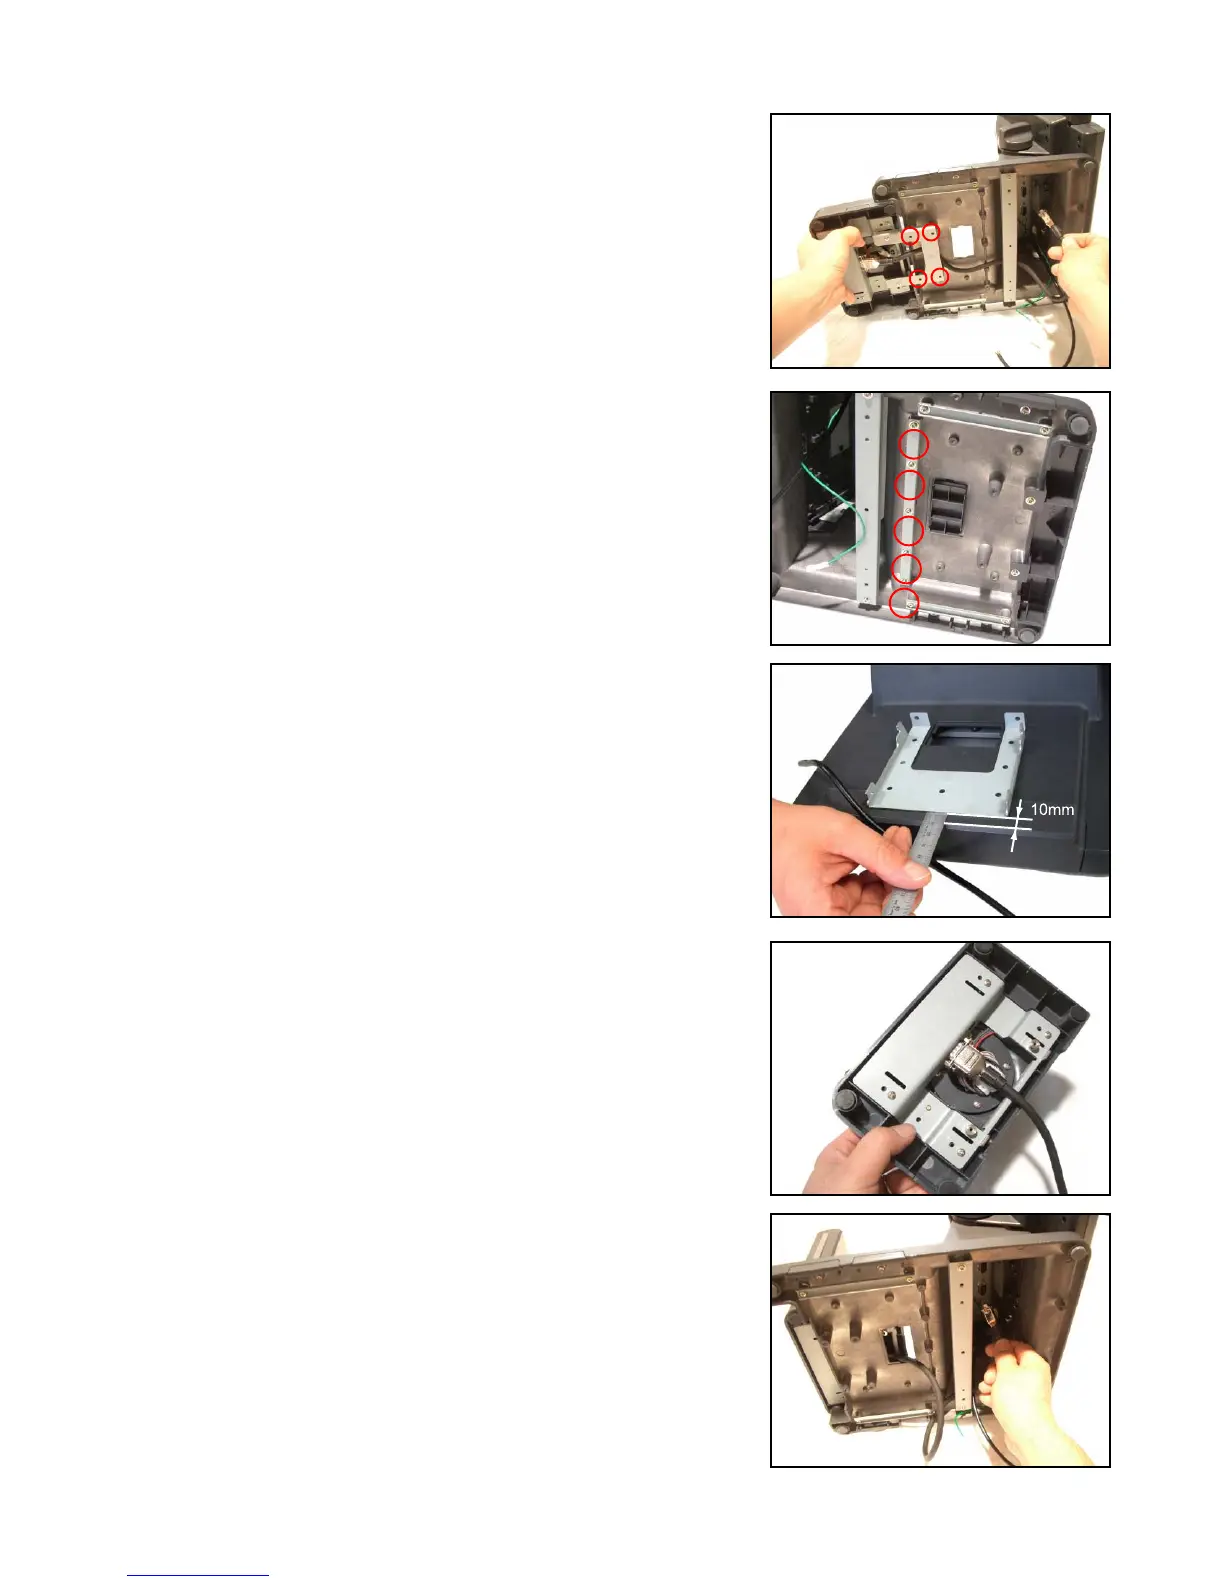
1. Remove five screws at the bottom and then the metal
bracket.
3. Connect the cable to EX-DP-UNIT-16.
2. Fix the metal bracket for type B to the main unit with double-
sided tape.
Position to be fixed: Align the metal bracket in the center of
the main unit and fix it where it is 1.0cm from the edge.
5. Fix EX-DP-UNIT-16 to the main unit with four screws.
6. Connect the cable to the main unit (COM3).
7.
Fix the metal bracket which was removed in the above step 2.
4. Fix the main unit to the metal bracket for type B.
5. Connect the cable to the main unit (COM3).
6.
Fix the metal bracket which was removed in the above step 1.

Table of Contents

Other manuals for Casio QT-6000

Questions and Answers:

Question and Answer IconNeed help?

Do you have a question about the Casio QT-6000 and is the answer not in the manual?

Casio QT-6000 Specifications

General IconGeneral
Types of paymentCash
Second displayYes
Second display typeLED
Power sourceAC
AC input voltage120-240 V
Power consumption1100 mA
Operating temperature (T-T)0 - 40 °C
Operating relative humidity (H-H)20 - 85 %
Weight and Dimensions IconWeight and Dimensions
Depth311 mm
Width343 mm
Height288 mm
Weight5300 g

Related product manuals