EasyManuals Logo
Home>Casio>Touch terminals>QT-6000

Casio QT-6000 Service Manual

Casio QT-6000
154 pages
To Next Page IconTo Next Page
To Previous Page IconTo Previous Page
Page #26 background imageLoading...
Page #26 background image
— 24 —
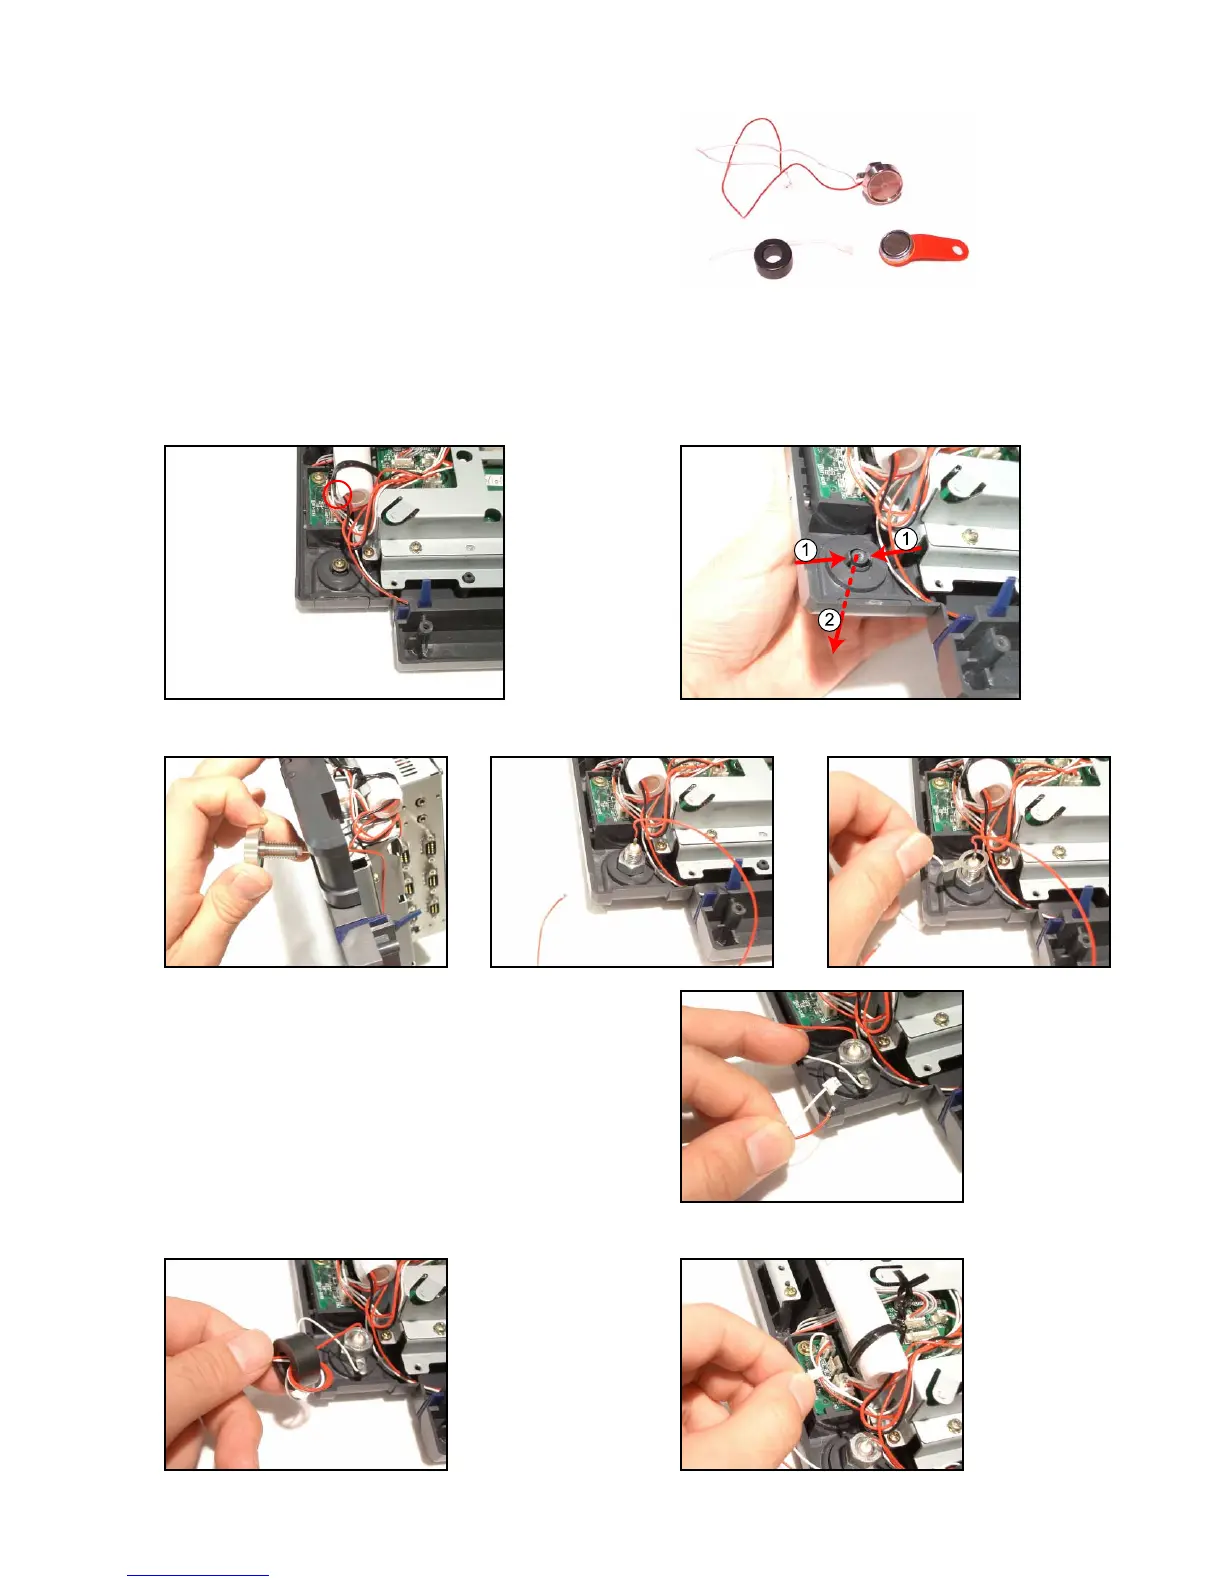
3. Insert the I-Button. R Fix it with a nut. R Insert the earth plate. R Fix it with a nut.
4. Assemble the lead wire (earth) into the connector.
5. Wind the lead wire around the core twice, and then connect the core to the connector of the main unit.
5-2. To install the I-Button
1. Remove the REAR COVER for QT-6000 (No.1 to No.10 in the disassembly procedure).
2. Remove one screw and then the I-Button cover.

Table of Contents

Other manuals for Casio QT-6000

Questions and Answers:

Question and Answer IconNeed help?

Do you have a question about the Casio QT-6000 and is the answer not in the manual?

Casio QT-6000 Specifications

General IconGeneral
Types of paymentCash
Second displayYes
Second display typeLED
Power sourceAC
AC input voltage120-240 V
Power consumption1100 mA
Operating temperature (T-T)0 - 40 °C
Operating relative humidity (H-H)20 - 85 %
Weight and Dimensions IconWeight and Dimensions
Depth311 mm
Width343 mm
Height288 mm
Weight5300 g

Related product manuals