ASXPRESS PLUS Rapid Sample Introduction System Operator’s Manual
Chapter 11: Maintaining the ASXpress Plus Rapid Sample Introduction System
122
8 In the Xpress Config software, select the “Load” button then the “Inject” button.
Do this twice. This will tell the electronics that the valve needs to be re-homed.
9 Plug the valve/pump module cable back into the electronics module.
10 In the Xpress Config software, select the “Load” button then the “Inject” button.
Now you are ready to reinstall the valve:
11 Insert the new valve, or reinsert the existing valve, at the desired angle. Rotate
it so that the nebulizer port will be as close as possible to the nebulizer.
12 Press down on the valve so that it is completely seated.
13 Inspect the valve to verify that there is no gap between the valve and the collar
on the valve/pump module.
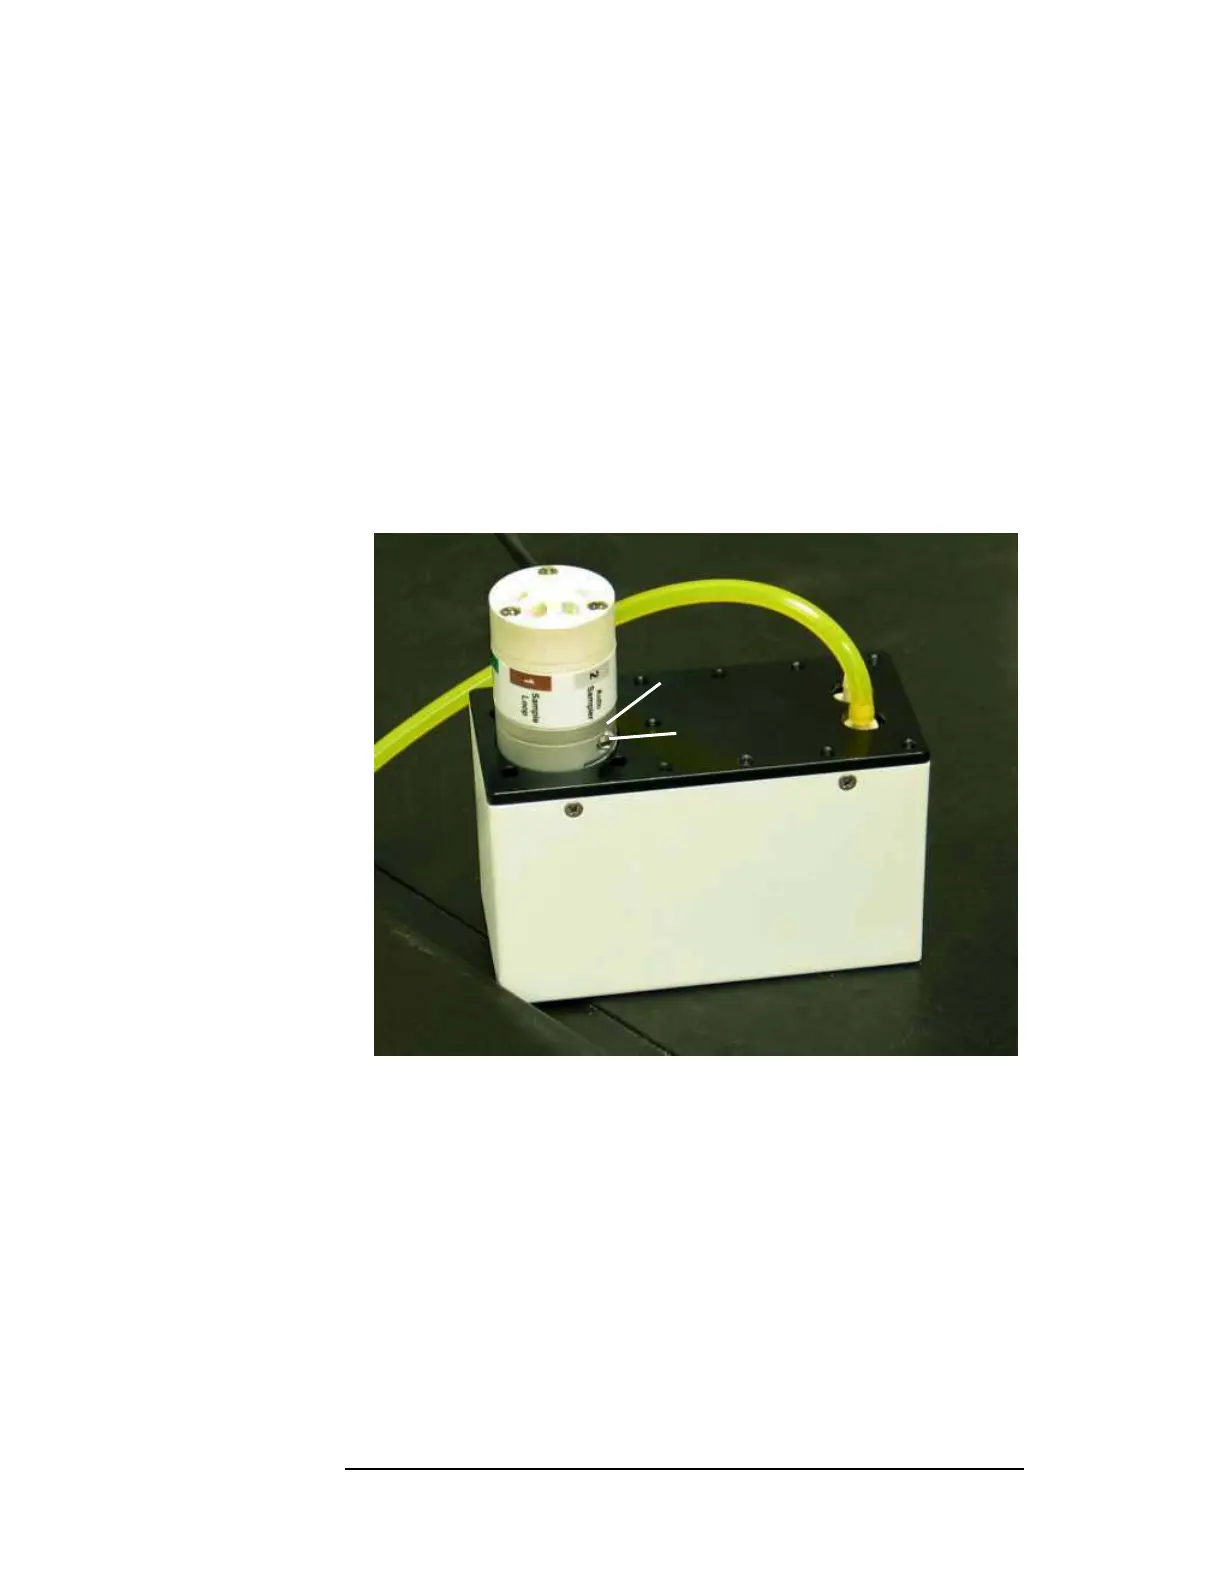
Figure 11-6 Reseating the 6-Port Valve
14 Power down the ASXPRESS PLUS electronics module, unplug any USB cables from
the electronics module, and wait a few seconds.
15 Power up the electronics module and plug in the USB cables.
16 Start the Xpress Configuration Tool and make sure it is communicating with
the electronics module.
17 Expand the GUI using the arrow button on the right side of the window.
18 Repeatedly cycle the actuator via the software “Load” and “Inject” buttons.
Keep toggling until an error window opens. At this time the valve has lost its
home position.
No gap
Hex screw