Spectrum Setup Operations
Mode l8500C/8500C+ Operators Manual
7-3
If
STOP
is pressed while the 8500C/C+ is in multiple mode, data acquisition is terminated and the last
whole data set displayed. The spectral plot cursor is added, and th
MULTIPLE
label at the top o
screen replaced with the current cursor position in vibration amplitude (in IPS) and frequency (in RPM
or Hertz). The display is essentially the same as if a single mode spectral data acquisition had been
allowed to run to completion (see the next Section 7.4 “Data Analysis”).
7.2.3 Storing Spectral Data
The current spectral data set may be saved and stored in 8500C/C+ memory or as a data file on disk.
First, press the
STATUS
key to be sure that th
Write To
field is set to the desired target device,
either
MEMORY
or
DISK
. If the field is set to
MEMORY,
subsequent store operations write data to
memory. To change the field, press
SETUP
, use the Arrow keys to highlight the field, and press th
<CHANGE>
soft key, followed by
ENTER
. If
DISK
has been selected, insert a formatted, writable
3.5-in. double-sided, double-density disk in the 8500C/C+ disk drive. In either case, press
STORE
to
write the data. If the data is written to disk it is given a unique file name based on the current date and
time, plus the extension *.SPC. See Sectio n10.2.2 “Storing Data to Disk or Memory” on pa ge10-4 for
more information on storing spectral data and A ppendixB Spectral Data File Format” for a
description of the spectral data file format.
It is strongly recommended that 8500C/C+ distribution chart disks
not
be used to store spectral data
files. Instead, use a backup copy of the chart disk and store the original chart disk in a safe place.
Instructions for making a backup disk are located in Sect ion10.2.4 Copying Balance Charts” on
page 10-6.
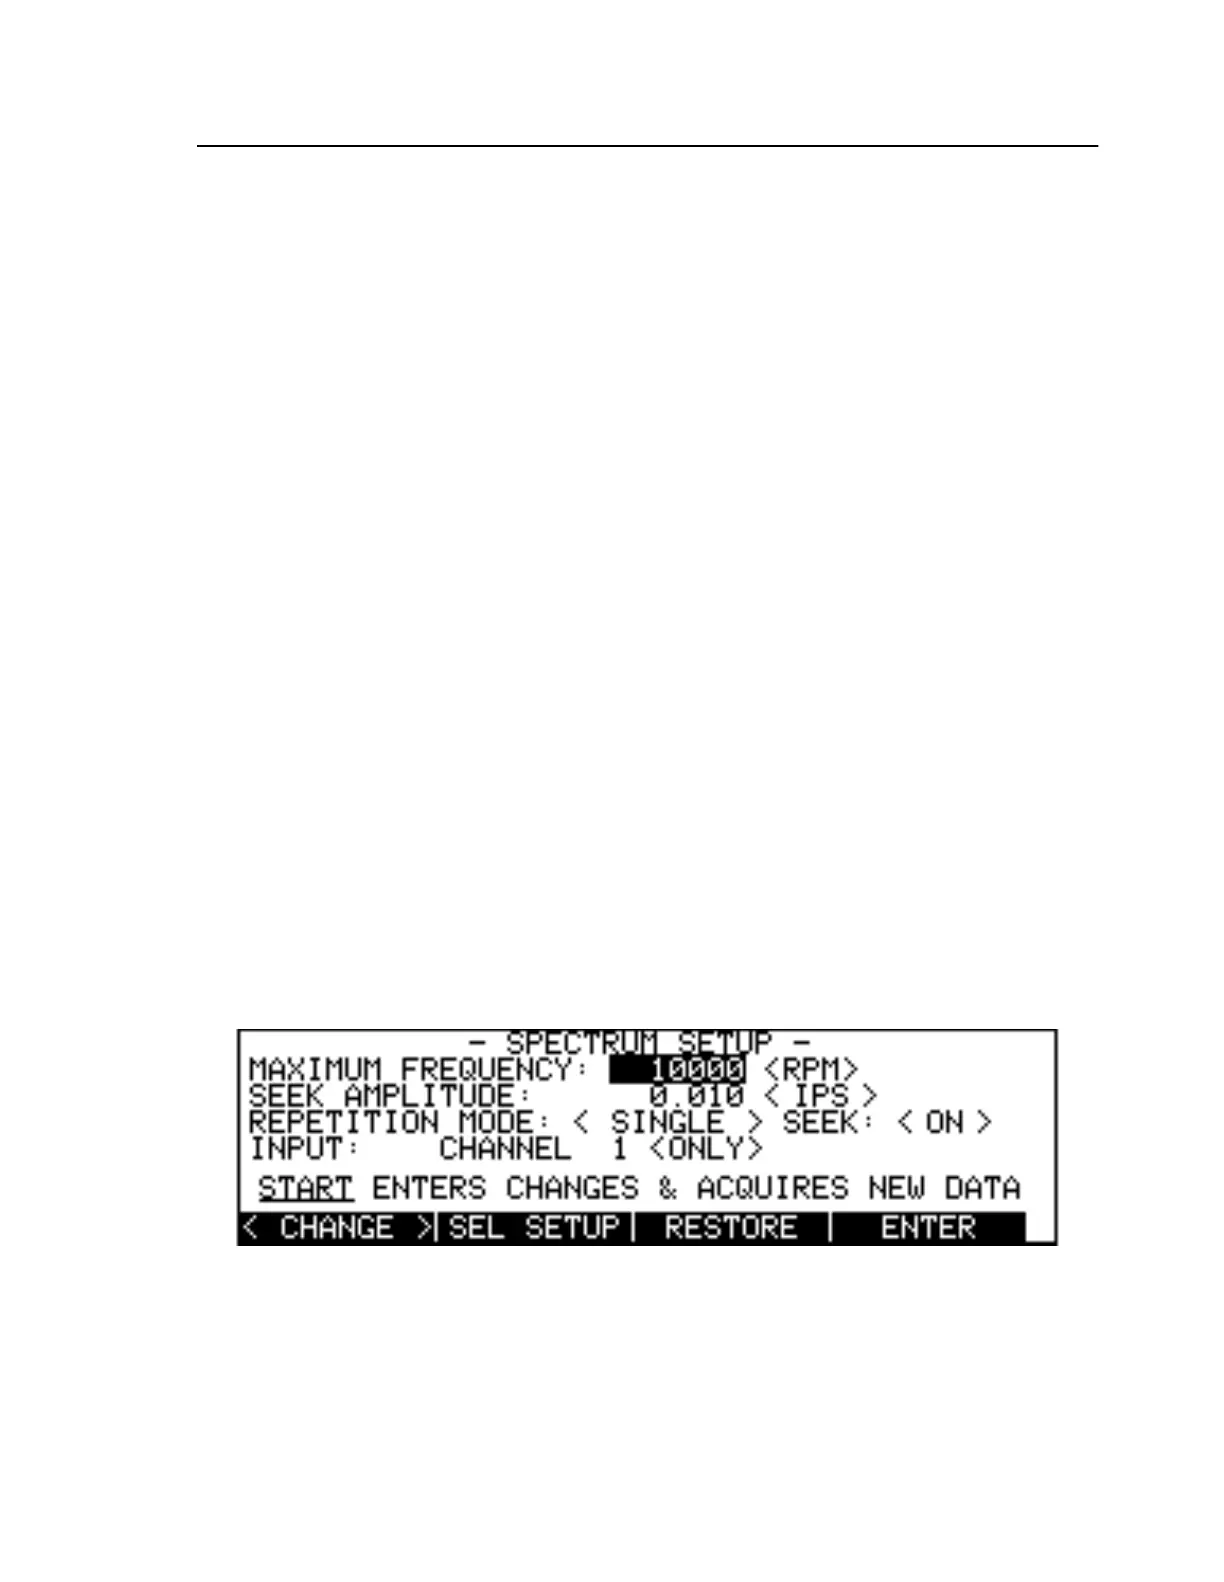
7.3 Spectrum Setup Operations
The 8500C/C+ supports the modification of several important parameters that are used to control the
acquisition and analysis of spectral data. These parameters may be accessed by pressing
SETUP
,
which in turn displays the Spectrum Setup screen (Figu re7-3). See the description of the
SETUP
key
in Secti on4.2.3.4 SETUP Key” on pa ge4-7 for more information on Setup screens.
Figure 7-3. Spectrum Setup Screen
Use the Arrow keys to select the field whose contents are to be modified, and use the
<CHANGE>
soft
key or the numeric keypad to effect the desired changes. The
ENTER
soft key saves the changes and
resumes operation in Spectrum mode. Th
RESTORE
soft key restores to all fields the values that were
set by the most recent
ENTER
.