Maintenance 5-211
Installing and Configuring Processor Modules
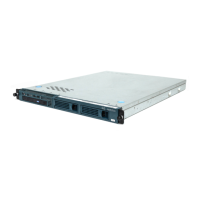
Follow these steps to remove and replace the FSIP:
Step 1 Disconnect all network interface cables attached to the FSIP ports.
Step 2 Put on a grounding strap and attach the equipment end to one of the captive installation
screws on the rear of the chassis.
Step 3 Use a screwdriver to loosen the two captive installation screws on the FSIP.
Step 4 Place your thumbs on the upper and lower ejector levers and simultaneously push the top
lever up and the bottom lever down to release the FSIP from the backplane connector.
Step 5 Grasp the FSIP handle with one hand and place your other hand under the carrier to support
and guide the FSIP out of the slot. Avoid touching the board.
Step 6 Carefully pull the FSIP straight out of the slot, keeping your other hand under the carrier to
guide it. (See Figure 5-2.) Keep the FSIP at a 90-degree orientation to the backplane.
Step 7 Place the removed FSIP on an antistatic mat or antistatic foam and proceed to the following
section, “Removing Port Adapters.”
Removing Port Adapters
Port adapters are installed on each FSIP at the factory. You must remove an existing port adapter in
order to replace or install a new one. Each port adapter is anchored to the FSIP with two double-row
vertical board-to-board (BTB) connectors and two Phillips-head screws that extend down into the
standoffs. (See Figure 5-18.) The port adapter is also anchored to the carrier faceplate with four
jackscrews with lock washers (two per port).
Caution The surface-mounted components on the port adapters are extremely susceptible to ESD
damage. Keep each port adapter in a separate antistatic bag until you are ready to install it. Always
wear a ground strap and handle boards as little as possible. When you must handle the board, limit
contact to the board edges only, avoiding contact between the board and clothing.
To remove a port adapter from the FSIP perform the following steps:
Step 1 Ensure that the FSIP is resting on an antistatic mat or on antistatic foam. You should still
be wearing an ESD-prevention ground strap.
Step 2 Position the FSIP so that it is in the same orientation as that shown in Figure 5-18.
Step 3 Locate the port adapter to be replaced. Use a 3/16-inch nut driver to loosen the four
jackscrews, one on either side of both serial connector ports.
Step 4 Remove the jackscrews and washers and put them aside. You may need them to install the
new port adapter.
Step 5 Use a Phillips screwdriver to loosen and remove the two standoff screws. (See Figure 5-18.)
You will need the standoff screws to install the new port adapter.
Step 6 While avoiding contact with any traces or components on the board, insert your thumb and
forefinger into the finger holes on the sides of the port adapter and gently lift it upward to
dislodge the BTB connectors. If the port adapter resists, rock it very slightly from side to
side until it pulls free of the FSIP connector.

 Loading...