User Manual: WaveLinx Lite (4.0)
133
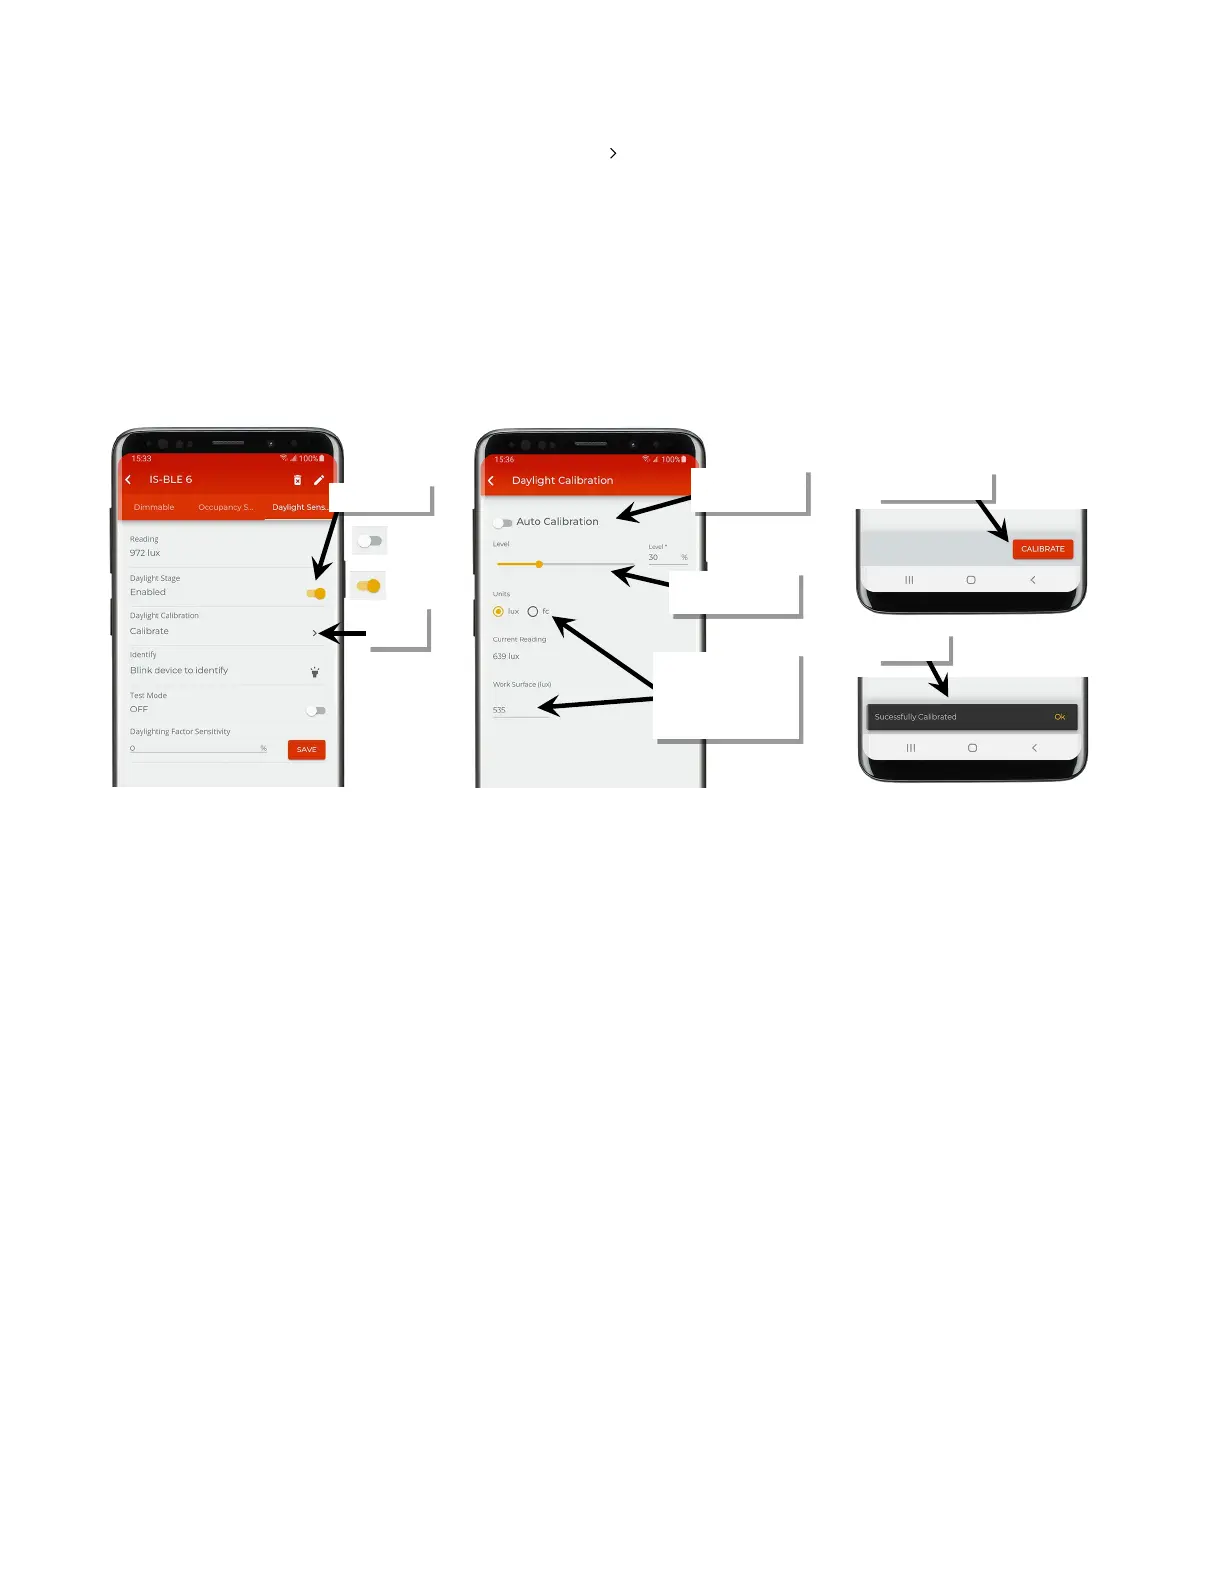
4: Make certain that the ‘Daylight Stage’ is set to enabled and then tap ‘ ’ next to ‘Daylight Calibration’.
5: In the calibration screen, first make sure that ‘Auto Calibration’ is turned off and then use the screen controls to adjust the light level:
• For outdoor applications calibrated at night: Set all closed loop sets to 100% light level.
• For indoor applications: Use the light level adjustment controls to adjust each fixture to the desired light level.
Lighting should respond and assume the defined light level.
6: Optionally, enter the surface light reading using a light meter for reference. This allows current reading fields to approximate more closely
what the light level is at the desired surface. This will have no effect on the calibrated level other than for reviewing or displaying the current
reading. If entering the reading, select either lux or foot-candles to match what was used on the light meter.
7: Tap the calibrate button. A message will briefly be shown at the bottom of the display to indicate a successful transmission indicating that
the current light level of the sensor will then be stored as the target light level. Tap the back button to exit the screen.
Calibration’
calibrate
surface light level reading,
entering the units used
and the value on the on
the light meter
the desired level