User Manual: WaveLinx Lite (4.0)
94
It is possible to view the individual sensors assigned to the occupancy sensor set. Fixture mount, integrated and tilemount sensors are
automatically assigned to the occupancy set when the device is provisioned and added to a zone that has already been assigned to an
occupancy set. Fixture mount, integrated and tilemount sensors cannot be assigned to an occupancy set that is different from the fixture’s
assigned zone.
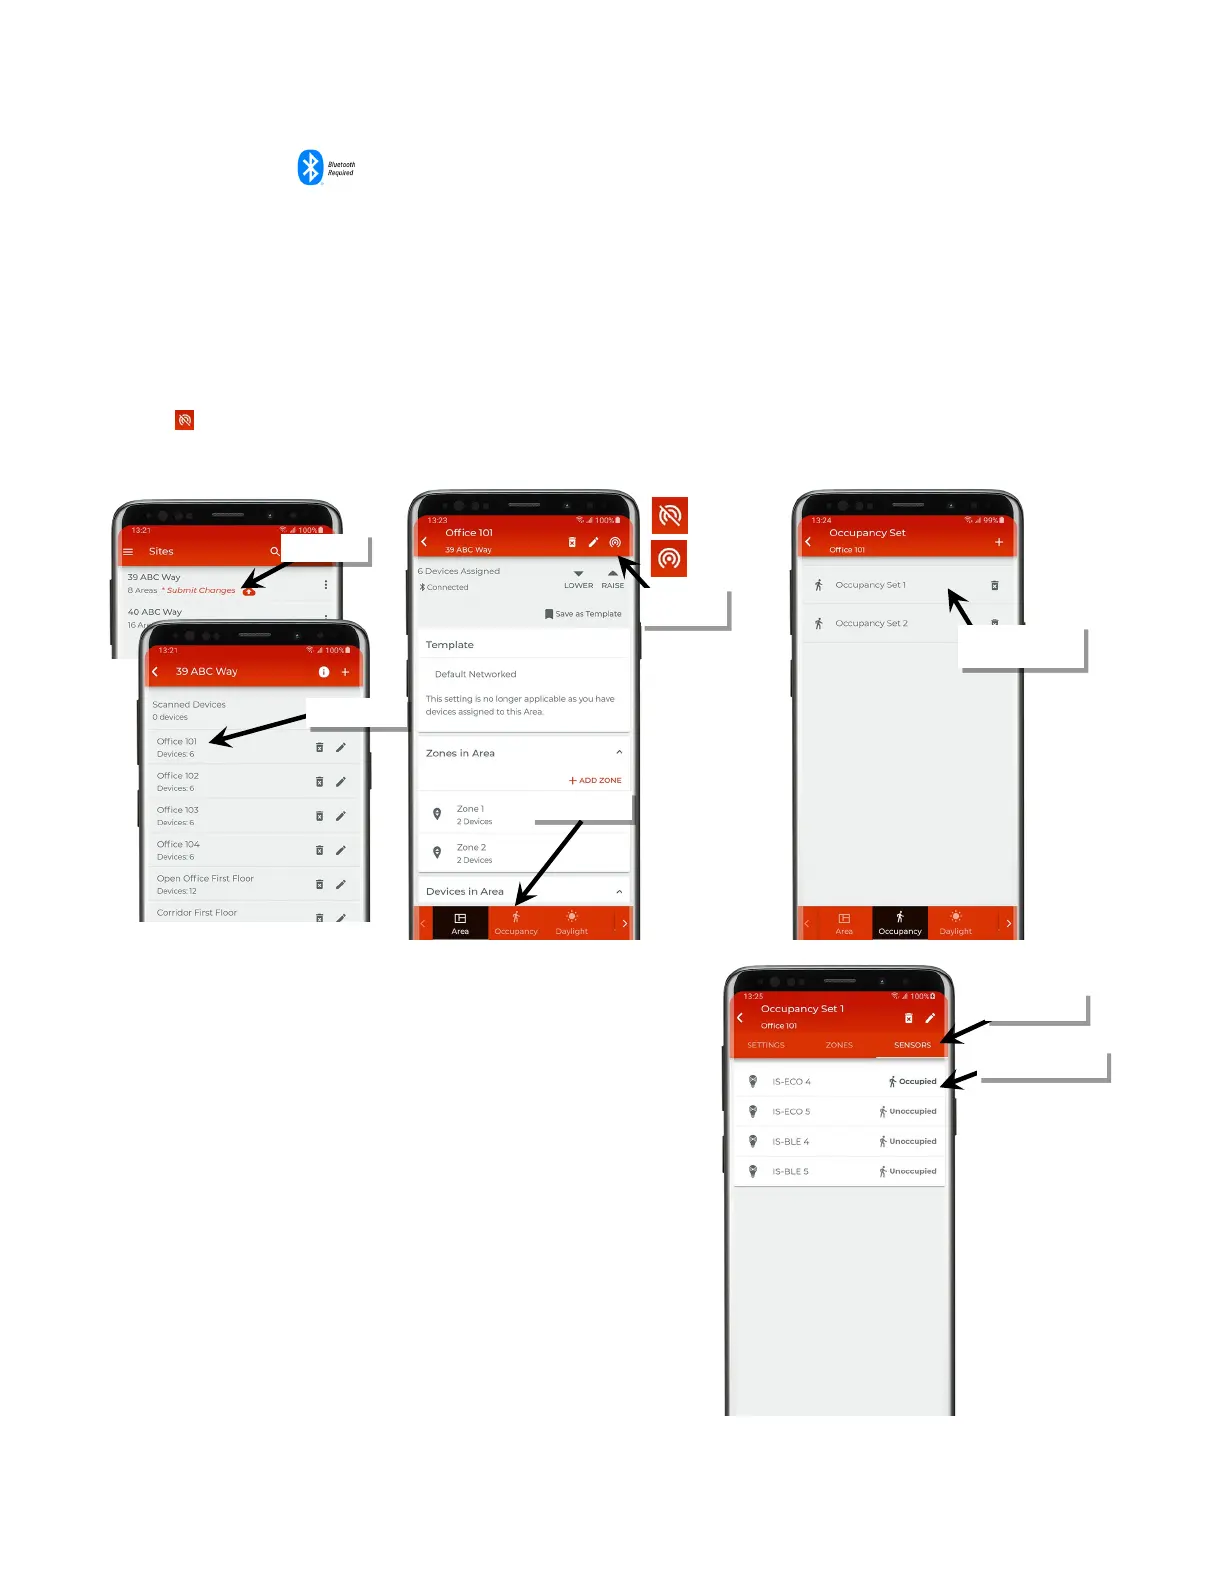
To review the individual sensors in the occupancy set:
1: Bring the mobile device within range (within 60 feet) of any line voltage powered provisioned WaveLinx Lite device in the desired area.
2: Ensure that the mobile device Bluetooth is turned on, and then open the WaveLinx Lite Mobile Application.
3: In the site list, select a site.
4: In the area list, select the desired area. After a short delay, verify that the area shows that the mobile application is connected to the network.
Tap on the icon if it is necessary to refresh the connection.
5: Tap on ‘Occupancy’ and then tap on the desired occupancy set to open it.
: Next, tap ‘Sensors’ to display the list of assigned sensors. Devices will be listed,
showing the device name and the status of the occupancy sensor.
Note: Status reflected does not include the hold time delay. It reflects the actual motion
activity that was occurring at the time the status page refreshed.
set to review
Verify network
connection