12 Paper and Other Media
238
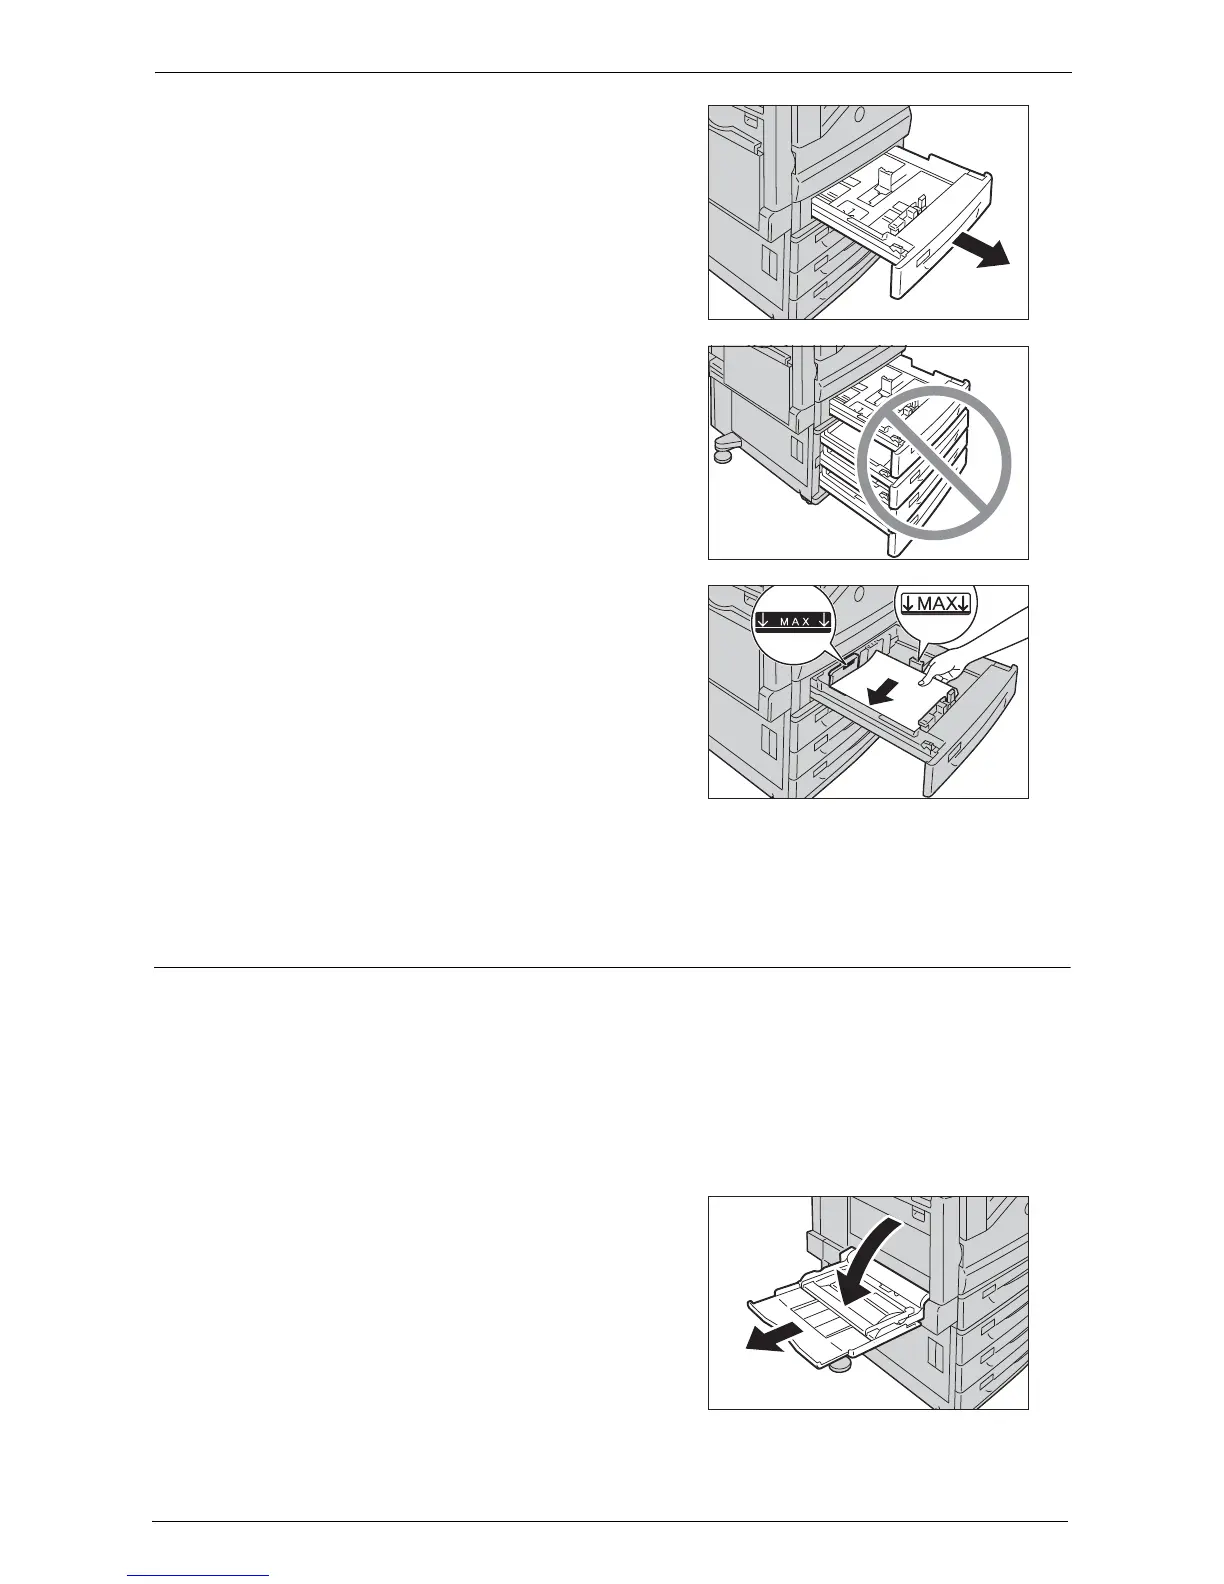
1
Pull out the tray until it stops.
Note • While the machine is processing a job, do not
pull out the tray that is being used for the job.
• To prevent paper jams or erroneous detection
of loaded paper in a tray by the machine, do
not add paper on top of any remaining paper in
the tray. Remove any remaining paper in the
tray, and then load that paper on top of the
newly loaded paper.
• Do not pull out all the trays at the same time.
Otherwise, the machine gets inclined and
turns over, which may cause injuries.
2
Load and align the edge of the paper against
the left edge of the tray, with the side to be
copied or printed on facing up.
Note • Do not load paper above the maximum fill line
("MAX" in the right figure). It may cause paper
jams or machine malfunction.
• Do not place any paper or objects in the empty
space on the right side of Trays 1 to 4. It may
cause paper jams or machine malfunction.
3
Push the tray in gently until it stops.
Note • When inserting the tray, push it gently. Forcibly pushing the tray in may cause machine malfunction.
Loading Paper in Tray 5 (Bypass Tray)
When printing or copying on a size or type of paper that cannot be set in Trays 1 to 4, use
Tray 5 (bypass tray). The following describes the procedures to load paper in Tray 5. To use
Tray 5 when printing, select Tray 5 and specify the paper type on the [Paper/Output] tab of
the print driver.
Note • To prevent paper jams and erroneous detection of paper loaded in the tray by the machine, do not take
out paper of a package until the tray runs out of paper.
• Carefully fan the paper before loading it in a tray. Otherwise, the paper may stick together, resulting in
paper jams, or multiple sheets being fed to the machine simultaneously.
1
Open Tray 5.
Note • If necessary, pull out the extension tray. The
extension tray can be extended in two stages.
Pull out the extension tray gently.