Auto :
Adjust the level while listening to the test tones
produced automatically from each speaker.
Manual :
Select the speaker from which you want to produce
the test tone to adjust the level.
51
¥ĺáļ©ńţŜũũŠŧ¥ōŠűŠŧ
¥
¥¥ŕŠŮů¥ŕŪũŠ¥¥¥¥¥¥«¥¥
¥
¥¥ŕŠŮů¥ŕŪũŠ¥ŔůŜŭů
¥
¥¥ōŠűŠŧ¥ńŧŠŜŭ
¥
¥
¥
;G U
;G U
#WVQ
/CPWCN
3
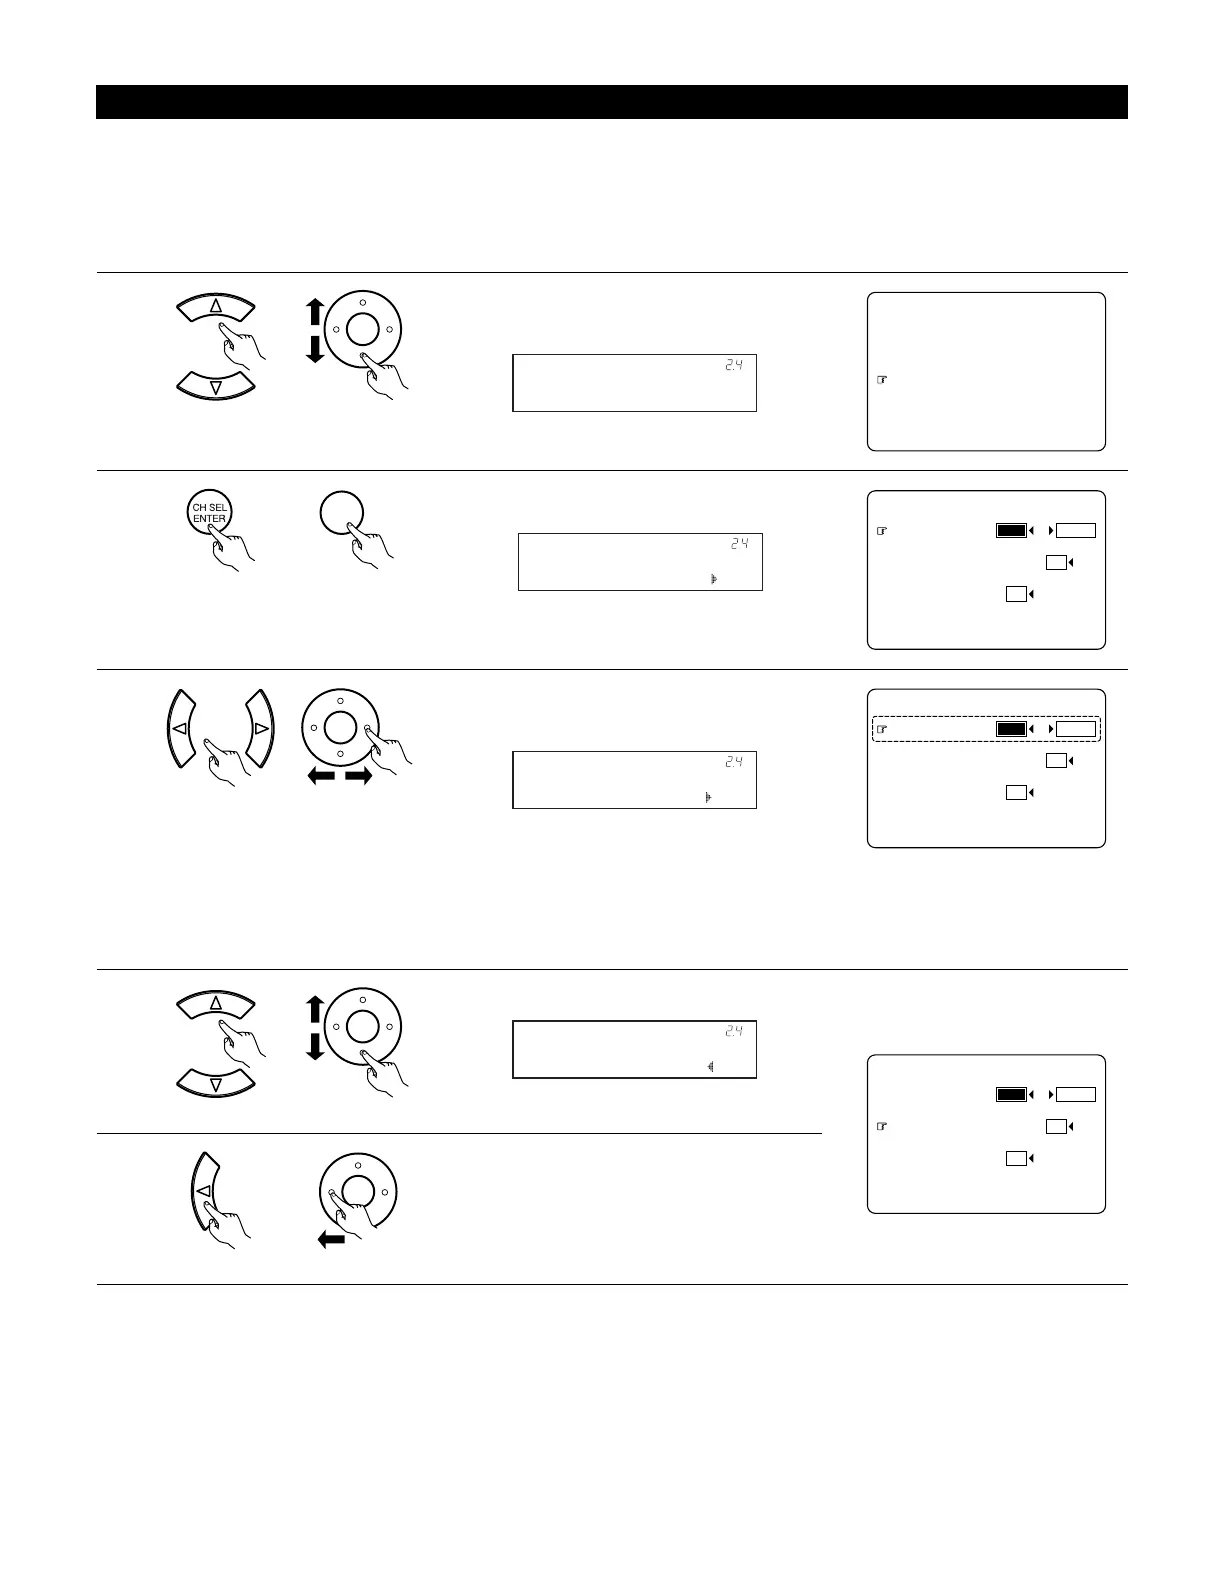
Select the mode.
Select “Auto” or “Manual”.
Example: When the “Auto” mode is selected
4
5
Select “Test Tone Start”.
¥ĺáļ©ńţŜũũŠŧ¥ōŠűŠŧ
¥
¥¥ŕŠŮů¥ŕŪũŠ¥¥¥¥¥¥«¥¥
¥
¥¥ŕŠŮů¥ŕŪũŠ¥ŔůŜŭů
¥
¥¥ōŠűŠŧ¥ńŧŠŜŭ
¥
¥
¥
;G U
;G U
#WVQ
/CPWCN
Select “Yes”.
Tone Start:Yes
*Channel Level
(Main unit) (Remote control unit)
T.Tone: Auto
*Channel Level
2-4. Setting the Channel Level
• Use this setting to adjust so that the playback level between the different channels is equal.
• From the listening position, listen to the test tones produced from the speakers to adjust the level.
• The level can also be adjusted directly from the Remote control unit. (For details, see pages 134, 135.)
• The level of each channel should be adjusted to 75 dB (C-weighted, slow meter mode) on a sound level meter at the listening position.
If a sound level meter is not available adjust the channels by ear so the sound levels are the same. Because adjusting the subwoofer level test
tone by ear is difficult, use a well known music selection and adjust for natural balance.
¥¥¥
¥¥Ĺ©ŔūŠŜŦŠŭ¥ńŪũšŤŢ©
¥¥ĺ©ŔŰŝŲŪŪšŠŭ¥ŔŠůŰū
¥¥Ļ©ŅŠŧŜŴ¥ŕŤŨŠ
¥¥ļ©ńţŜũũŠŧ¥ōŠűŠŧ
¥¥Ľ©ńŭŪŮŮŪűŠŭ¥ŇŭŠŬŰŠũŞŴ
¥¥ľ©ŔŰŭŭŪŰũş¥Ŕū¥ŔŠůŰū
¥¥Ŀ©ŕʼnř¥łŰşŤŪ¥ŔŠůŰū
¥¥ņųŤů
¥ĺ©ŔūŠŜŦŠŭ¥ŔŠůŰū
¥ĺáļ©ńţŜũũŠŧ¥ōŠűŠŧ
¥
¥¥ŕŠŮů¥ŕŪũŠ¥¥¥¥¥¥«¥¥
¥
¥¥ŕŠŮů¥ŕŪũŠ¥ŔůŜŭů
¥
¥¥ōŠűŠŧ¥ńŧŠŜŭ
¥
¥
¥
;G U
;G U
#WVQ
/CPWCN
1
2
Select “Channel Level” at the Speaker Setup Menu.
Display the Channel Level screen.
Channel Level
*Speaker Setup
T.Tone: Auto
*Channel Level
(Main unit) (Remote control unit)
(Main unit) (Remote control unit)
(Main unit) (Remote control unit)
(Main unit) (Remote control unit)
 Loading...