71
Setting the Video Setup
1
2
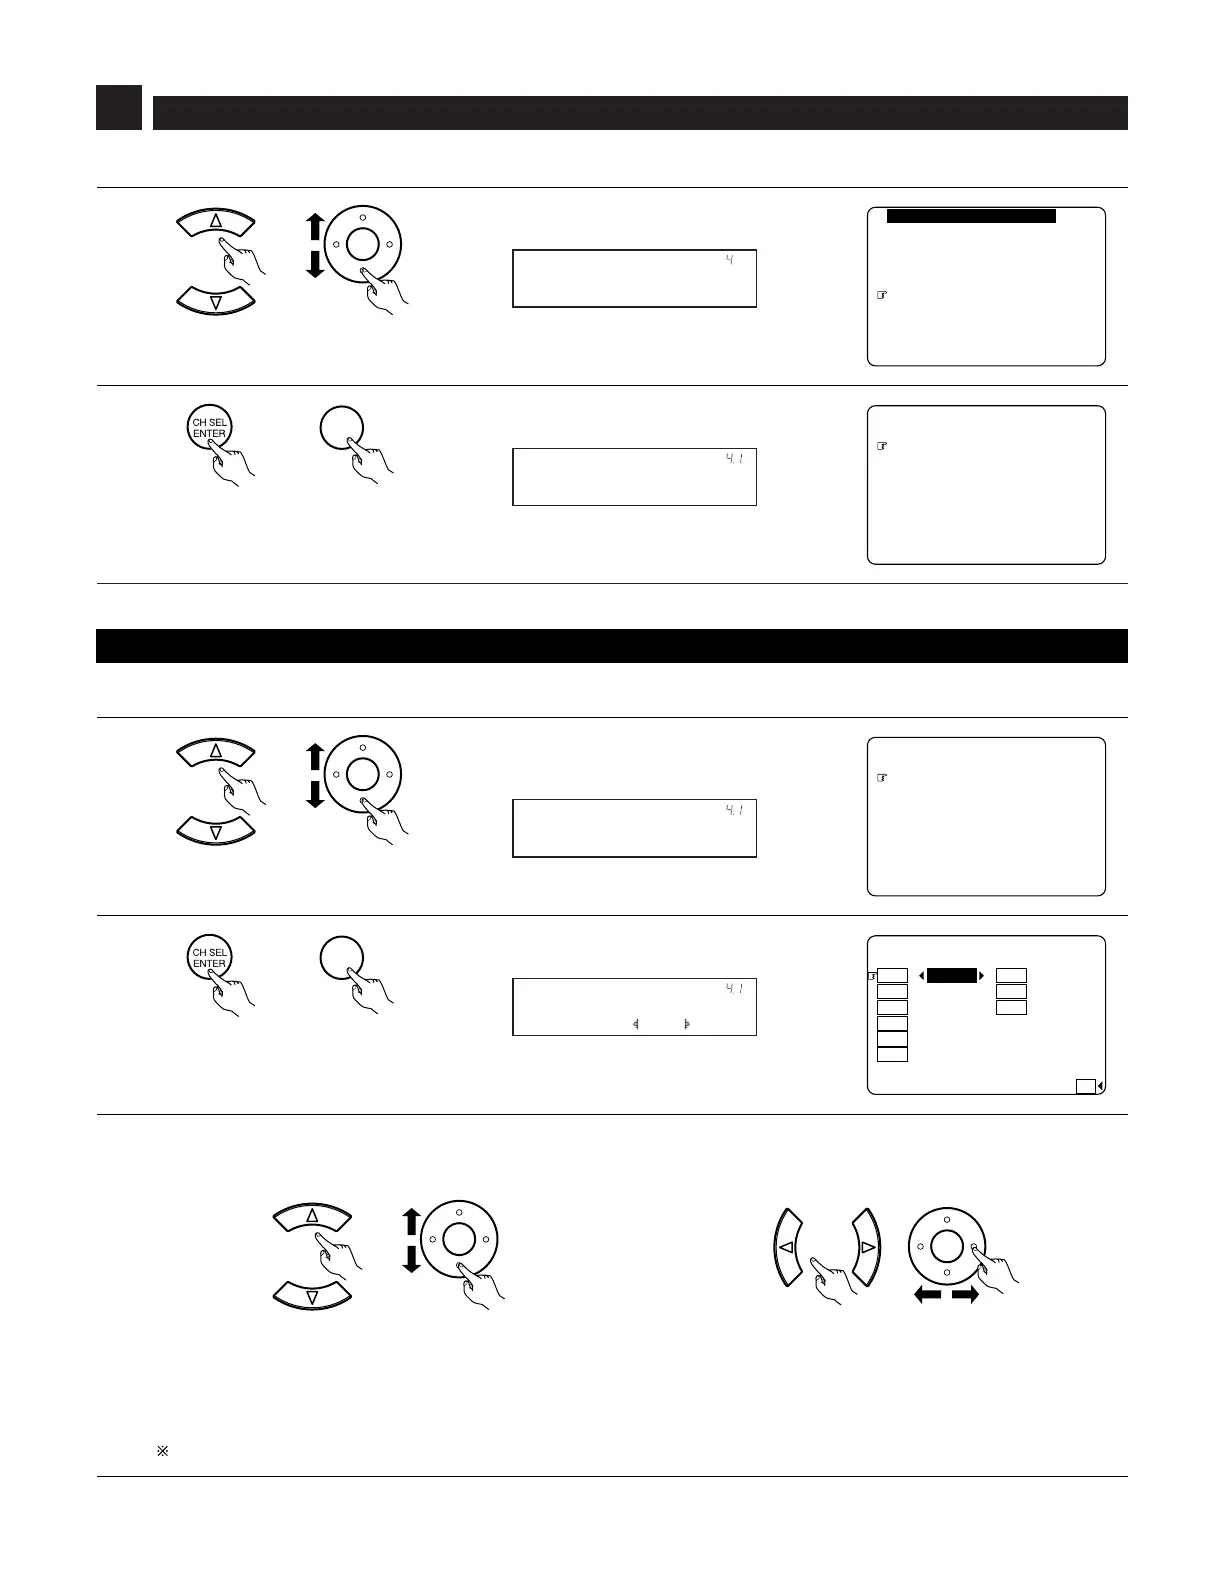
Select “Video Setup” at the System Setup Menu.
Display the Video Setup Menu screen.
¥
¥¥Ĺ©łŰůŪ¥ŔŠůŰūÃœŪŪŨ¥ņŒ
¥¥ĺ©ŔūŠŜŦŠŭ¥ŔŠůŰū
¥¥Ļ©łŰşŤŪ¥ŊũūŰů¥ŔŠůŰū
¥¥ļ©ŗŤşŠŪ¥ŔŠůŰū
¥¥Ľ©łşűŜũŞŠş¥őŧŜŴŝŜŞŦ
¥¥ľ©śŪũŠ¥ŔŠůŰū
¥¥Ŀ©ŐūůŤŪũ¥ŔŠůŰū
¥¥ņųŤů
¥¥ŔŴŮůŠŨ¥ŔŠůŰū¥ŎŠũŰ
¥¥¥
¥¥Ĺ©ńŪŨūŪũŠũů¥Ŋũ¥łŮŮŤŢũ
¥¥ĺ©ŗŤşŠŪ¥ńŪũűŠŭů¥ŎŪşŠ
¥¥Ļ©ŗŤşŠŪ¥ŔŞŜŧŠŭ
¥¥ļ©ĻŅ¥ŚÃń¥ŔŠūŜŭŜůŤŪũ
¥¥Ľ©ʼnŅŎŊÃŅŗŊ¥Ŋũ¥łŮŮŤŢũ
¥¥ľ©łŰşŤŪ¥ŅŠŧŜŴ
¥¥Ŀ©Őũ¥ŔŞŭŠŠũ¥ŅŤŮūŧŜŴ
¥¥ņųŤů
¥ļ©ŗŤşŠŪ¥ŔŠůŰū
4
• Make the video-related settings.
(Main unit) (Remote control unit)
(Main unit) (Remote control unit)
4-1. Setting the Component In Assign
• This setting assigns the component video input terminal of the AVR-5805 for the different input sources.
1
¥¥¥
¥¥Ĺ©ńŪŨūŪũŠũů¥Ŋũ¥łŮŮŤŢũ
¥¥ĺ©ŗŤşŠŪ¥ńŪũűŠŭů¥ŎŪşŠ
¥¥Ļ©ŗŤşŠŪ¥ŔŞŜŧŠŭ
¥¥ļ©ĻŅ¥ŚÃń¥ŔŠūŜŭŜůŤŪũ
¥¥Ľ©ʼnŅŎŊÃŅŗŊ¥Ŋũ¥łŮŮŤŢũ
¥¥ľ©łŰşŤŪ¥ŅŠŧŜŴ
¥¥Ŀ©Őũ¥ŔŞŭŠŠũ¥ŅŤŮūŧŜŴ
¥¥ņųŤů
¥ļ©ŗŤşŠŪ¥ŔŠůŰū
Select “Component In Assign” at the Video Setup
Menu.
2
Display the Component In Assign screen.
ļáĹ©ńŪŨūŪũŠũů¥Ŋũ¥łŮŮŤŢũ
¥¥¥¥«¥ĺáœńł¥¥¥¥¥«¥ŏŐŏņ
¥¥¥¥«¥Ļáœńł¥¥¥¥¥«¥ŏŐŏņ
¥¥¥¥«¥ļáœńł
¥¥¥¥«¥Ľáœńł
¥¥¥¥«¥ľáŃŏń
¥
¥¥¥¥¥¥¥¥¥¥¥¥¥ŅŠšŜŰŧů
¥
¥¥¥¥«¥Ĺáœńł¥¥¥¥¥«¥ŏŐŏņ
;G U
&8&
8%4
8%4
8#WZ
8&2
68
&$5
8%4
8%4
(Main unit) (Remote control unit)
(Main unit) (Remote control unit)
3
Select the component (Y, PB/CB and PR/CR) video input terminal to be assigned to the input source.
Select from among 1-RCA to 5-RCA and 6-BNC.
Select “NONE” for input sources for which the component (Y, P
B/CB and PR/CR) video input is not to be used.
It is not possible to select the same component video input jack for different sources.
If the same component video input jack is selected, the setting for the input source that was previously assigned switches to “NONE”.
If “Yes” is selected for “Default”, the settings are reset to the default values.
q Select the input source. w Select the component video input terminal.
(Main unit) (Remote control unit)
(Main unit) (Remote control unit)
 Loading...