207
c HELP Mode Function and Operation Procedures
chap.7
(1)
Adjusting/Checking the Drum Section
(4 pages in total)
Page 1 :
2
Check the drum positions.
removal / pre-detach / detach / post-detach / attach position
2
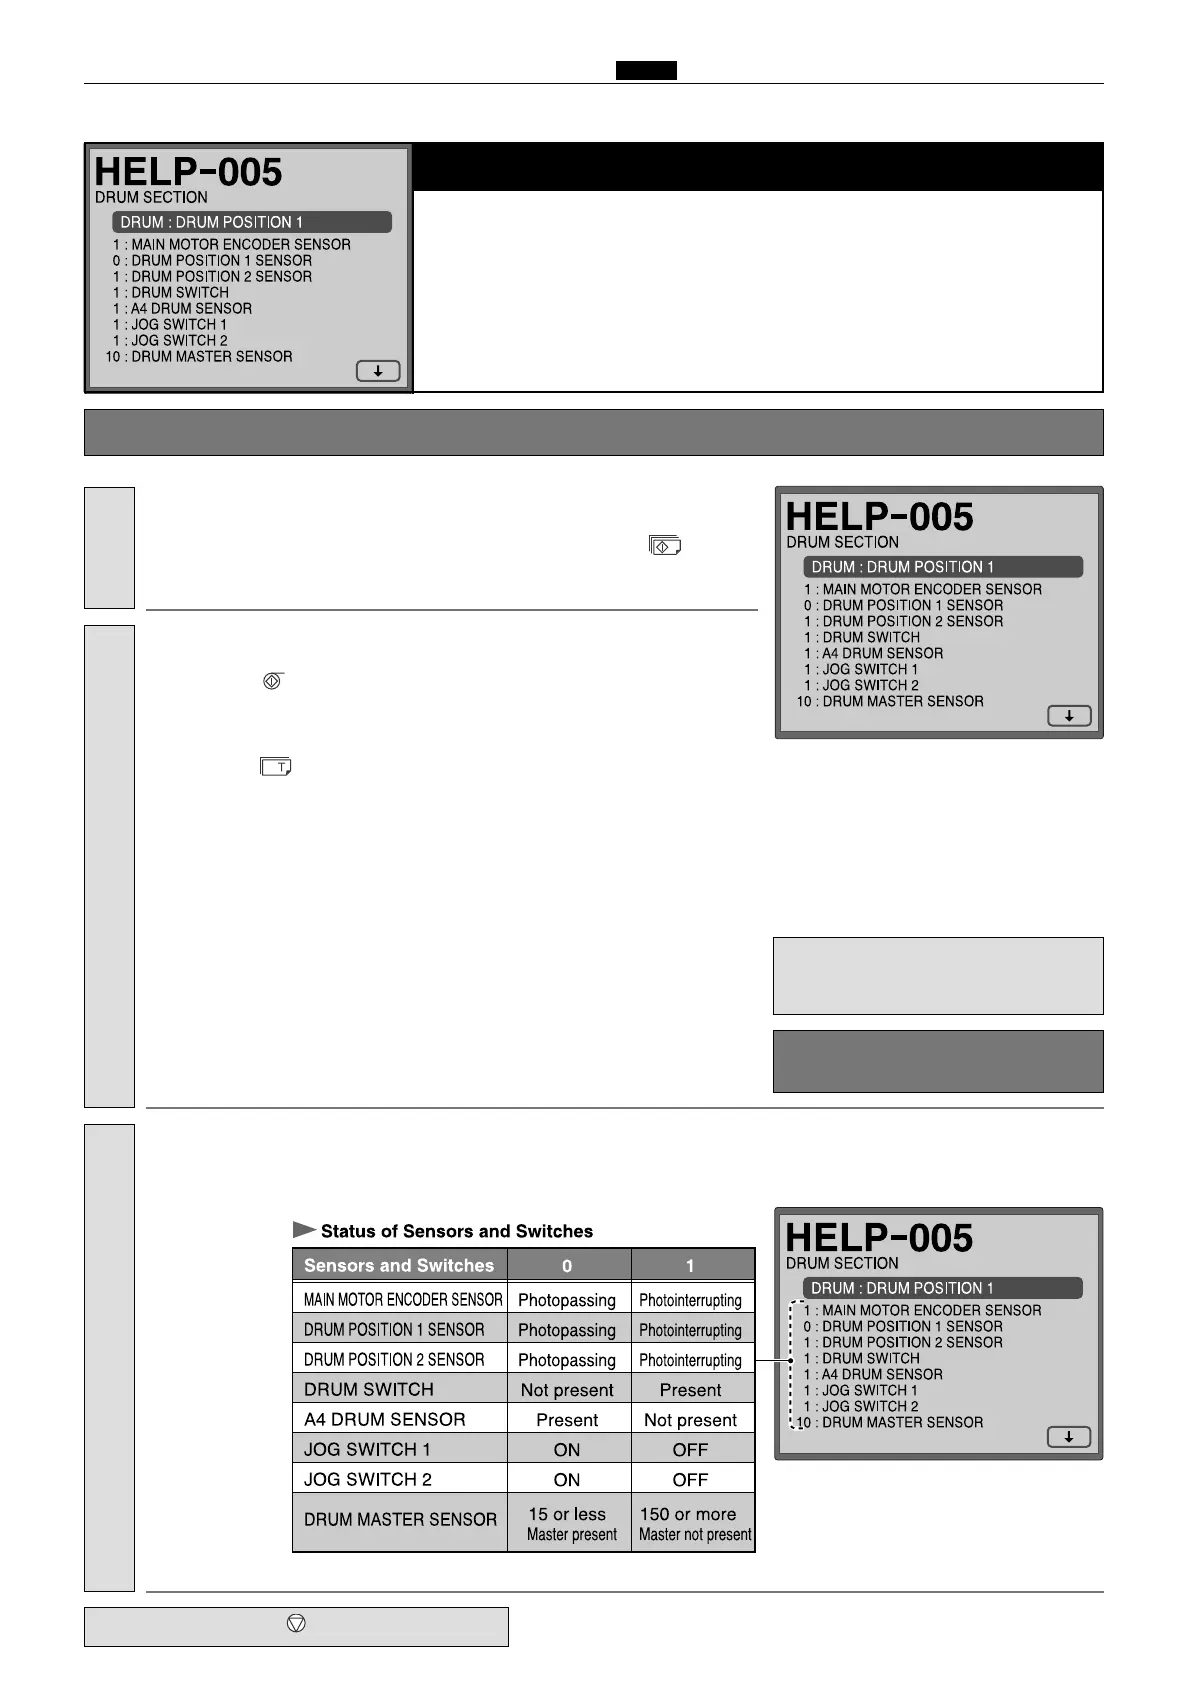
Checking sensors/switches.
DRUM POSITION 1 SENSOR / DRUM POSITION 2 SENSOR / DRUM SWITCH /
A4 DRUM SENSOR / JOG SWITCH 1 / JOG SWITCH 2 / DRUM MASTER SENSOR
¡ Operation procedure
1.
Enter
“
005
”
by the
NUMERIC
keys and then press the
(PRINT)
key.
3.
Call the HELP mode
“
H-005
”
.
Check the following sensors and switches.
Checking sensors/switches.
2.
2
Press the
(MASTER MAKING)
key.
Every time this key is pressed, the drum stops at the
detach position
,
the
attach position
and the
removal position
, in order.
2
Press the
(TEST PRINT)
key.
Every time this key is pressed, the drum stops at the
pre-detach
position
, the
post-detach position
, the
removal position
and the
attach
position
, in order.
2
Press the “
1
” key. Every time this key is pressed, the drum rotates and
stops at the
detach position
.
2
Press the “
2
” key. Every time this key is pressed, the drum rotates and
stops at the
attach position
.
2
Press the “
3
” key. Every time this key is pressed, the drum rotates and
stops at the
removal position
.
2
Press the “
4
” key. Every time this key is pressed, the drum rotates and
stops at the
pre-detach position
.
2
Press the “
5
” key. Every time this key is pressed, the drum rotates and
stops at the
post-detach position
.
Check the drum positions.
¡
The drum does not rotate even if the
drum removal button is pressed.
¡
Except when the
“3”
key is pressed
to select the stop position, the ink
roller moves down.
step 4.
a
Press the
(STOP)
key.
 Loading...