61
Printing Position Adjustment Function
[ Print Position ]
S
Printing Position Adjustment Function
After platemaking has finished, you can fine-tune the position of the printed image 1.5cm
in the vertical direction and 1.0cm in the horizontal direction). This position adjustment can
be performed in one of two ways: on the print position screen and on the main screen.
"
You cannot adjust while printing. Stop the operation with (STOP) key to adjust the
position.
IMPORTANT
:
s
How to Set Printing Position Adjustment
Pressing (CANCEL) key redisplays the main screen
.
1
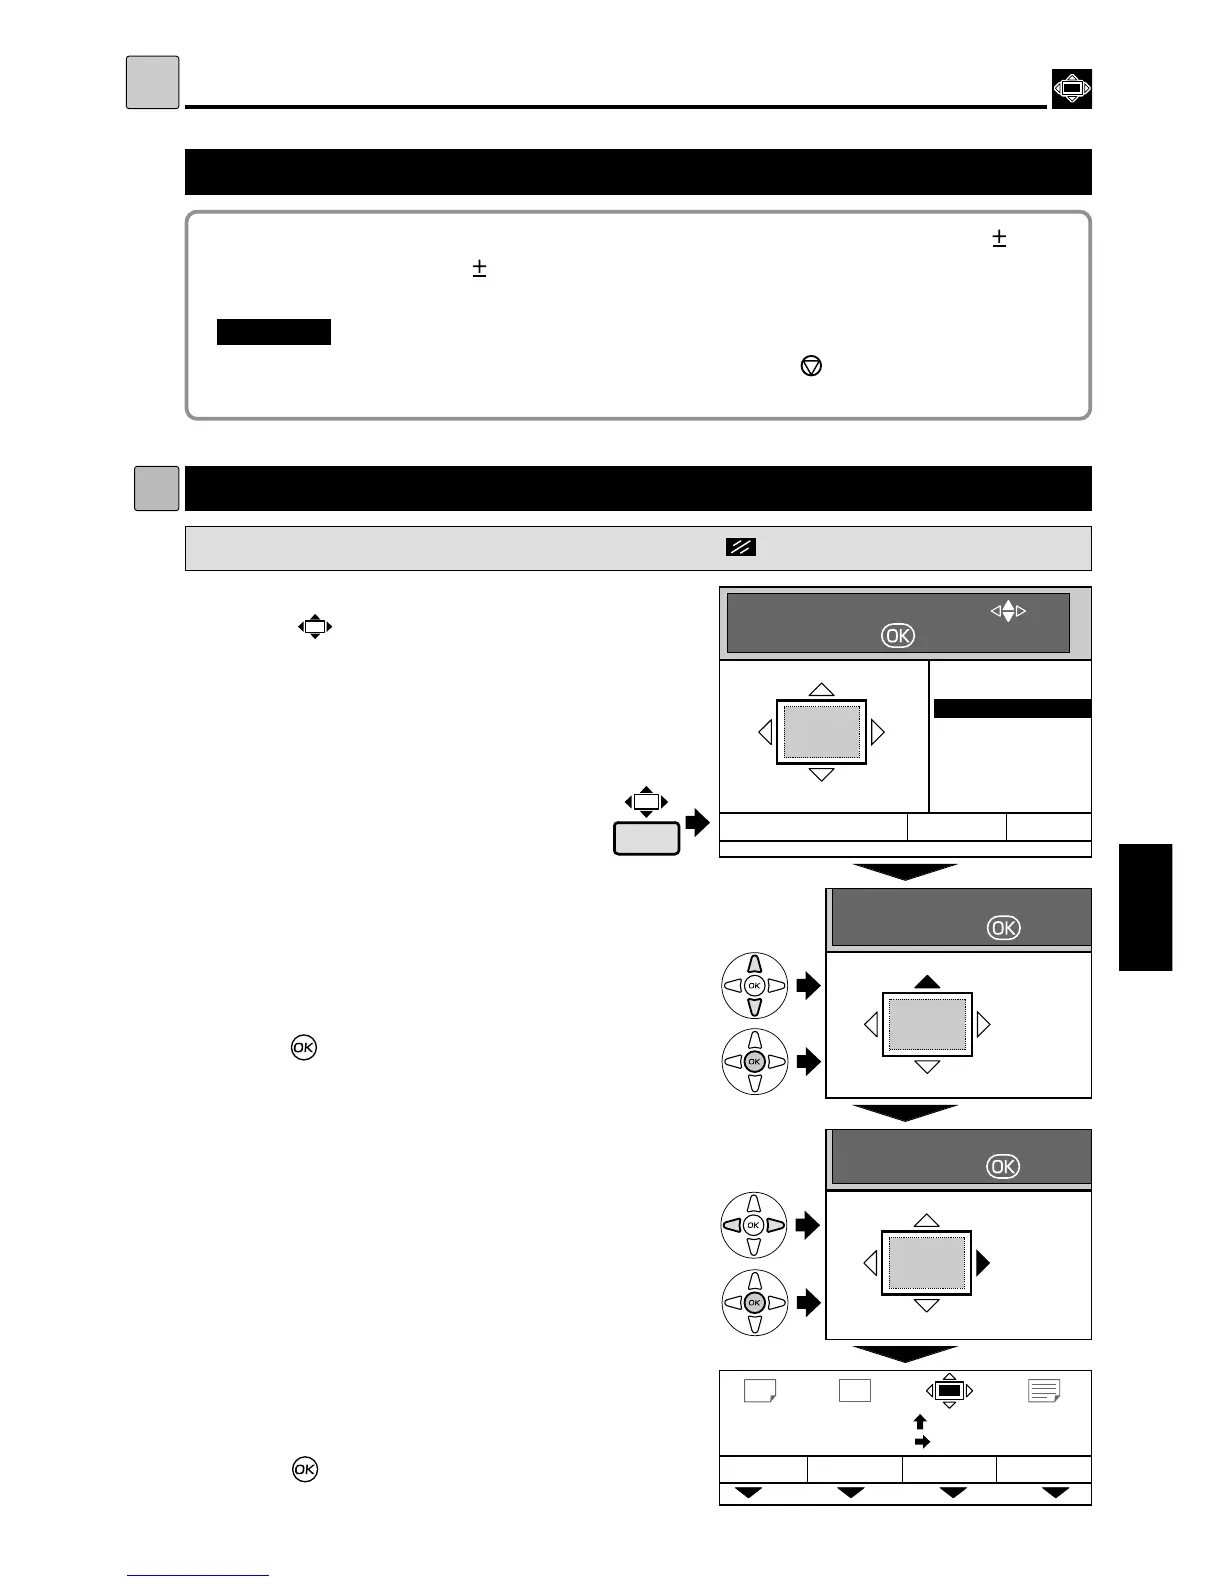
Press (PRINT POSITION) key.
2
Press“CURSOR”keys to select “ADJUST”.
Each press of“CURSOR” keys moves to a
different item and that item is displayed
highlighted.
3
Press (OK) key.
The printing position adjustment is displayed on the
LCD panel.
5
Press“CURSOR” keys (left/right). Adjust the
printing position in the horizontal direction.
Each press of“CURSOR”keys changes the
printing position by 0.5mm.
4
Press“CURSOR” keys (up/down). Adjust the
printing position in the vertical direction.
Each press of“CURSOR”keys changes the
printing position by 0.5mm.
Printing Position Adjustment
Other Functions
4.