4. INSTALLATION
MPORTANTI
Be advised that possible mounting and connection errors and their effects are beyond our control. Therefore, the manufacturer
cannot be held responsible for damages as a result of incorrect handling, installation and maintenance of the equipment.
4.1. Installation Location
For reliable, continuous stability and accuracy of the device, follow the instructions below:
• Choose a measuring site with a steady distribution of flow velocity over the cross-section, avoiding highly turbulent
flow conditions.
• Avoid measuring sites with sediment accumulation or deposits.
• Always observe ambient temperature at the installation site. Avoid exposure to heat, frost, extreme temperature
fluctuations and direct sunlight.
• Make sure that the device is protected from mechanical impacts and vibration.
• If using the device under corrosive or aggressive atmospheric conditions, make sure the location is well ventilated.
• Protect the transmitter from flooding.
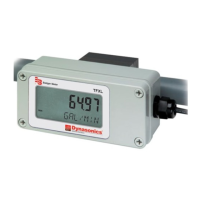
4.2. Mounting the Transmitter
OTE: N Mount the transmitter in a position that is protected against direct sunlight and rainfall.
1. Select a proper position on a at wall surface. Make sure to have a sucient power supply in the vicinity of the transmitter.
Make sure the cabling is safe.
2. Mark the upper drill hole at the positions of the upper hanger in the middle on top of the transmitter enclosure.
3. Drill a hole for corresponding wall plug for xing screw at the marked point.
4. Mount the transmitter with xing screw on the wall. Use suitable screws and plugs depending on the wall construction
and installation conditions. Make sure the enclosure is aligned horizontally.
5. Then mark the holes for the last two drillings on the left and right site on the bottom of the enclosure and follow the
procedure described above.
6. Be sure to tighten the screws rmly.
Temperature Strip
For monitoring ambient temperatures higher than 104° F (40° C), view the yellow self-adhesive temperature strip inside the
transmitter enclosure.
An increase in temperature in the range of 104…160° F (40…71° C) will cause an irreversible change of color of the specific
segment from light grey to dark grey. The dark color will remain even after subsequent cooling, indicating the maximum
temperature that has been reached.
Indicated temperature segments: 104° F (40° C), 109.4° F (43° C), 114.8° F (46° C), 120.2° F (49° C), 129.2° F (54° C),
140° F (60° C), 150.8° F (66° C), 159.8° F (71° C).
OTE: N Always check temperature strip when opening the enclosure.
The temperature strip is for quality assurance and warranty demands. Removal of the strip invalidates the warranty.
Installation
Page 16 March 2021HYB-UM-03155-EN-03
 Loading...