Date Time
Setting Description
NTP Server > Enter IP address of desired NTP Server.
Many lists of IP addresses of NTV servers are available online.
Time zone > Select local time zone from drop-down list.
automatic
Synchronization
> Tick check-box for automatic synchronization.
Synchronization
interval
> Select desired interval for time synchronization from drop-down-list
Test NTP connection
Click test NTP connection to check settings.
NTP time & date are displayed.
Click Apply to save entries.
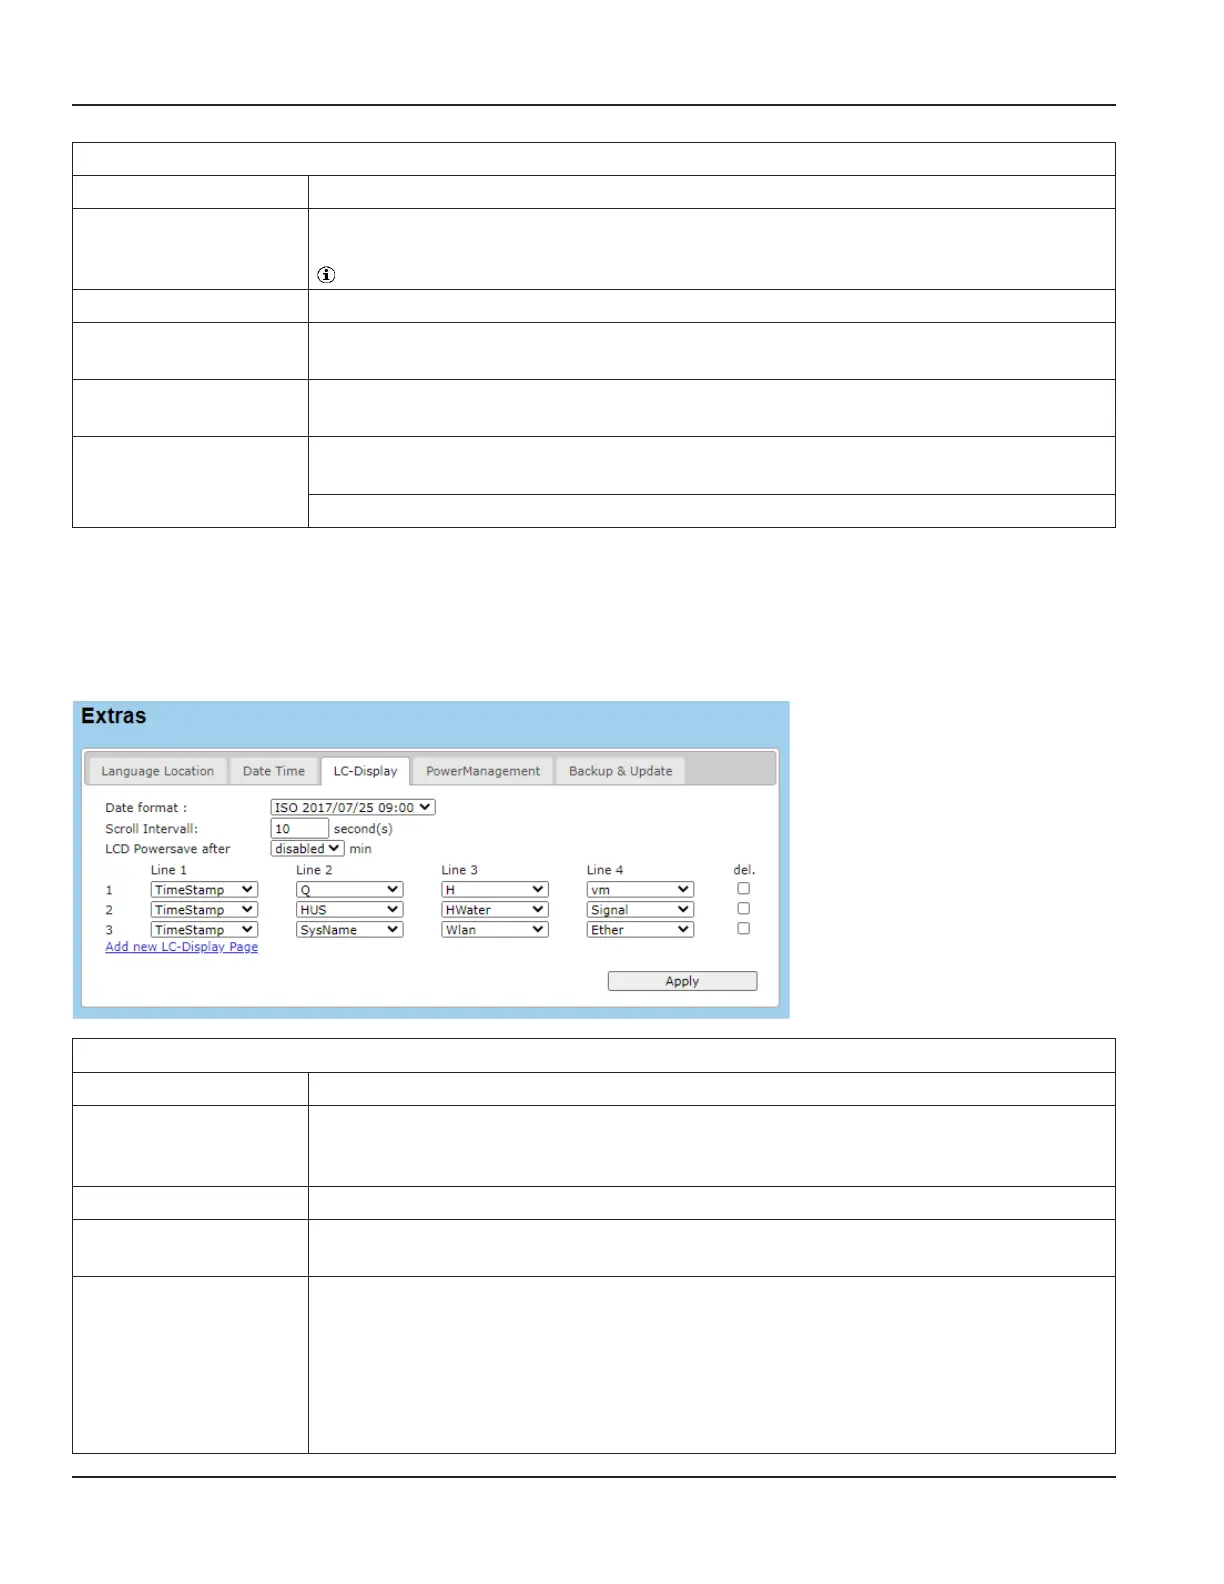
7.12.3. LC Display
Settings for LC- transmitter display.
Definition for displayed parameters for 4-line display of transmitter (Line 1…Line 4). 4 parameters per LC screen can be
displayed at once. Parameters can be selected individually from parameter list (see “7.13. Abbreviations” on page100).
By adding additional LC screens, further parameters can be displayed in intervals.
LC-Display
Setting Description
Date format: > Select data format.
ISO: yyyy/mm/dd hh:ss
US: mm/dd/yyyy hh:ss AM/PM
Scroll Interval > Set time for scroll / display interval.
LCD Powersave
after
> Set time for activation of power save modus for LC display. Or choose disabled to deactivate
power save modus.
Line 1
Line 2
Line 3
Line 4
> Select parameter to be displayed from drop-down list.
(abbreviation of parameter names as listed in database)
TimeStamp
Wlan
(…)
vm
Programming
Page 96 March 2021HYB-UM-03155-EN-03
 Loading...