13.4 DMI Calibration
Dynatest provides a simple user-friendly method for calibrating the DMI. It does require
however, that the user has access to a smooth straight pavement section (of say 1 km or 1 mile
of length) which has been accurately measured and whose endpoints have been marked.
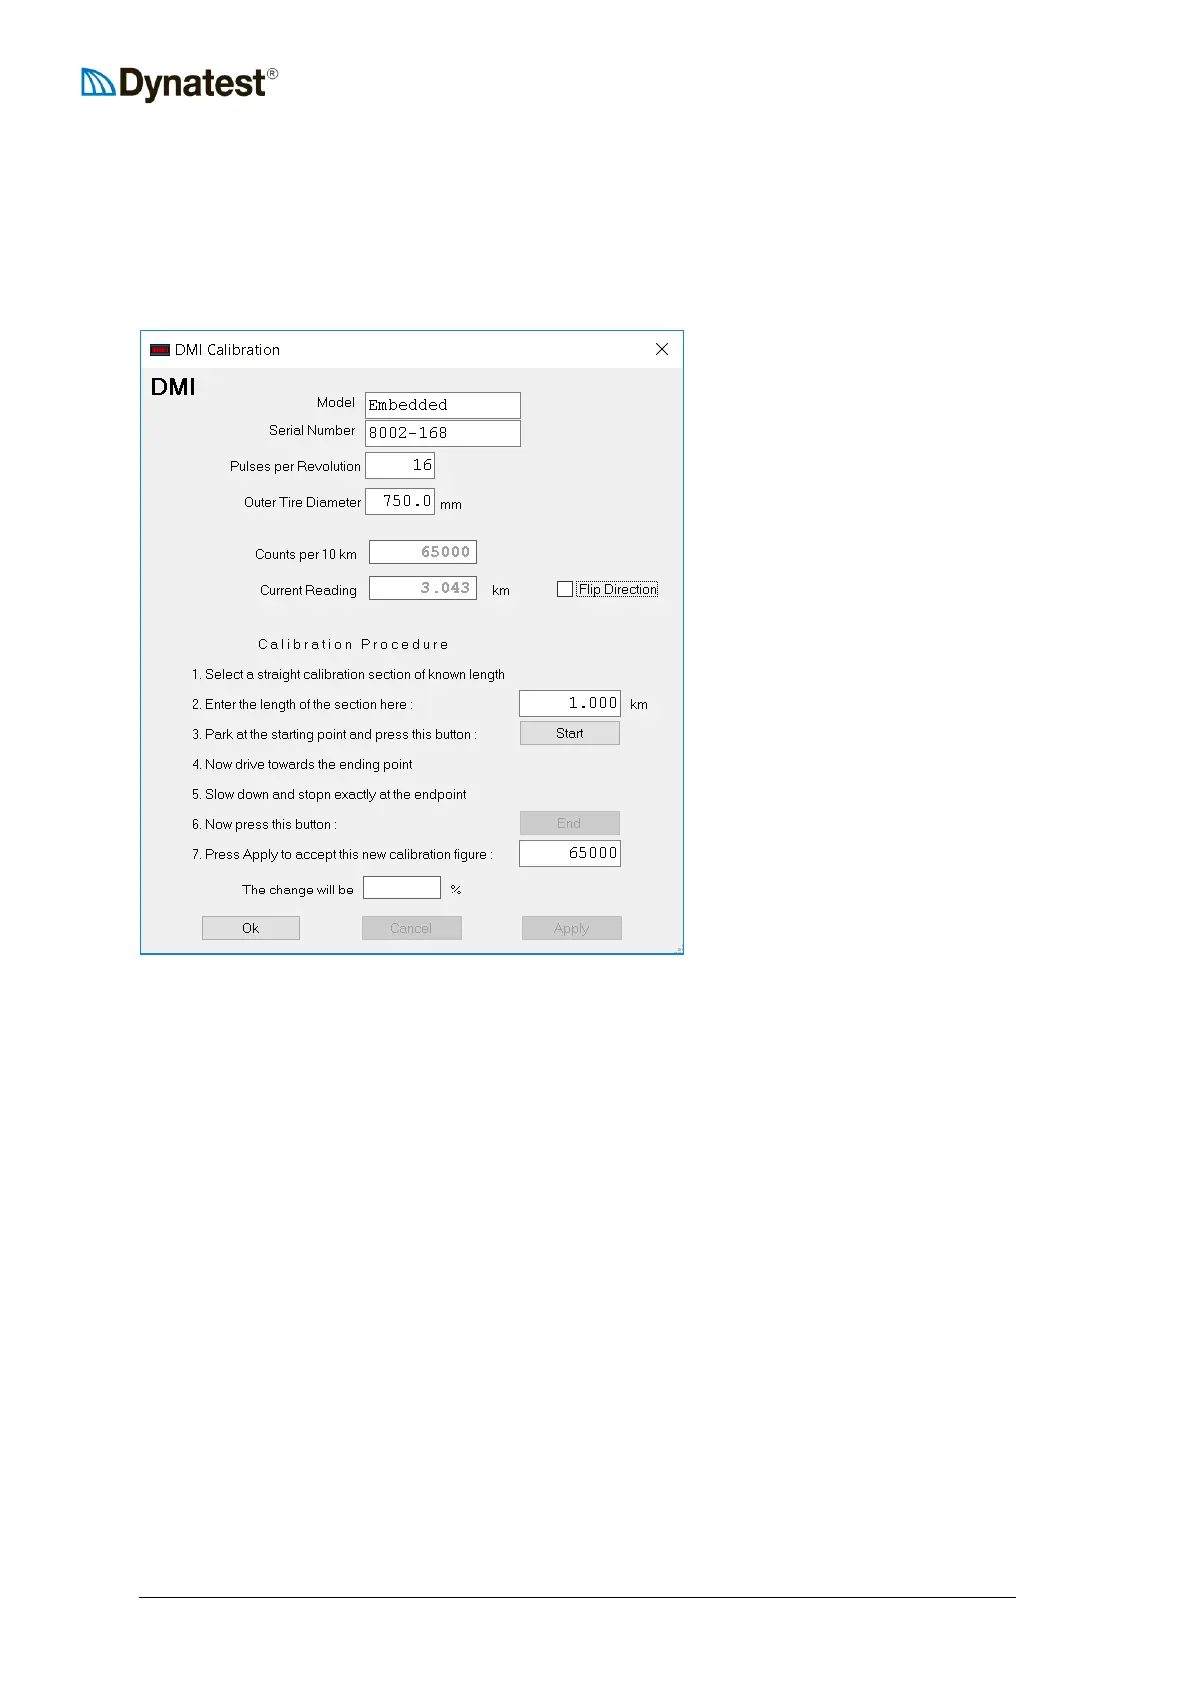
To initiate the DMI calibration, right click the DMI applet and select Calibration.
The first fields in the screen holds
the encoder Model, Serial Number
and Pulses per Revolution.
Enter the approximate tire diameter
“Counts per 10 km” is the
calibration value currently in effect.
This is the total number of counts
received from the wheel encoder
over 10 kilometres.
The field labelled “Current
reading” is the distance travelled
since the DMI was last reset.
The “Flip Direction” (phase
reversal) should be toggled if the
reading decreases when driving
forward.
The Calibration Procedure consists of the following steps:
1. Locate a straight, smooth, accurately measured pavement section with no distresses.
2. Enter the measured length of the section.
3. Locate the starting point and stop the vehicle as close as possible, then press Start.
4. Accelerate gently to a constant speed, maintaining a straight trajectory over the length of
the calibration section.
5. Slow down in a smooth manner and stop the vehicle as close to the end of the section as
possible.
6. Click the End button. The program will calculate a new calibration figure and display it
in the window under the End button.
7. If the calibration figure is within a few percent of the old figure, click the Apply button to
accept it. Note that the box at the bottom of the window shows the percent change from
last calibration.
8. Click the Ok button to return to close the window.
9. If the calibration figure is more than 1% different from the old figure, subsequent runs
should be performed. If the calibration figure is erratic, check the system for possible
problems with the tires, encoder mounting, encoder wiring, etc.
10. The calibration process can be abandoned at any time provided the Cancel button is
pressed before the Apply button.