Installing Options 197
6
6
6
6
6
6
6
6
6
6
6
6
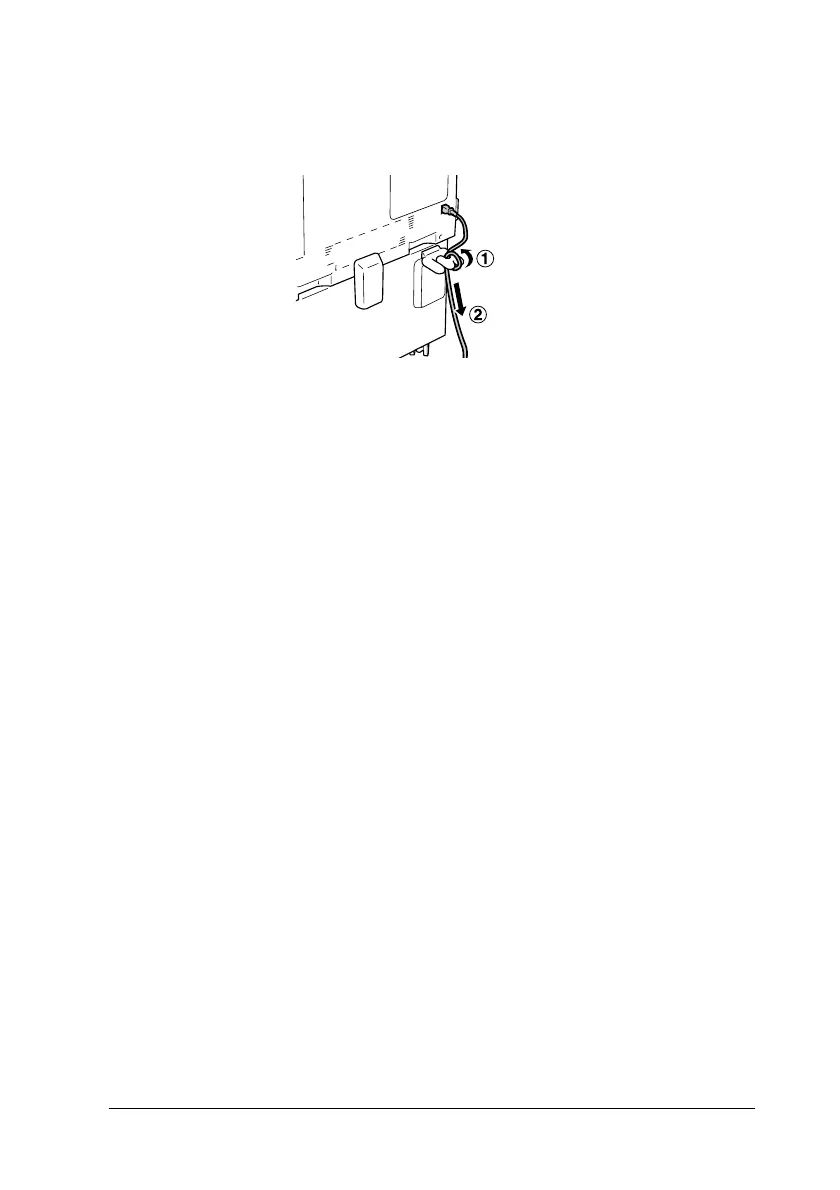
10. Plug the power cord into the printer by winding it around the
hook as shown below, then turn the printer on.
To confirm that the option is installed correctly, print a Status
Sheet. See “Printing a Status Sheet” on page 276.
Note for Windows users:
If you are using Windows, and EPSON Status Monitor 3 is not
installed, you have to make settings manually in the printer driver. See
“Making Optional Settings” on page 83.
Note for Macintosh users:
When you have attached or removed printer options, you need to delete
the printer using Print Setup Utility (for Mac OS X 10.3), Print
Center (for Mac OS X 10.2 or below), or Chooser (for Mac OS 9),
and then re-register the printer.
Removing the optional paper cassette unit
Follow the steps below to remove the optional paper cassette unit.
1. Turn the printer off and unplug the power cord.
2. Perform the installation procedure in reverse.
 Loading...


