Installing Options 211
6
6
6
6
6
6
6
6
6
6
6
6
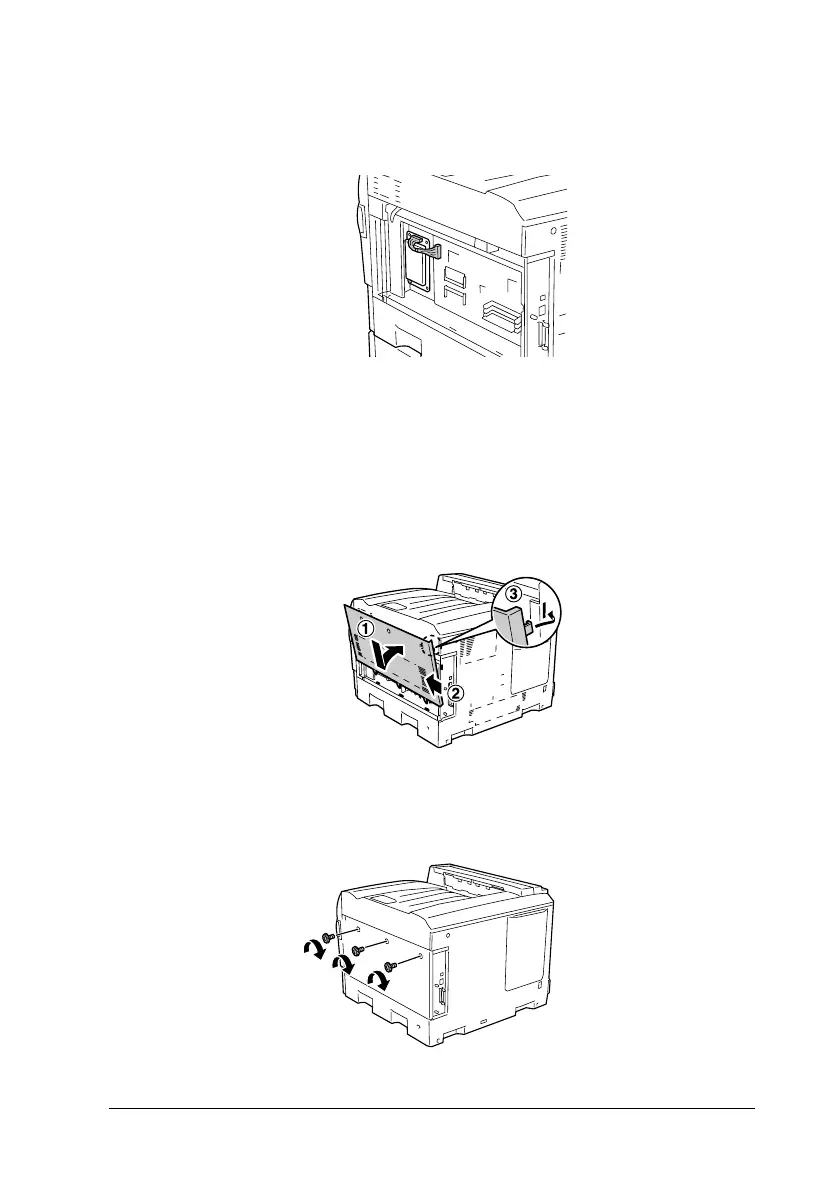
6. Plug the connection cable into both the socket on the HDD
and that on the board as shown below.
7. Reattach the cover to the right side of the printer by inserting
the three projections at the bottom of the cover to the notches
on the printer, and then sliding the cover forward to firmly fit
it to the printer. Make sure the projection at the top of the
cover is inserted to the notch on the printer.
8. Secure the cover with the three screws.
 Loading...


