SMP 300 Series • Front Panel Operations 22
B
Config port (see figure8 on page21)— Connect a control device to this port with a
USB mini‑B cable (not supplied). Use this port to send SIS commands to the SMP300
Series for device configuration and control (see Remote Communication and
Control starting on page106).
C
Input selection — Press these buttons to select inputs associated with the rear panel
input ports.
• Channel A — Press the corresponding button to select HDMI input 1 or 2. If
analog audio (instead of embedded audio) is selected for an input, Channel A
analog audio is output with the video.
• Channel B — Press the corresponding button to select composite/component
input3, HDMI input 4, and (optional) SDI input 5. If analog audio is selected for
input 4, Channel B analog audio is output with the selected video input.
The currently selected Channel A input button and currently selected Channel B input
button light solid amber.
NOTE: Input 5 lights only when the optional SDI input card is installed and the input
is selected.
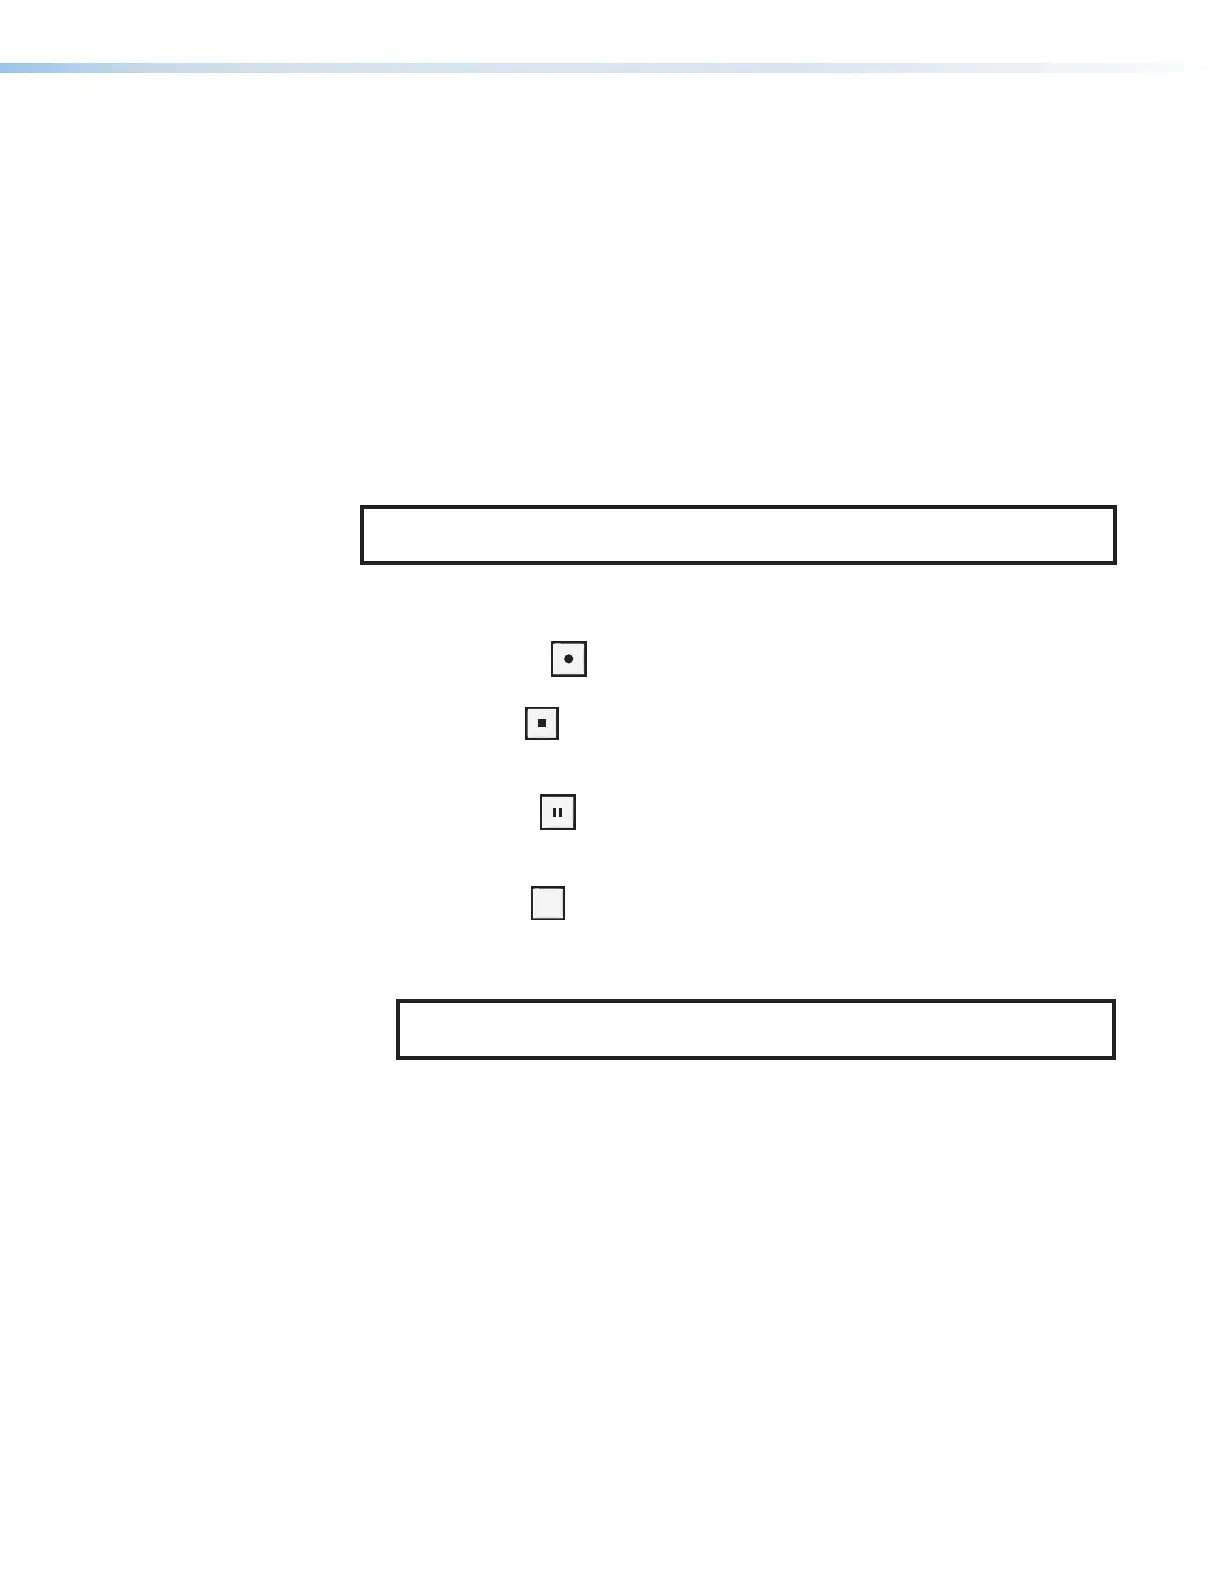
D
Record controls with LED indicators — Press the Record, Stop, Pause, and Mark
buttons to perform the operation. The buttons light to indicate the current state of
record operation.
• Record — Press to record the selected inputs. The record button lights solid
red during active recording.
• Stop — Press to stop the active recording. When pressed during a recording,
the stop button blinks green while the recorded file is being finalized, then lights
solid green when the file is finalized.
• Pause — Press to pause recording. When pressed, the Pause button blinks
green to indicate recording is paused. Press Record or press Pause again to
resume recording, or press Stop to halt the recording.
• Mark — Press
MARK
to place a chapter marker in the recorded file. When pressed
during recording, the button illuminates green momentarily to indicate a chapter
marker is inserted. The button also illuminates when JPEG thumbnails are
automatically created at a fixed interval (default: 1 minute).
NOTE: The SMP does not create chapter marks or capture thumbnails on
virtual input recordings.
E
Audio level indicators — Two stacks of eight green LEDs track the audio level of the
left and right audio channels from ‑60 dBFS (one LED) to 0 dBFS (eight LEDs). The
LEDs indicate both signal presence and active input signal levels.
• Input Configuration Mode — When input gain is adjusted, the meters display the
currently selected input left and right channel audio levels to assist setting audio
gain (see Audio Level on page43).
• Normal Mode — The meters display the left and right encoder input levels
measured after all audio input adjustments are applied and audio sources are
blended or merged (if applicable).
F
Layout Preset (for composite mode only) and Swap — Press LAYOUT PRESET to
select one of the 16 capture presets (see Layout Presets (For Composite Mode
Only) on page23). The button illuminates green. Use the ADJUST knobs (see
figure8,
I
on page23) to select the desired output layout. Press NEXT (
H
) to
activate it.
Press SWAP to switch Channel A and B inputs between the two layout windows. The
button illuminates green for 1 second to indicate the input swap.