SMP 300 Series • Front Panel Operations 23
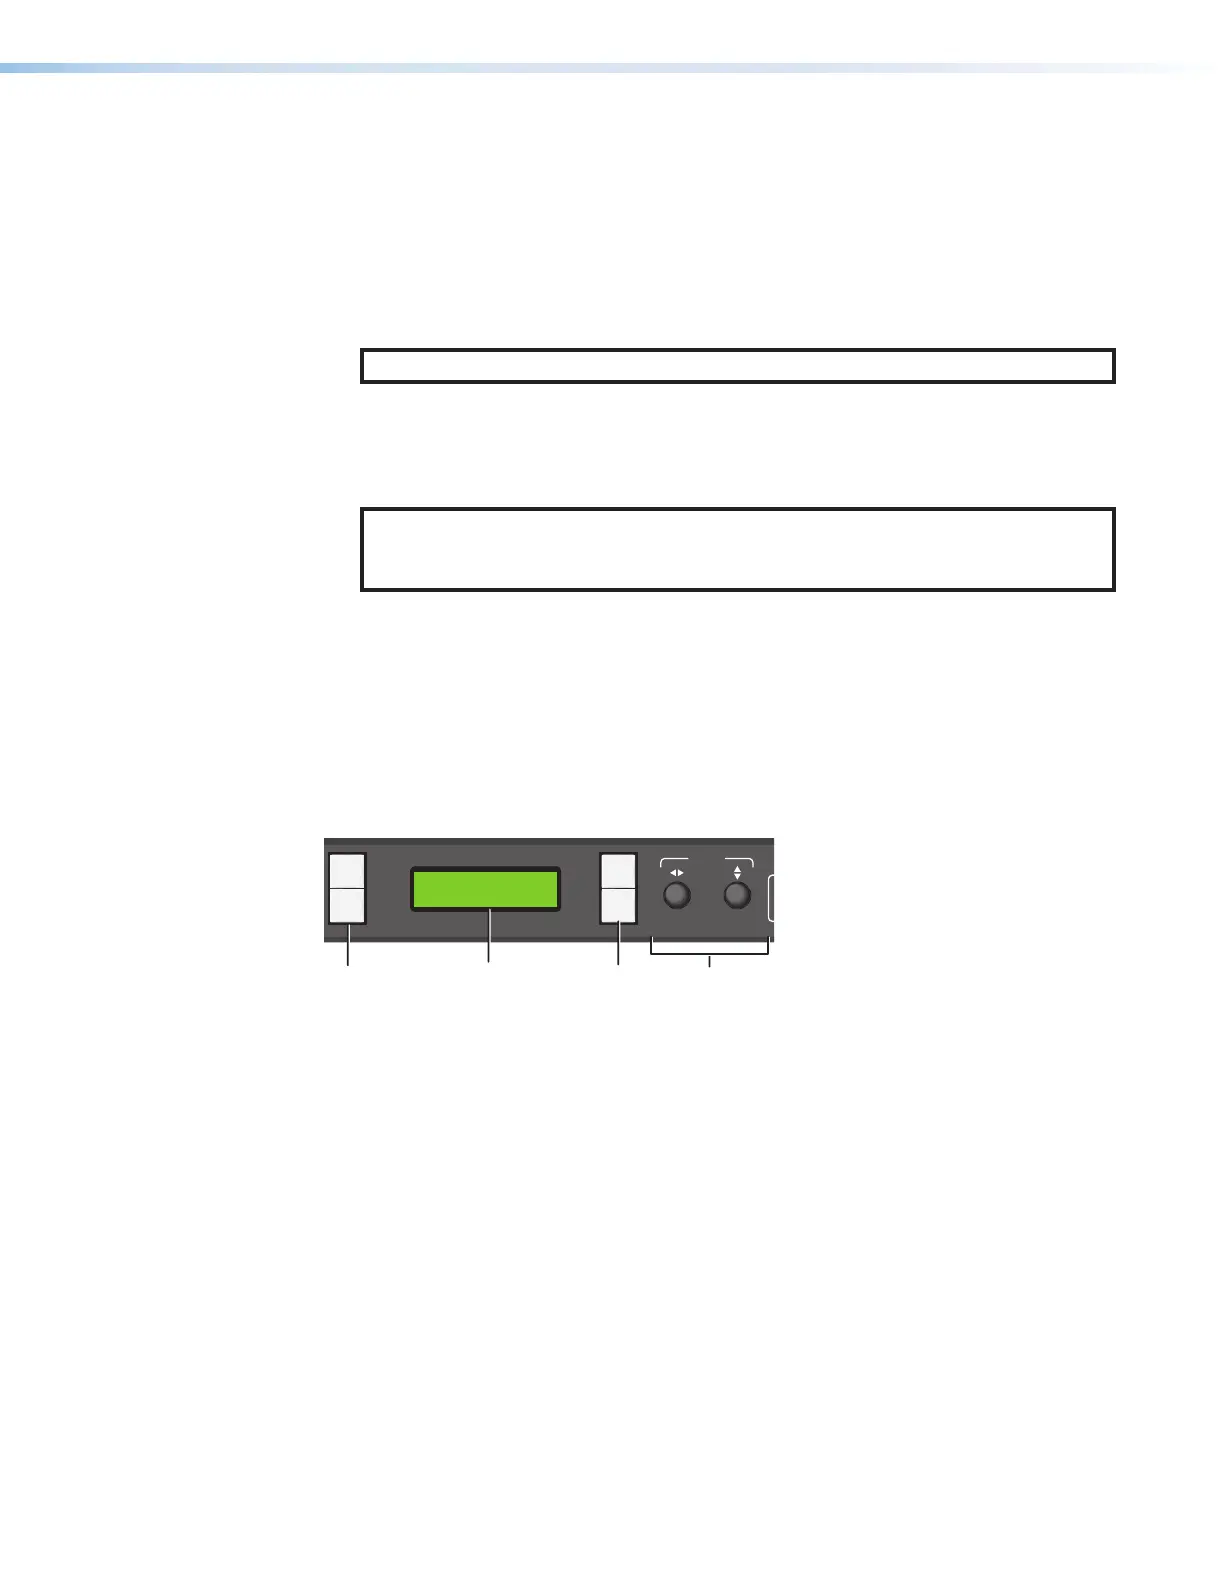
G
Menu display — Displays configuration menus and status information. Use the MENU
and NEXT buttons (see figure8 on page21,
H
) and ADJUST knobs (
I
) to navigate
the menu. During normal operation, a default display cycle is presented (see Power Up
Procedure on page25). If there is an active alarm (see Alarms on page49), it is
listed instead.
H
Menu navigation (MENU and NEXT) — Lights amber (unless menu lockout is
enabled). Press to access and navigate the configuration and control menus and
submenus.
NOTE: The menu button blinks red when there is an active alarm (see Alarms).
• MENU — Use this button to enter and move through the main menu system.
• NEXT — Use this button to step through the submenus of the selected menu.
I
Adjust knobs (left [ and right {) — Rotate these controls to scroll through menus
and to make adjustments within a menu or submenu.
NOTE: The buttons and controls on the SMP300 Series can be locked so that
configuration using the front panel is not possible (see Front Panel Lockout
(Executive Modes) on page49).
J
I/O display — A stack of four green LEDs that correspond to the four digital I/O
connections on the rear panel (see figure4 on page15). Each LED indicates the
on or off status of the corresponding ports which can be configured as digital input or
digital output (see Digital I/O Configurator on page104).
Layout Presets (For Composite Mode Only)
Layout presets define which inputs are selected and where they are placed on the output
screen. There are 12 preconfigured and 4 user presets for custom layout configurations.
ADJUST
1
2
3
4
I/O
AUDIO
CHANNEL A
CHANNEL B
LR
1
2
3
4
5
LAYOUT
PRESET
SWAPSWAP NEXT
MENU
NEXT
F
F G
G H
H
I
I
SMP 351
Streaming Media Processor
Figure 9. Front Panel Layout Preset and Swap
The two input channels, A and B, are determined by direct selection from the front panel.
To select 1 of the 12 preconfigured layout presets:
1. Select input 1 or 2 for channel A and input 3, 4, or 5 for channel B (see figure4).
2. Press LAYOUT PRESET (see figure9,
F
) to open the menu on the front panel display
(
G
).
3. Use either ADJUST knob (
I
) to cycle through the presets. When the desired layout
name appears on the output display, stop.
9