SMP 300 Series • Installation 19
Rear Panel Reset
The Reset button on the rear panel of the SMP300 Series (see figure4 on page15)
returns the SMP300 Series to various modes of operation. There are three unit reset modes
(numbered 1, 4, and 5) that are initiated from the rear panel reset button. To select different
reset modes, use a pointed stylus or small screwdriver to press and hold the Reset button
when the SMP300 Series is powered on or press and hold the Reset button while applying
power to the SMP300 Series.
NOTES:
• The reset modes listed in the SMP 300 Series Reset Modes table on page20
close all open IP and Telnet connections and all sockets. The table has details
comparing the reset modes and detailing affected configuration settings and user
content.
• Each reset mode is a separate reset (not a continuation from mode 1 to mode 5).
• Reset modes 2 and 3 are not available for the SMP300 Series.
• The SMP300 Series can also be reset using the web-based user interface (see
System Resets on page102).
• For information on resetting the SMP300 Series using SIS commands see Resets
on page116.
ATTENTION:
• Review the reset modes carefully. Some reset modes delete all user loaded
content and revert the device to default configuration.
• Analysez minutieusement les différents modes de réinitialisation. Certains modes
de réinitialisation suppriment l’intégralité du contenu chargé de l’utilisateur et
remettent l’appareil au mode de configuration par défaut.
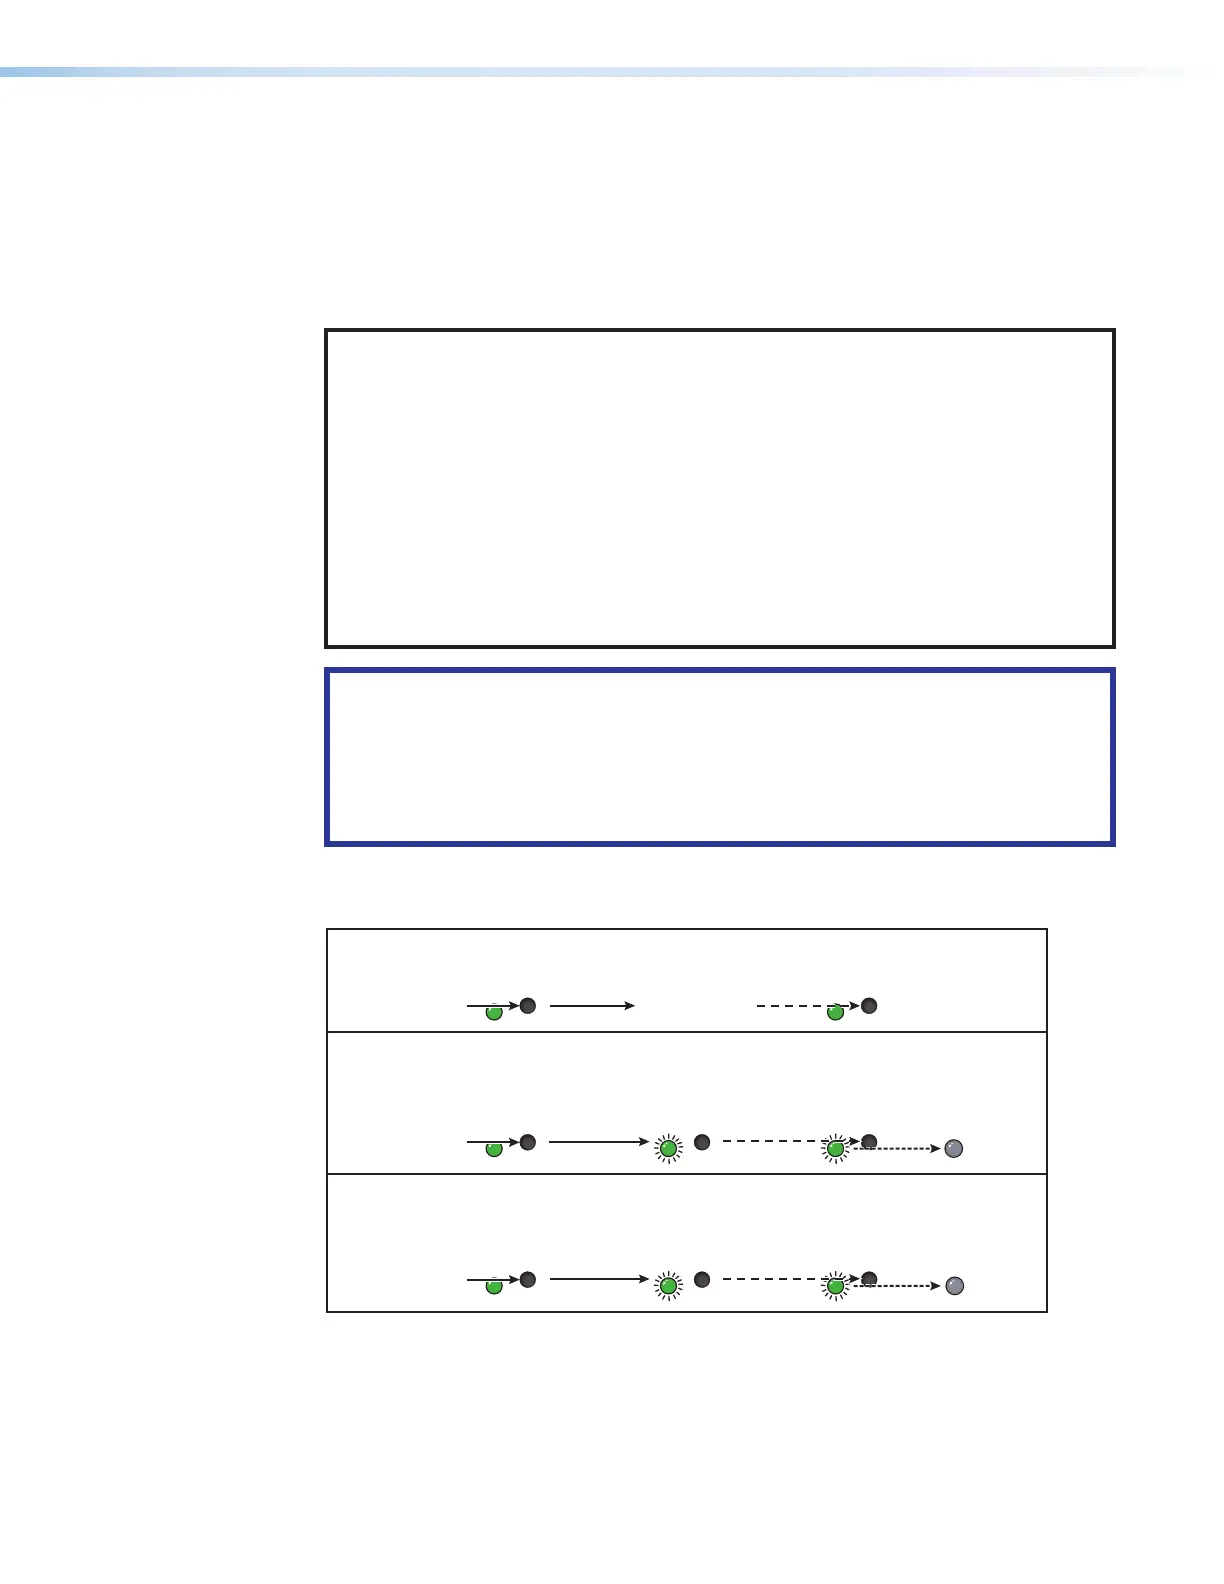
See figure7 and the SMP 300 Series Reset Modes table for a summary of the reset
modes.
RESET
RESET
RESET RESET
RESET RESET
RESET
RESET
Press and hold
the Reset button.
Mode 1
Apply power
to the SMP.
Release Reset button.
Release, then immediately
press and release again.
Reset LED flashes, then goes off.
Mode 4
Reset LED flashes twice.
Press and hold
for 6 seconds.
Release, then immediately
press and release again.
Reset LED flashes, then goes off.
Mode 5
Reset LED flashes three
times.
Press and hold
for 9 seconds.
Figure 7. Resetting the SMP300 Series
7