5.9 Servo Controlled Oxygen Service Procedures
5.9.1 Installing Oxygen Sensors
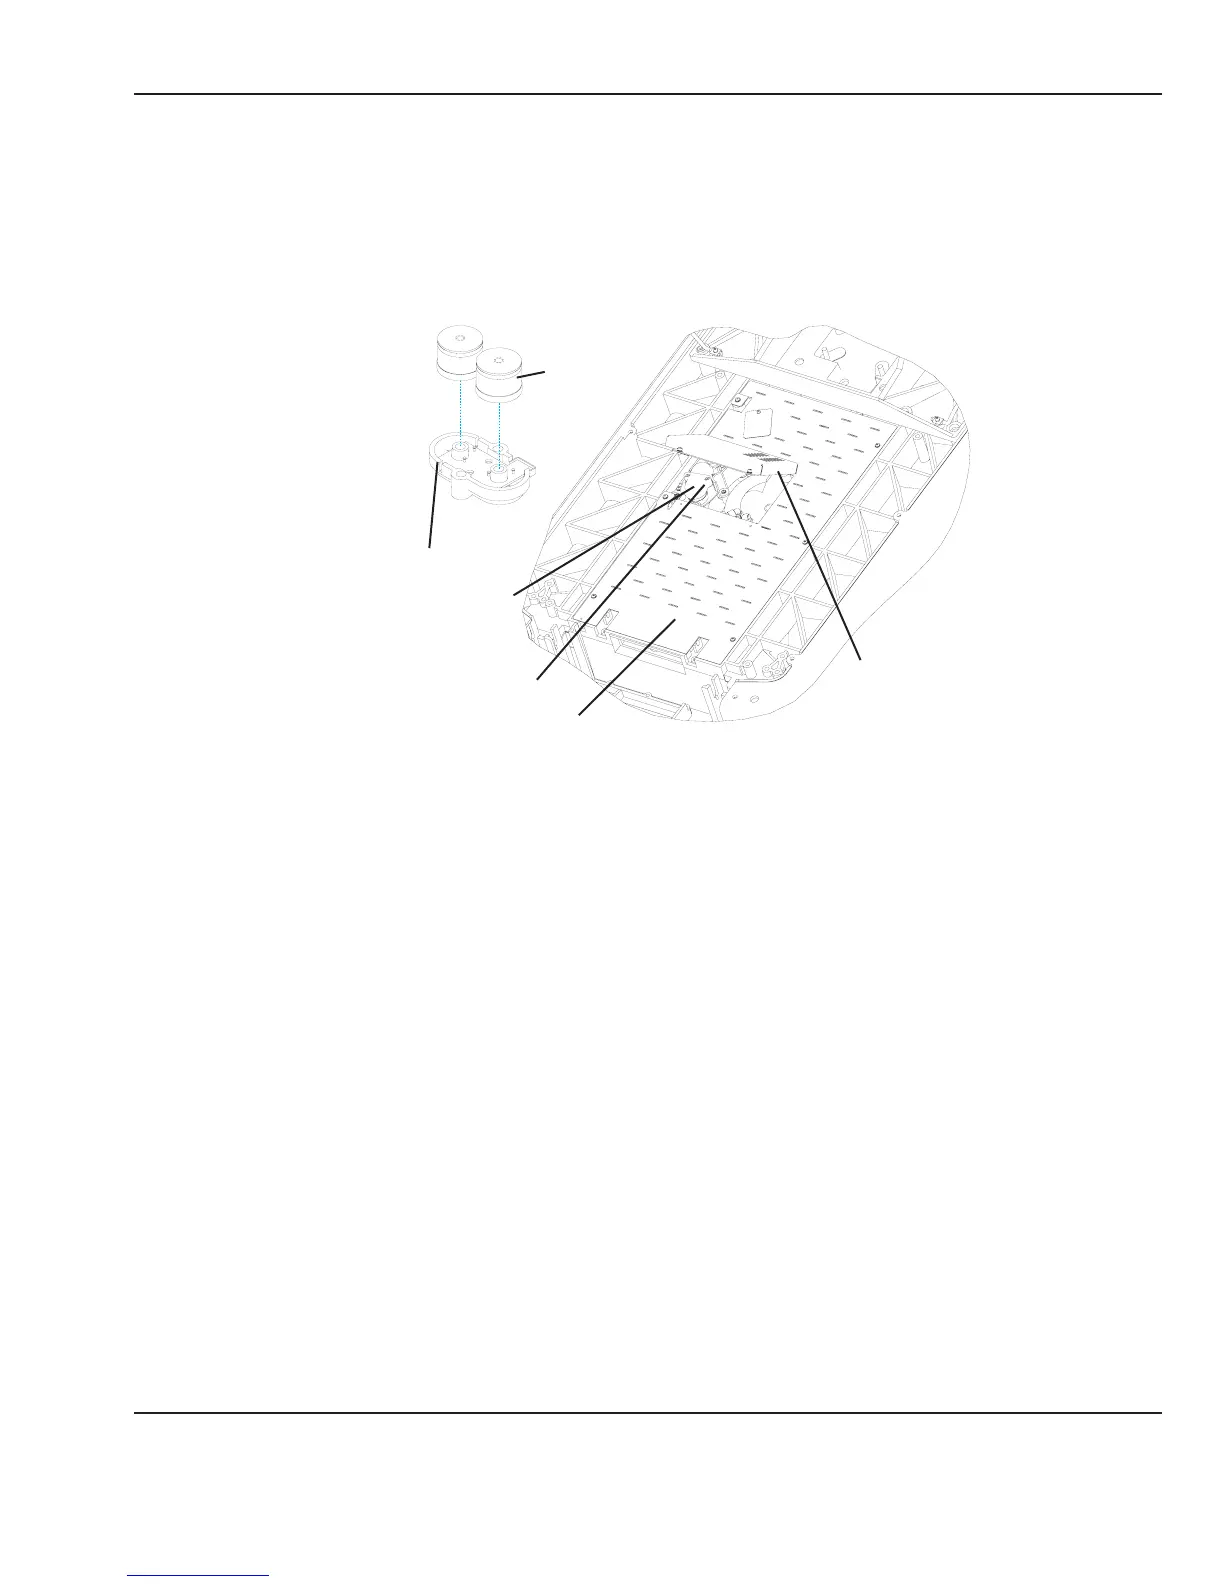
Refer to “Figure 5-15 Installing Sensors”.
Chassis cover
Sensor housing cover
Sensor housing cover
Oxygen
sensor
Captive screw
Sensor housing door
Figure 5-15 Installing Sensors
1. Slide the drawer to one side and using a 3mm hex key, loosen the captive screws in the chassis cover
sensor housing door and swing the door down to access the sensor housing.
2. Using a 3mm hex key, loosen the two M4 socket head screws that secure the sensor housing cover, and
remove the cover.
3. Remove the old oxygen sensors. Replace with two new sensors (6600-0120-850).
NOTE: the date on the sensor is a discard date; the sensor should be removed from service on this date.
All sensors are shipped from Ohmeda at least 12 months prior to this date; sensors should be installed
immediately to ensure maximum operating life.
4. Reinstall the sensor housing cover and close and secure the door in the chassis cover.
5. Perform the Pre-use Checkout.
© 2001 by Datex-Ohmeda, Inc.. All rights reserved. 6600-0356-000 103 93
Chapter 5: Repair Procedures