5.4 Compartment Probe Repairs
Refer to “Figure 5-3 Compartment Probe”.
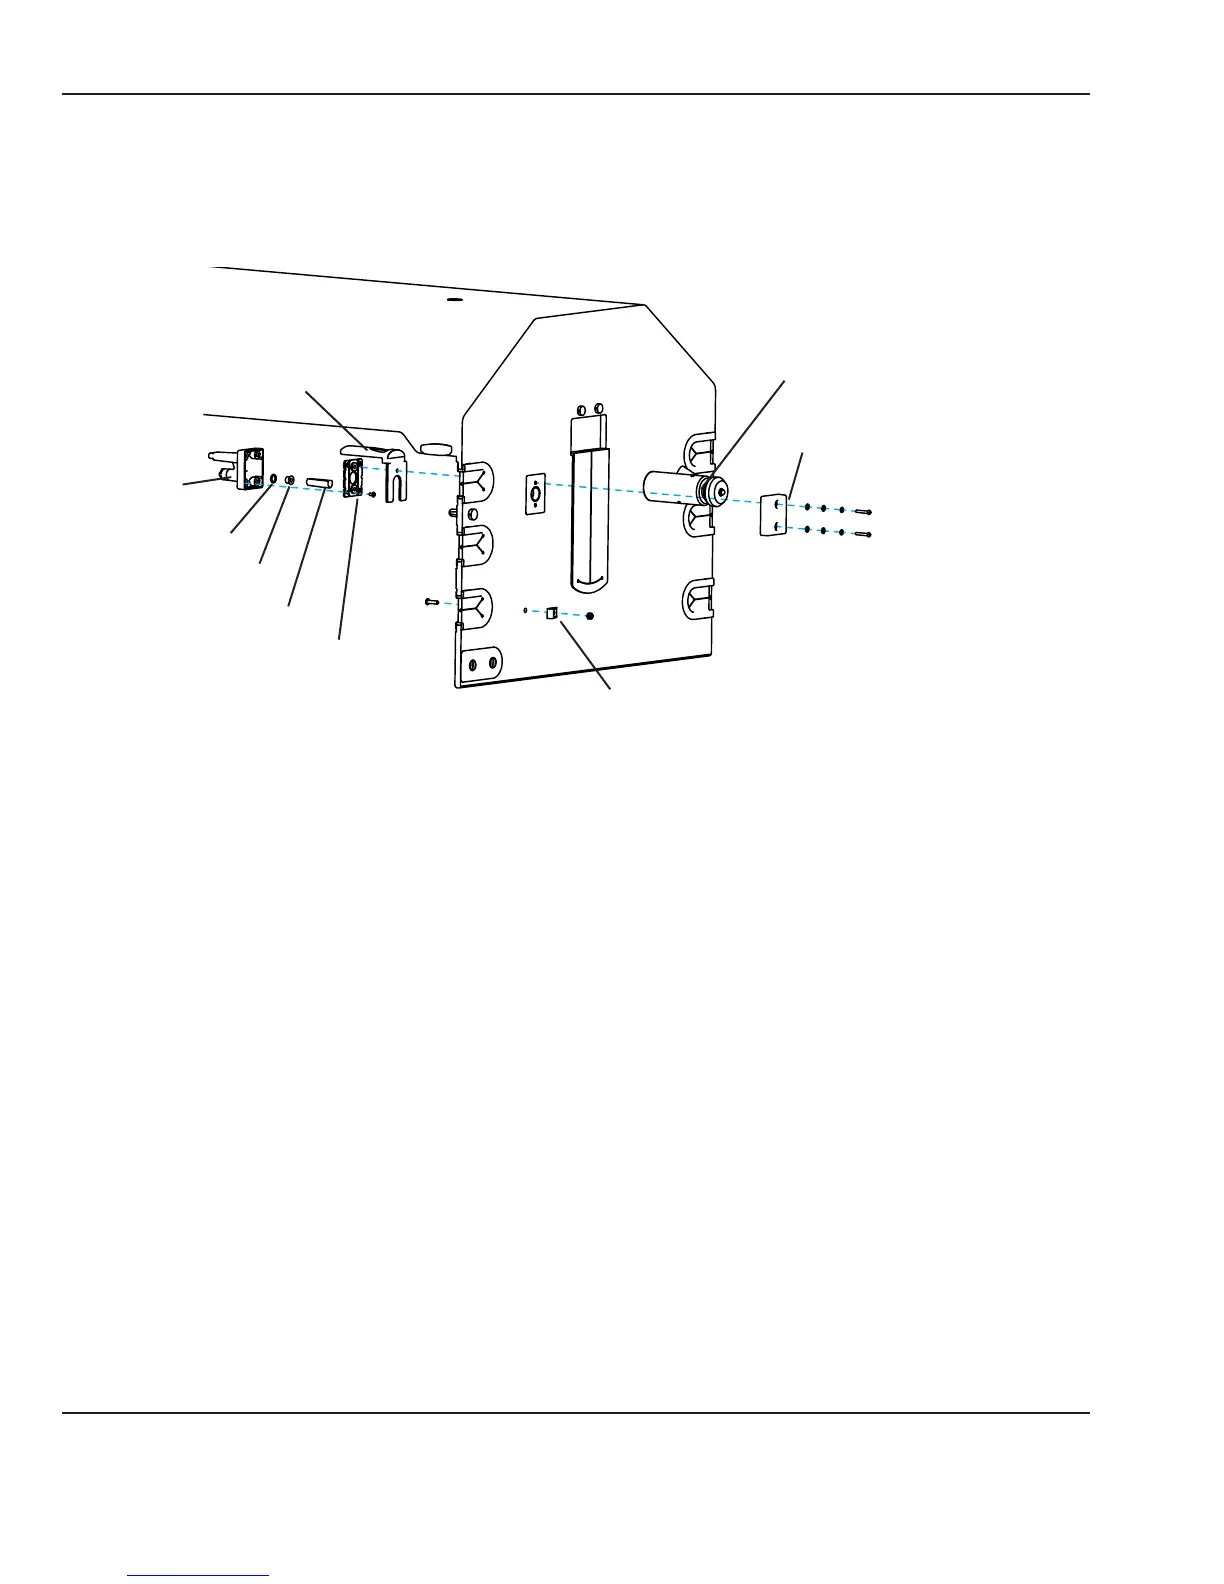
Compartment
air probe
O-ring
Humidity sensor
Cylindrical spacer
Break plate
Probe shield
Probe housing cover
Jack cable clip
Hood latch post
Figure 5-3 Compartment Probe
1. Using a 2.5 mm hex key, remove the screw that secures the jack cable clip to the hood back wall.
2. Remove the 2 screws (2mm hex key) that secure the probe housing cover and remove it. The top screw
secures the probe shield, so that it can now be removed from the inside front of the probe housing.
3. Disconnect the electrical connectors for the temperature and humidity sensor (if installed) wires and
remove the compartment air probe.
NOTE: Some early units have compartment air probes with jack connectors at the probe panel and should
be disconnected there.
4. Remove the 4 screws in the break plate and remove the plate.
5. To replace humidity sensor, pull it back out of the probe housing. Slide the wires out of the cylindrical
spacer. Place the O-ring over the tip of the new sensor, and gently push it back into the housing using the
cylindrical spacer until the O-ring seats. The sensor tip should be visible, but not up against its guard. Check
to ensure that the O-ring did not roll over the sensor ange during insertion.
NOTE: Always perform Humidier Calibration after replacing the humidier sensor.
6. To replace the temperature sensor, you must replace the entire probe housing.
70 6600-0356-000 103 © 2001 by Datex-Ohmeda, Inc.. All rights reserved.
Chapter 5: Repair Procedures