56 P/N MAN-01964 Revision 001
DRAFT Preview copy—Generated 7/9/2010
User Manual
Chapter 5—How to Use the Accessories
Crosshair Devices
6.0 Crosshair Devices
6.1 How to Install and Remove the Localization Crosshair Device
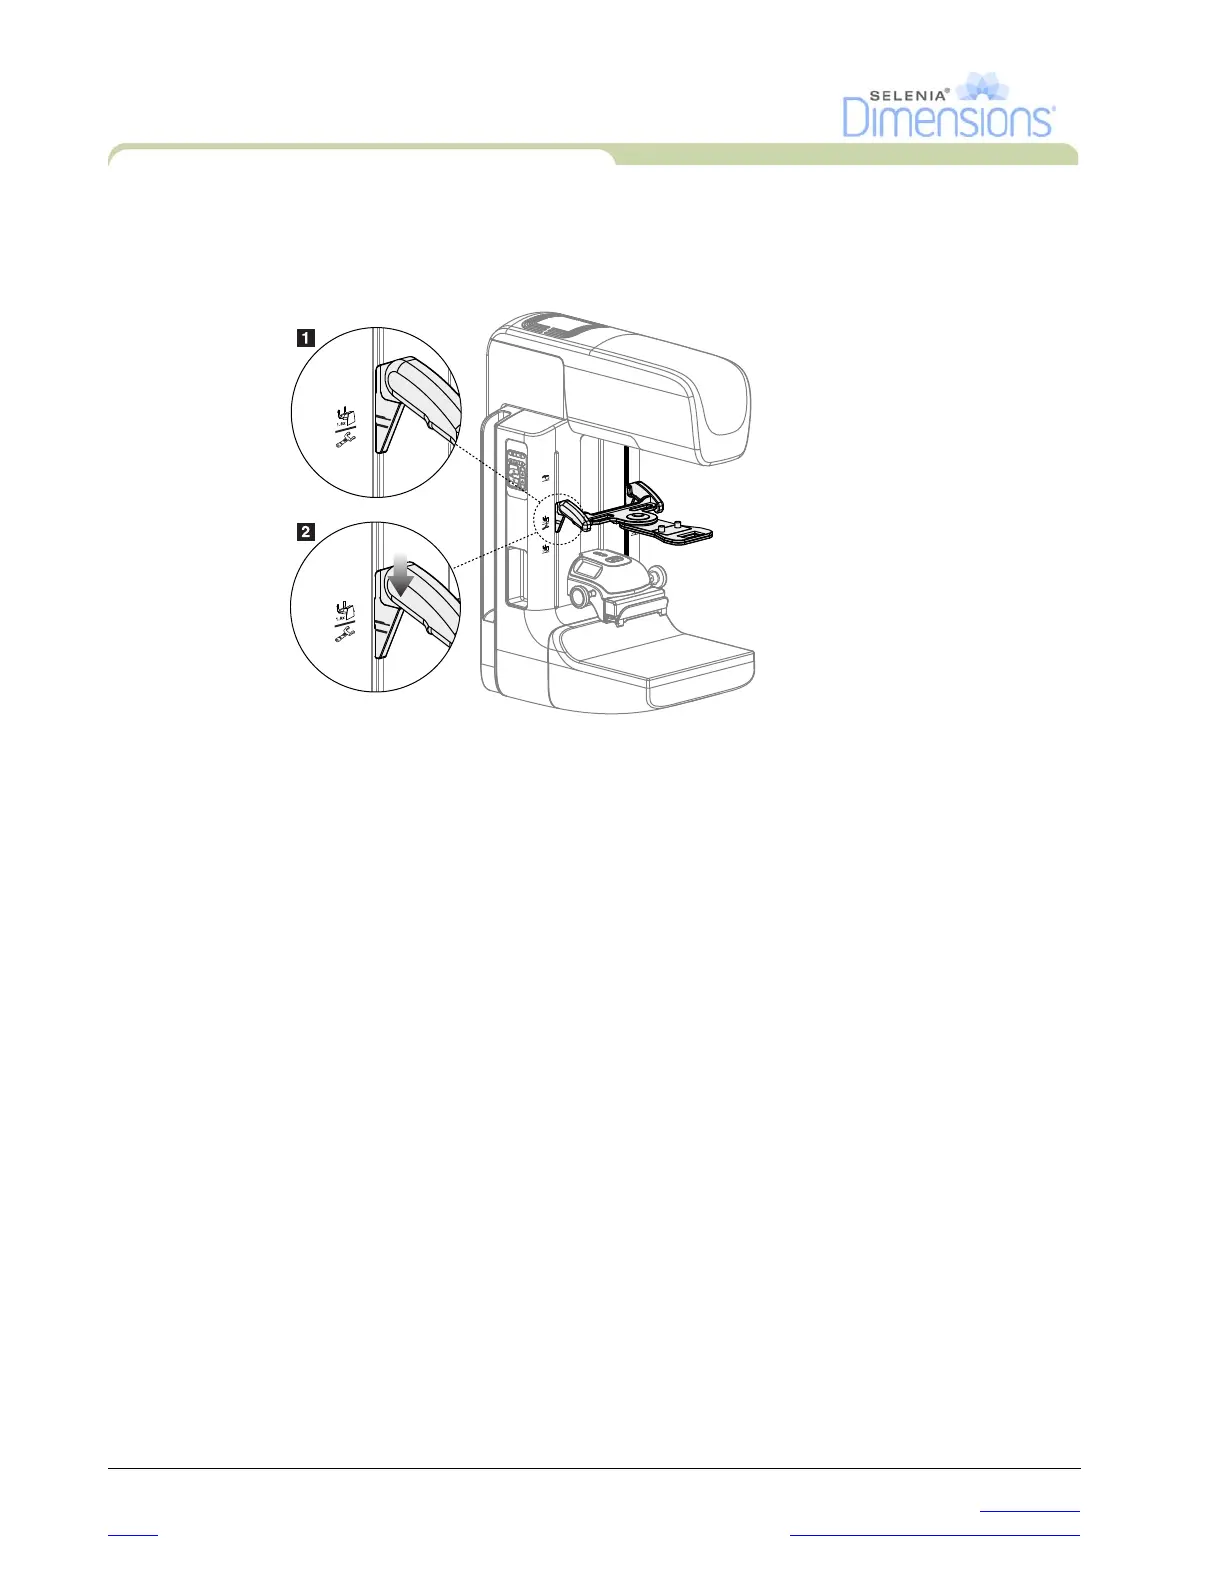
Figure 5-10: How to Attach the Localization Crosshair Device
6.1.1 To install the Localization Crosshair Device
1. Remove the face shield (see Section 3.0, page 48).
2. Move the Compression Device below the mounting slots, indicated by a
crosshair icon. See Figure 5-1, page 47, number 2.
3. Hold the crosshair device by the handles and align the thick lines on the device
with the line on the C-arm. Compress the release levers.
4. Put the hooks into the C-arm slots.
5. Slide the hooks toward the bottom until the thin black lines on the crosshair
meet the black line on the C-arm.
6. Release the levers. The locking pins slide into holes and lock the device in
position.
6.1.2 To remove the Localization Crosshair Device
1. Compress the release levers.
2. Lift the frame toward the top and remove the hooks from the C-arm slots.
6.2 How to Use the Localization Crosshair Device
1. The crosshair device rotates to the left or right of the tubehead. Rotate the device away
from the x-ray beam during the exposure acquired with the localization paddle.
2. When you rotate the device back to the front for use, make sure the rotation continues
until the device clicks into position.
3. Turn on the light field lamp.
4. Rotate the two crosshair knobs until the shadow on the breast matches the crosshairs on
the image that identifies the suspect lesion.